Пилы торцовочные Einhell TE-SM 2131 - инструкция пользователя по применению, эксплуатации и установке на русском языке. Мы надеемся, она поможет вам решить возникшие у вас вопросы при эксплуатации техники.
Если остались вопросы, задайте их в комментариях после инструкции.
"Загружаем инструкцию", означает, что нужно подождать пока файл загрузится и можно будет его читать онлайн. Некоторые инструкции очень большие и время их появления зависит от вашей скорости интернета.


GB
- 26 -
5. Before starting the equipment
Before you connect the equipment to the mains
supply make sure that the data on the rating plate
are identical to the mains data.
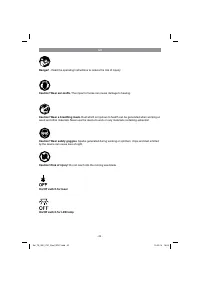
Warning!
Always pull the power plug before making
adjustments to the equipment.
5.1 General information
•
The equipment must be set up where it can
stand securely, i.e. it should be bolted to a
workbench, a universal base frame or similar.
•
All covers and safety devices have to be pro-
perly fitted before the equipment is switched
on.
•
It must be possible for the blade to run freely.
•
When working with wood that has been pro-
cessed before, watch out for foreign bodies
such as nails or screws, etc.
•
Before you actuate the On/Off switch, make
sure that the saw blade is correctly fitted
and that the equipment‘s moving parts run
smoothly.
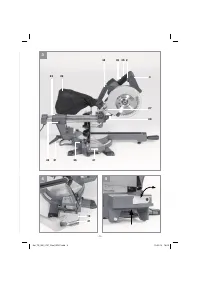
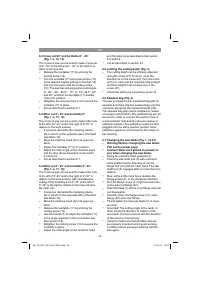
5.2 Assembling the saw (Fig. 1-5)
•
Fasten the transport handle (34) to the machi-
ne head (4) using the supplied screws.
•
Insert the guide pins of the adjustable workpi-
ece supports (10) into the mounting holes on
the machine housing. Tighten the fastening
screws at the guide pins in order to secure
the workpiece supports against falling out.
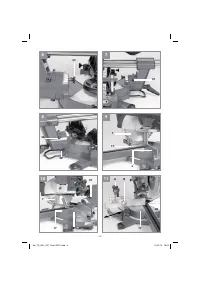
•
To adjust the turntable (17), loosen the lo-
cking screw (14) by approx. 2 turns and press
the button (42), thus freeing the turntable
(17).
•
Turn the turntable (17) and scale pointer (15)
to the desired angular setting on the dial (16)
and lock into place with the locking screw
(14). The saw has locking positions at angles
of - 45°, -30°, -22.5°, -15°, 0°, 15°, 22.5°, 30°
and 45°.
•
To release the saw from its position at the
bottom, pull the fastening bolt (25) out of the
motor mounting while pressing down lightly
on the machine head (4). Turn the fastening
bolt (25) through 90° before releasing it, so
that the saw remains unlocked.
•
Swing up the machine head (4).
•
The clamping device (8) can be fitted on the
left or right of the fixed saw table (18).
•
For the horizontal clamping of workpieces you
can anchor the clamping device in the holder
(44).
- To move out the workpiece supports (10)
press the lever on the bottom side of the
workpiece support and then pull the workpie-
ce support outwards to the right or left.
•
For repeat cuts of identical length you can
unfold the longitudinal stop (41).
•
When the locking grip (21) is undone, you
can tilt the machine head (4) to the left by up
to 45°.
•
To ensure that the saw is standing securely,
adjust the adjustable foot (13) by turning it so
that the saw stands in a horizontal and firm
position.
•
For better stability, the machine is equipped
with a stability bar (z) at the rear.
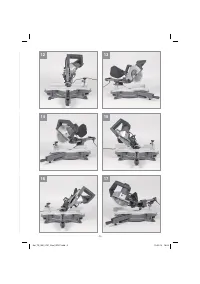
5.3 Adjusting the miter angle on the machine
head (Fig. 1, 2, 6)
•
Undo the locking grip (21).
•
Hold the machine head (4) by the handle (1).
•
After pulling the button (33), the machine
head can be tipped infinitely as well as to se-
veral locking points.
•
Angles to the left: 0-47°
•
Angles to the right: 0-47°
•
Re-tighten the locking screw (21).
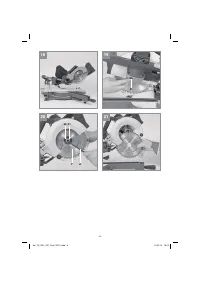
5.4 Precision adjustment of the stop for cros-
scut 90° (Fig. 7-10)
•
Fasten the turntable (17) in 0° position.
•
Undo the locking screw (21) and move the
machine head (4) all the way to the right using
the handle (1).
•
Place the 90° angular stop (a) between the
blade (7) and the turntable (17).
•
Open the counternut on the adjustment screw
(39).
•
Adjust the adjustment screw (39) until the
angle between the blade (7) and the turntable
(17) equals 90°.
•
Then tighten the counternut again.
•
Finally check the position of the pointer (20)
on the scale (19). If necessary, undo the poin-
ter (20) with a Philips screwdriver, set it to the
0° position on the scale (19) and retighten the
retainer screw.
•
No stop angle included.
Anl_TE_SM_2131_Dual_SPK7.indb 26
Anl_TE_SM_2131_Dual_SPK7.indb 26
13.05.14 16:04
13.05.14 16:04
Характеристики

Остались вопросы?Не нашли свой ответ в руководстве или возникли другие проблемы? Задайте свой вопрос в форме ниже с подробным описанием вашей ситуации, чтобы другие люди и специалисты смогли дать на него ответ. Если вы знаете как решить проблему другого человека, пожалуйста, подскажите ему :)


