
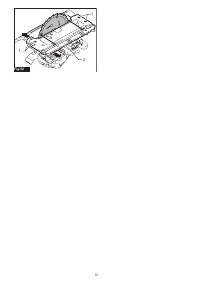
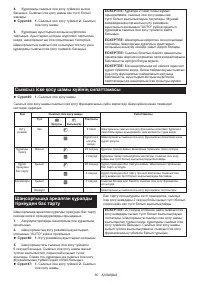
Пилы дисковые Makita DHS900Z - инструкция пользователя по применению, эксплуатации и установке на русском языке. Мы надеемся, она поможет вам решить возникшие у вас вопросы при эксплуатации техники.
Если остались вопросы, задайте их в комментариях после инструкции.
"Загружаем инструкцию", означает, что нужно подождать пока файл загрузится и можно будет его читать онлайн. Некоторые инструкции очень большие и время их появления зависит от вашей скорости интернета.


ENGLISH
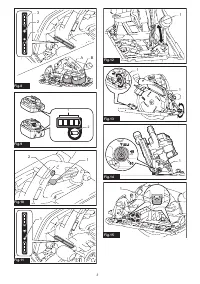
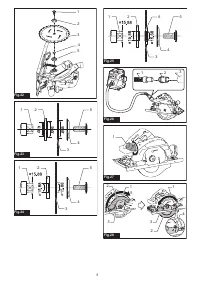
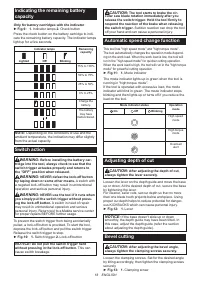
Positive stopper
The positive stopper is useful for setting the des-
ignated angle quickly. Turn the positive stopper so
that the arrow on it points your desired bevel angle
(22.5°/45°/60°). Loosen the lever and then tilt the tool
base until it stops. The position where the tool base
stops is the angle you set with the positive stopper.
Tighten the lever with the tool base at this position.
►
Fig.14:
1.
Positive stopper
-1°-bevel cutting
To perform -1°-bevel cutting, loosen the clamping
screws and press the levers toward the direction of the
arrow in the figure. Then set the bevel angle to -1° and
tighten the clamping screws.
►
Fig.15:
1.
Lever
Sighting
For straight cuts, align the 0° position on the front of the
base with your cutting line. For 45° bevel cuts, align the
45° position with it.
►
Fig.16:
1.
Cutting line (0° position)
2.
Cutting line
(45° position)
Lighting the lamp
CAUTION:
Do not look in the light or see the
source of light directly.
To turn on the lamp without running the tool, pull the
switch trigger without pressing the lock-off button.
To turn on the lamp with the tool running, press and hold
the lock-off button and pull the switch trigger.
The lamp goes out 10 seconds after releasing the
switch trigger.
►
Fig.17:
1.
Lamp
NOTE:
Use a dry cloth to wipe the dirt off the lens of
the lamp. Be careful not to scratch the lens of lamp, or
it may lower the illumination.
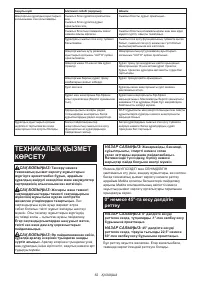
Electric brake
This tool is equipped with an electric blade brake. If the
tool consistently fails to quickly stop the circular saw
blade after switch lever release, have tool serviced at a
Makita service center.
CAUTION:
The blade brake system is not a
substitute for blade guard. NEVER USE TOOL
WITHOUT A FUNCTIONING BLADE GUARD.
SERIOUS PERSONAL INJURY CAN RESULT.
Electronic function
The tools equipped with electronic function are easy to
operate because of the following feature(s).
Soft start feature
Soft start because of suppressed starting shock.
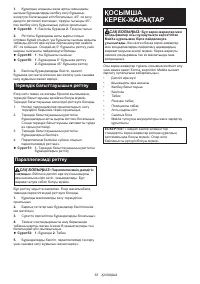
ASSEMBLY
CAUTION:
Always be sure that the tool is
switched off and the battery cartridge is removed
before carrying out any work on the tool.
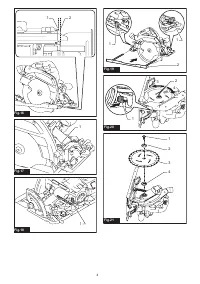
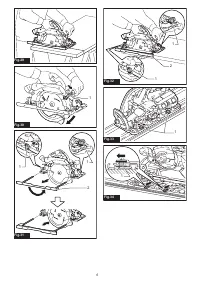
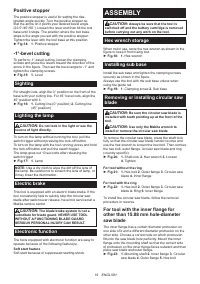
Hex wrench storage
When not in use, store the hex wrench as shown in the
figure to keep it from being lost.
►
Fig.18:
1.
Hex wrench
Installing sub base
Install the sub base and tighten the clamping screws
securely as shown in the figure.
Always use the tool with the sub base unless when
using the guide rail.
►
Fig.19:
1.
Clamping screw
2.
Sub base
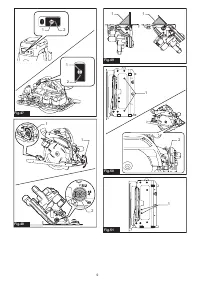
Removing or installing circular saw
blade
CAUTION:
Be sure the circular saw blade is
installed with teeth pointing up at the front of the
tool.
CAUTION:
Use only the Makita wrench to
install or remove the circular saw blade.
To remove the circular saw blade, press the shaft lock
fully so that the circular saw blade cannot revolve and
use the hex wrench to loosen the hex bolt. Then remove
the hex bolt, outer flange, circular saw blade and ring
(country specific).
►
Fig.20:
1.
Shaft lock
2.
Hex wrench
3.
Loosen
4.
Tighten
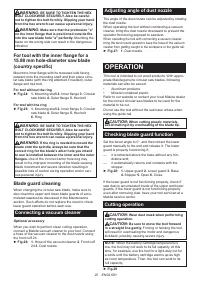
For tool without the ring
►
Fig.21:
1.
Hex bolt
2.
Outer flange
3.
Circular saw
blade
4.
Inner flange
For tool with the ring
►
Fig.22:
1.
Hex bolt
2.
Outer flange
3.
Circular saw
blade
4.
Ring
5.
Inner flange
To install the circular saw blade, follow the removal
procedure in reverse.
For tool with the inner flange for
other than 15.88 mm hole-diameter
saw blade
The inner flange has a certain diameter protrusion on
one side of it and a different diameter protrusion on the
other side. Choose a correct side on which protrusion
fits into the saw blade hole perfectly. Mount the inner
flange onto the mounting shaft so that the correct side
of protrusion on the inner flange faces outward and then
place saw blade and outer flange.
►
Fig.23:
1.
Mounting shaft
2.
Inner flange
3.
Circular
saw blade
4.
Outer flange
5.
Hex bolt
19
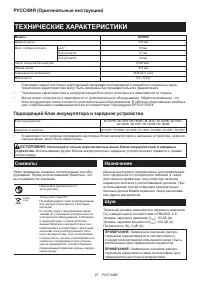
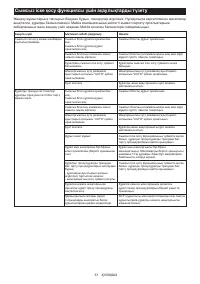
Содержание
- 27 ТЕХНИЧЕСКИЕ ХАРАКТЕРИСТИКИ; Подходящий блок аккумулятора и зарядное устройство
- 28 Вибрация; МЕРЫ БЕЗОПАСНОСТИ; Общие рекомендации по; Сохраните брошюру с инструк
- 30 Правила техники безопасности
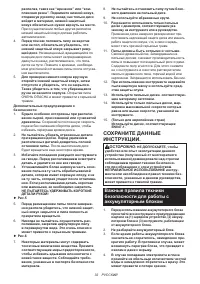
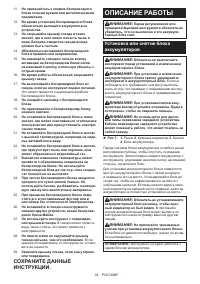
- 32 СОХРАНИТЕ ДАННЫЕ; Важные правила техники
- 34 ОПИСАНИЕ РАБОТЫ; Установка или снятие блока
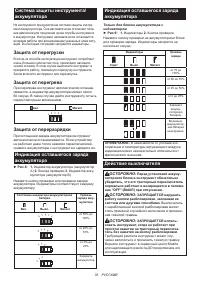
- 35 Защита от перегрузки
- 37 СБОРКА; Для инструмента с внутренним
- 38 Регулировка угла наклона; ЭКСПЛУАТАЦИЯ; Проверка работы защитного
- 39 Резка; Подсоединение стропа
- 40 ФУНКЦИЯ; Что позволяет делать функция
- 41 Регистрация инструмента для
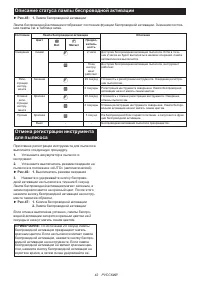
- 42 Описание статуса лампы беспроводной активации
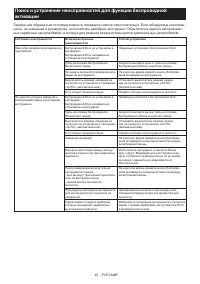
- 43 Поиск и устранение неисправностей для функции беспроводной
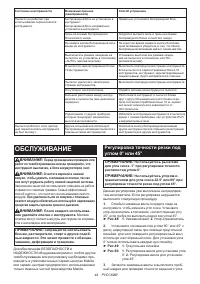
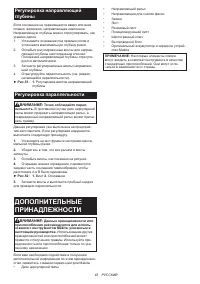
- 44 ОБСЛУЖИВАНИЕ; Регулировка точности резки под
- 45 Регулировка направляющей; ДОПОЛНИТЕЛЬНЫЕ
Характеристики

Остались вопросы?Не нашли свой ответ в руководстве или возникли другие проблемы? Задайте свой вопрос в форме ниже с подробным описанием вашей ситуации, чтобы другие люди и специалисты смогли дать на него ответ. Если вы знаете как решить проблему другого человека, пожалуйста, подскажите ему :)


