
Перфораторы Makita HR2653 - инструкция пользователя по применению, эксплуатации и установке на русском языке. Мы надеемся, она поможет вам решить возникшие у вас вопросы при эксплуатации техники.
Если остались вопросы, задайте их в комментариях после инструкции.
"Загружаем инструкцию", означает, что нужно подождать пока файл загрузится и можно будет его читать онлайн. Некоторые инструкции очень большие и время их появления зависит от вашей скорости интернета.


10 ENGLISH
WARNING:
DO NOT let comfort or familiarity
with product (gained from repeated use) replace
strict adherence to safety rules for the subject
product. MISUSE or failure to follow the safety
rules stated in this instruction manual may cause
serious personal injury.
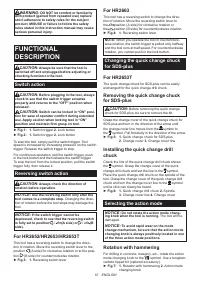
FUNCTIONAL
DESCRIPTION
CAUTION:
Always be sure that the tool is
switched off and unplugged before adjusting or
checking function on the tool.
Switch action
CAUTION:
Before plugging in the tool, always
check to see that the switch trigger actuates
properly and returns to the "OFF" position when
released.
CAUTION:
Switch can be locked in “ON” posi-
tion for ease of operator comfort during extended
use. Apply caution when locking tool in “ON”
position and maintain firm grasp on tool.
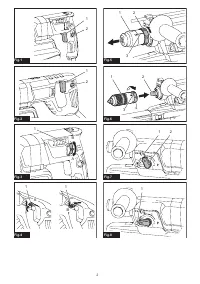
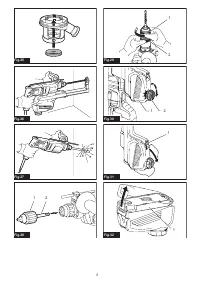
►
Fig.1:
1.
Switch trigger
2.
Lock button
►
Fig.2:
1.
Switch trigger
2.
Lock button
To start the tool, simply pull the switch trigger. Tool
speed is increased by increasing pressure on the switch
trigger. Release the switch trigger to stop.
For continuous operation, pull the switch trigger, push
in the lock button and then release the switch trigger.
To stop the tool from the locked position, pull the switch
trigger fully, then release it.
Reversing switch action
CAUTION:
Always check the direction of
rotation before operation.
NOTICE:
Use the reversing switch only after the
tool comes to a complete stop.
Changing the direc-
tion of rotation before the tool stops may damage the
tool.
NOTICE:
If the switch trigger cannot be
depressed, check to see that the reversing switch
is fully set to position
/
(A side) or
/
(B
side).
For HR2652/HR2653/HR2653T
This tool has a reversing switch to change the direc-
tion of rotation. Move the reversing switch lever to the
position (A side) for clockwise rotation or to the posi-
tion (B side) for counterclockwise rotation.
►
Fig.3:
1.
Reversing switch lever
For HR2663
This tool has a reversing switch to change the direc-
tion of rotation. Move the reversing switch lever to
the
position (A side) for clockwise rotation or
the
position (B side) for counterclockwise rotation.
►
Fig.4:
1.
Reversing switch lever
NOTE:
When you operate the tool in counterclock-
wise rotation, the switch trigger is pulled only halfway
and the tool runs at half speed. For counterclockwise
rotation, you cannot push in the lock button.
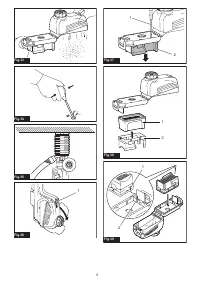
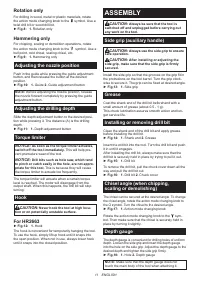
Changing the quick change chuck
for SDS-plus
For HR2653T
The quick change chuck for SDS-plus can be easily
exchanged for the quick change drill chuck.
Removing the quick change chuck
for SDS-plus
CAUTION:
Before removing the quick change
chuck for SDS-plus, be sure to remove the bit.
Grasp the change cover of the quick change chuck for
SDS-plus and turn in the direction of the arrow until
the change cover line moves from the symbol to
the symbol. Pull forcefully in the direction of the arrow.
►
Fig.5:
1.
Quick change chuck for SDS-plus
2.
Change cover
3.
Change cover line
Installing the quick change drill
chuck
Check the line of the quick change drill chuck shows
the symbol. Grasp the change cover of the quick
change drill chuck and set the line to the symbol.
Place the quick change drill chuck on the spindle of the
tool. Grasp the change cover of the quick change drill
chuck and turn the change cover line to the symbol
until a click can clearly be heard.
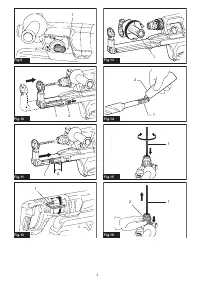
►
Fig.6:
1.
Quick change drill chuck
2.
Spindle
3.
Change cover line
4.
Change cover
Selecting the action mode
NOTICE:
Do not rotate the action mode chang-
ing knob when the tool is running.
The tool will be
damaged.
NOTICE:
To avoid rapid wear on the mode
change mechanism, be sure that the action mode
changing knob is always positively located in one
of the three action mode positions.
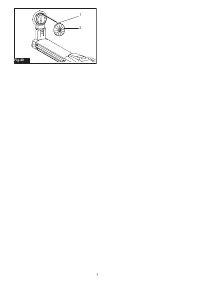
Rotation with hammering
For drilling in concrete, masonry, etc., rotate the action
mode changing knob to the
symbol. Use a tungsten-
carbide tipped bit (optional accessory).
►
Fig.7:
1.
Rotation with hammering
2.
Action mode
changing knob
Содержание
- 57 ТЕХНИЧЕСКИЕ ХАРАКТЕРИСТИКИ; Назначение
- 58 МЕРЫ БЕЗОПАСНОСТИ; Сохраните брошюру с инструк
- 59 СОХРАНИТЕ ДАННЫЕ; ОПИСАНИЕ РАБОТЫ; Действие выключателя
- 60 Смена быстро сменяемого
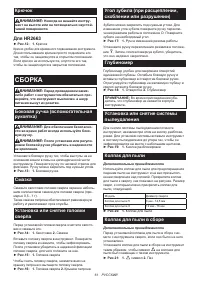
- 61 СБОРКА
- 62 ЭКСПЛУАТАЦИЯ; Сверление с ударным действием
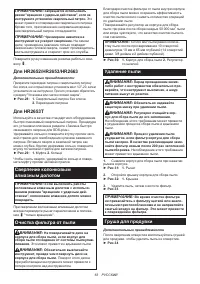
- 63 Сверление колонковым
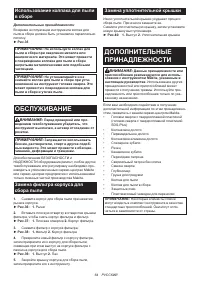
- 64 Использование колпака для пыли; ОБСЛУЖИВАНИЕ; Замена фильтра корпуса для; ДОПОЛНИТЕЛЬНЫЕ
Характеристики

Остались вопросы?Не нашли свой ответ в руководстве или возникли другие проблемы? Задайте свой вопрос в форме ниже с подробным описанием вашей ситуации, чтобы другие люди и специалисты смогли дать на него ответ. Если вы знаете как решить проблему другого человека, пожалуйста, подскажите ему :)


