
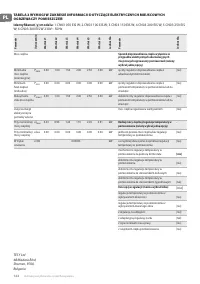
Обогреватели TESY CN 03 250 EIS W 304180 - инструкция пользователя по применению, эксплуатации и установке на русском языке. Мы надеемся, она поможет вам решить возникшие у вас вопросы при эксплуатации техники.
Если остались вопросы, задайте их в комментариях после инструкции.
"Загружаем инструкцию", означает, что нужно подождать пока файл загрузится и можно будет его читать онлайн. Некоторые инструкции очень большие и время их появления зависит от вашей скорости интернета.


4
Operation and Storage Manual
EN
•
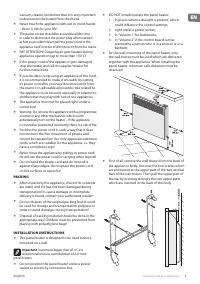
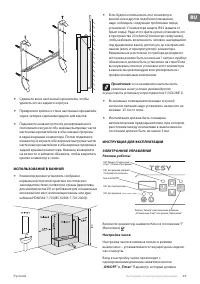
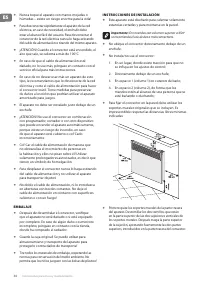
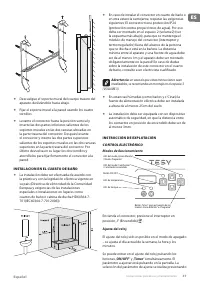
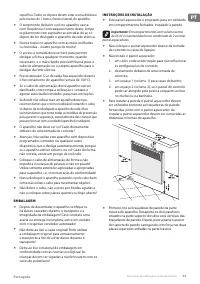
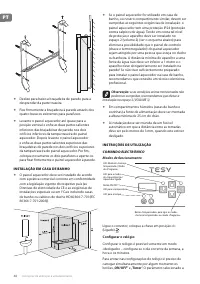
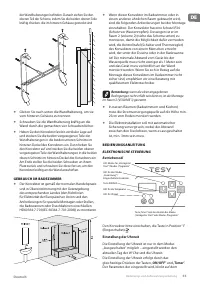
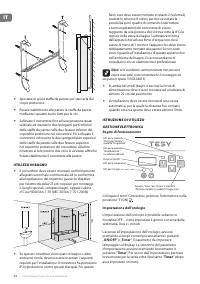
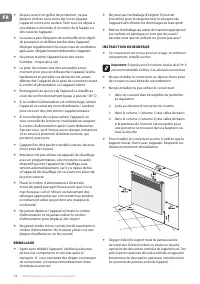
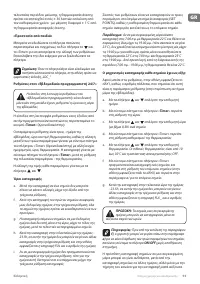
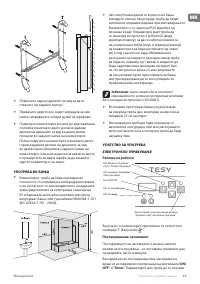
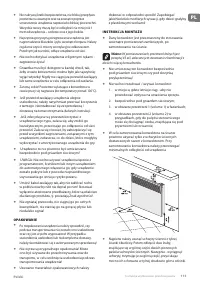
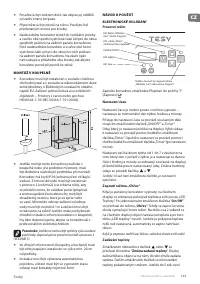
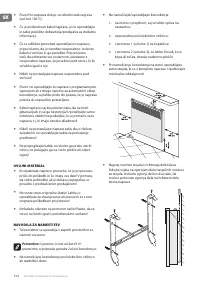
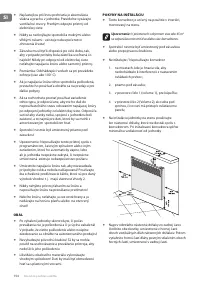
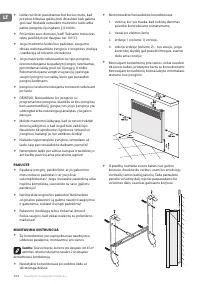
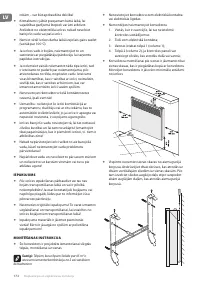
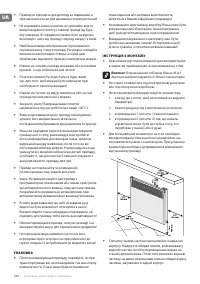
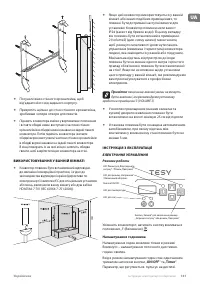
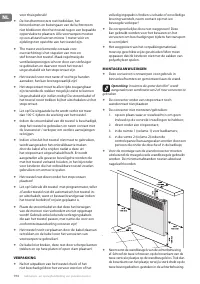
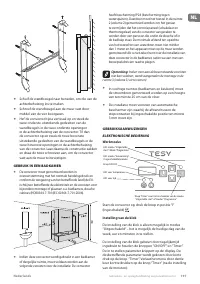
Slide down the wall brace in order to detach it from
the back of the body.
•
Attach firmly the wall brace onto a wall through the
four screw holes.
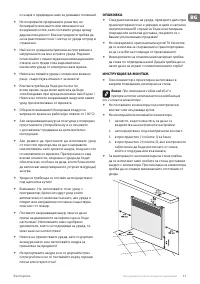
•
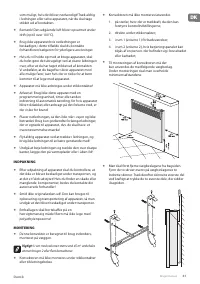
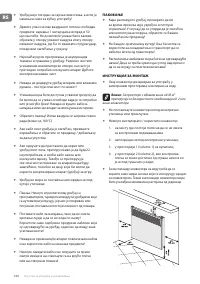
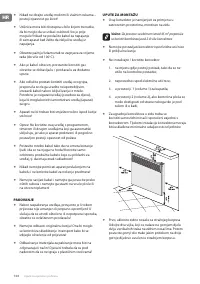
Lift the panel heater up to almost vertical position
and insert the two lower protruding parts of the
braces into the two lower openings of the back
cover of the panel heater. Then lift the panel heater
and insert the two upper protruding parts of the
wall braces into the two upper openings of the back
cover of the heater. Finally, put the two screws back
to their places and tighten them in order to install
the panel heater firmly to the wall.
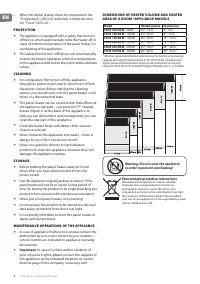
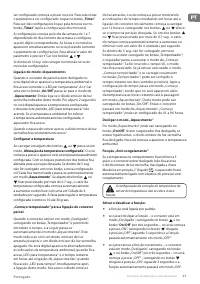
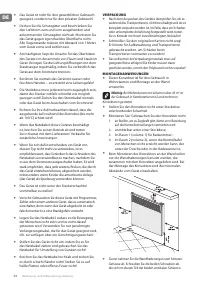
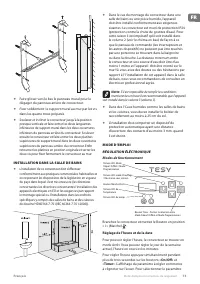
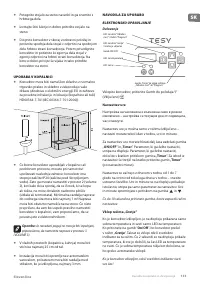
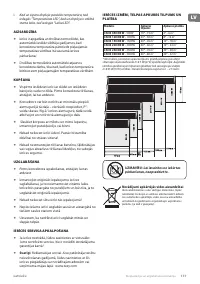
BATHROOM OPERATION
•
The panel heater must be installed in accordance
with the normal trade practices and in compliance
with the national legislation (EU electricity directives
and regulations concerning special installations and
places of operation including bathrooms, shower
cabins HD60364-7-701(IEC 60364-7-701:2006)).
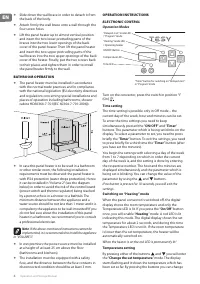
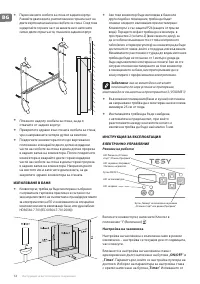
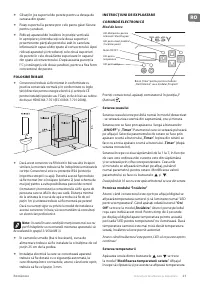
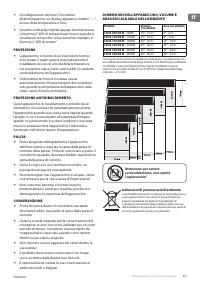
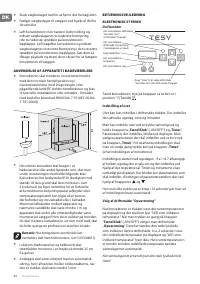
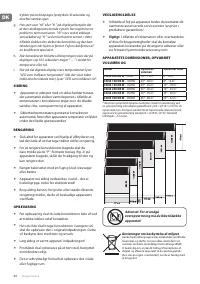
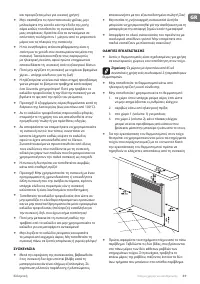
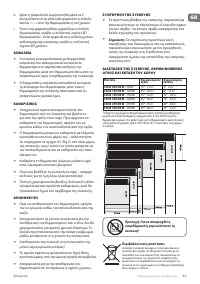
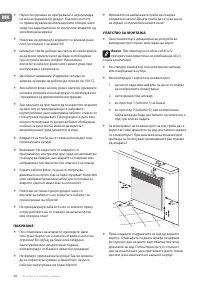
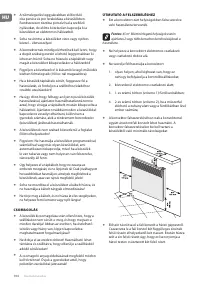
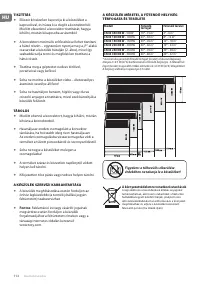
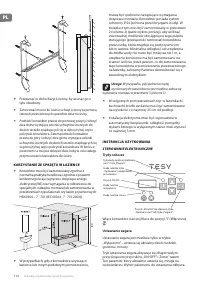
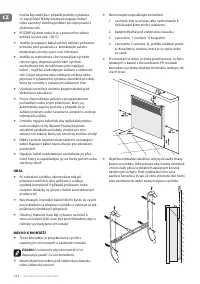
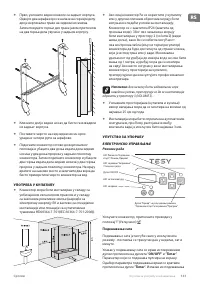
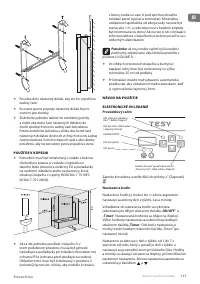
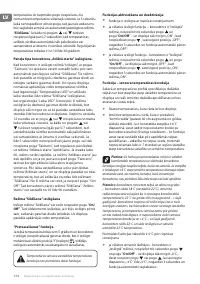
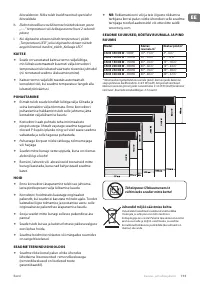
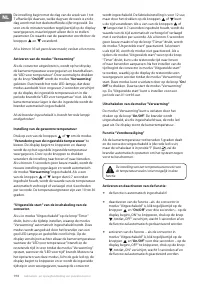
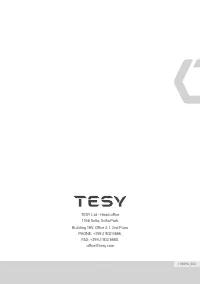
•
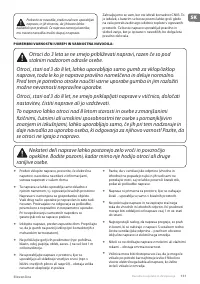
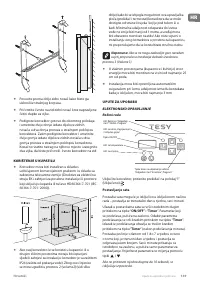
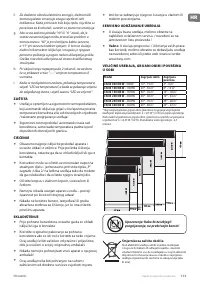
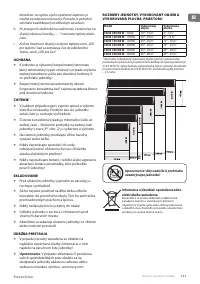
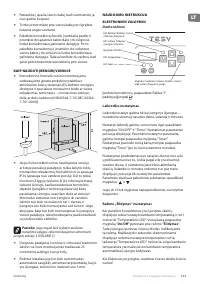
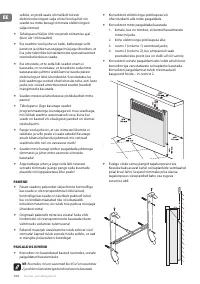
In case this panel heater is to be used in a bathroom
or other similar room, the following installation
requirements must be observed: the panel heater is
with IP24 protection (water drops protection). Hence
it can be installed in “Volume 2” (see the diagram
below) in order to avoid the risk of the control board
(power switch and thermo regulator) being reached
by a person who is in a shower or a bathtub. The
minimum distance between the appliance and a
water source should be not less than 1 meter and it is
compulsory the appliance to be wall-mounted! If you
do not feel sure about the installation of this panel
heater in a bathroom, we recommend you to consult
a professional electrician.
Note
: If the above-mentioned instructions cannot be
implemented, it is recommended to install the appliance
in “VOLUME 3”.
•
In wet premises the power source must be installed
at a height of at least 25 cm above the floor
(bathrooms and kitchens).
•
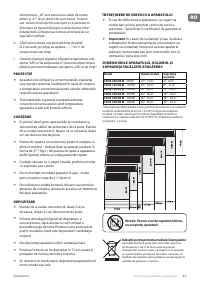
The installation must be equipped with a safety
fuse, and the distance between the fuse contacts in
disconnected condition should be at least 3 mm.
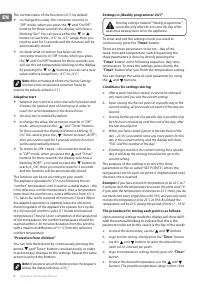
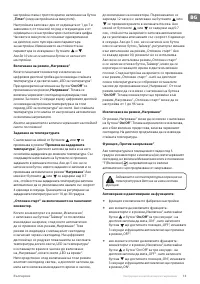
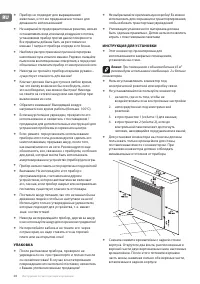
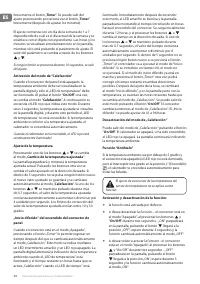
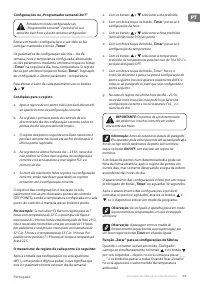
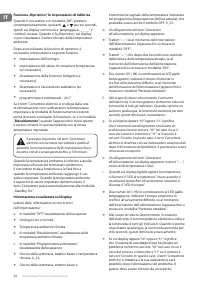
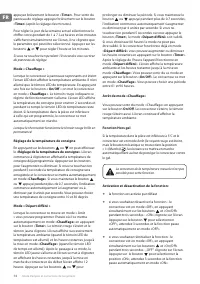
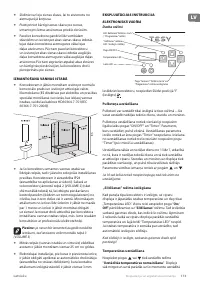
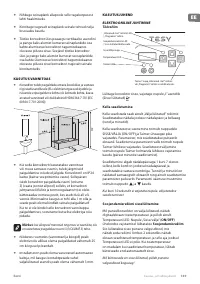
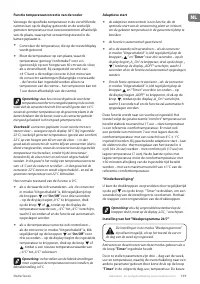
OPERATION INSTRUCTIONS
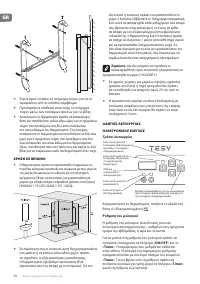
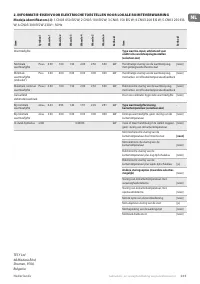
ELECTRONIC CONTROL
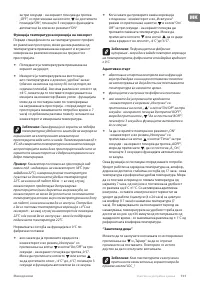
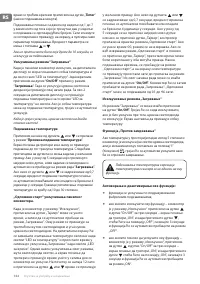
Operation Modes
Temperature LED
Time LED
“Heating” mode LED
/ Operating heater
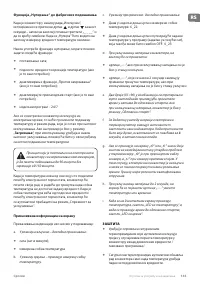
“Delayed start” mode LED
/ “Program” mode
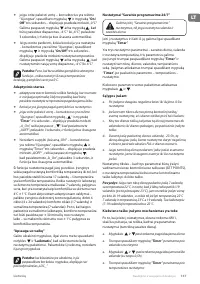
ON/OFF Button
“Timer” button for switching on “Delayed start”
or “Program” mode
Turn on the convector, press the switch in position “I”
(On) .
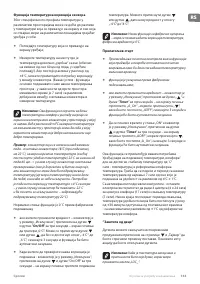
Time setting
The time setting is possible only in Off mode – the
current day of the week, hour and minutes can be set.
To enter the time settings you need to keep
simultaneously pressed the “
ON/OFF
” and “
Timer
”
buttons. The parameter which is being set blinks on the
display. To select a parameter to set, you need to press
briefly the “
Timer
” button. To exit the settings, you need
to press briefly for a third time the “
Timer
” button (after
you have set the minutes).
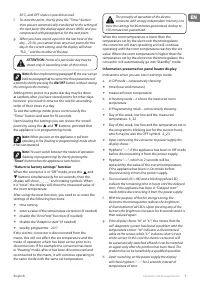
You begin the settings with selecting a day of the week
from 1 to 7 depending on which in order the current
day of the week is, and the setting is done by entering
the respective number. The hour and the minutes are
displayed simultaneously and the parameter which is
being set is blinking. You can change the value of the
parameter by using the and buttons.
If no button is presses for 10 seconds, you will exit the
settings.
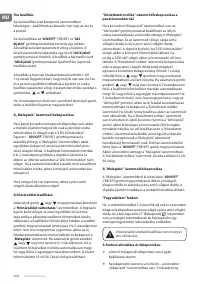
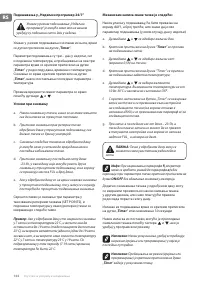
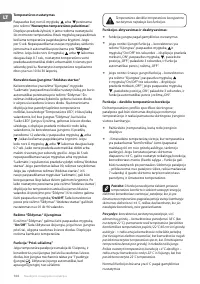
Switching on “Heating” mode
When the panel convector is switched off, the digital
display shows the room temperature and only the
Temperature LED is lit. If you press the “
On/Off
” button
once, you will enable “
Heating
” mode. A red LED is lit
indicating this mode. The digital display shows the set
temperature for about 2 seconds, and during this time
the Temperature LED is not lit. If the room temperature
is lower than the set temperature, the heater will be
automatically switched on.
When the heater is on the red LED is permanently lit!
Temperature setting
By pressing either of the buttons and you will enter
the “
Change the set temperature
” mode. The display
starts flashing and it shows the temperature which has
been set so far. By pressing the buttons you can change
Содержание
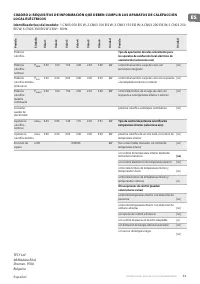
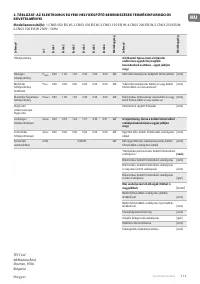
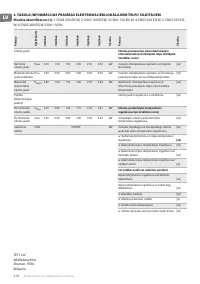
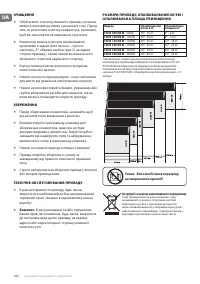
- 28 Прибор нельзя ставить непосредственно под розеткой!; УПАКОВКА; При помещениях с объемом больше 45 м3
- 29 ИСПОЛЬЗОВАНИЕ В ВАННОЙ; если невозможно выполненить; ИНСТРУКЦИЯ ДЛЯ ЭКСПЛУАТАЦИИ; ЭЛЕКТРОННОЕ УПРАВЛЕНИЕ; Настройка часов
- 31 Включение и выключение функции:
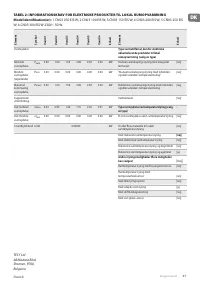
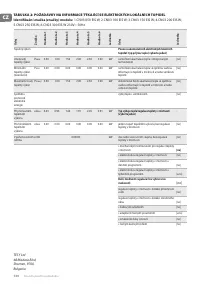
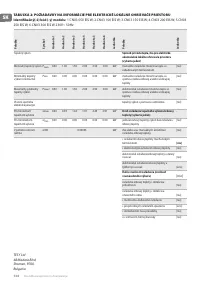
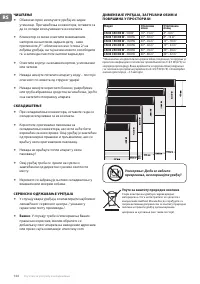
- 33 Функция „Сброс“ до заводских настроек; установить часы; Нагрева; измеренная температура в комнате
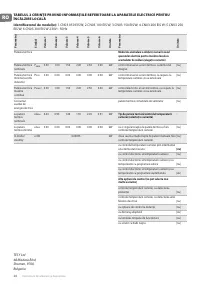
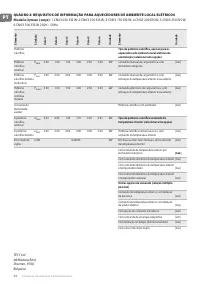
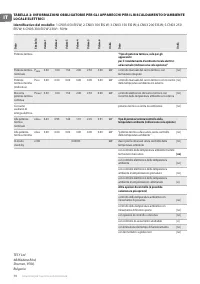
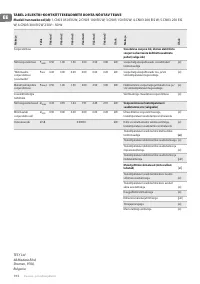
- 34 ОЧИСТКА; Никога не храните теплый прибор в его упаковке!; СЕРВИСНАЯ ПОДДЕРЖКА ПРИБОРА; Модель; Инструкции по защите окружающей среде

