
Обогреватели FRICO AD220W - инструкция пользователя по применению, эксплуатации и установке на русском языке. Мы надеемся, она поможет вам решить возникшие у вас вопросы при эксплуатации техники.
Если остались вопросы, задайте их в комментариях после инструкции.
"Загружаем инструкцию", означает, что нужно подождать пока файл загрузится и можно будет его читать онлайн. Некоторые инструкции очень большие и время их появления зависит от вашей скорости интернета.


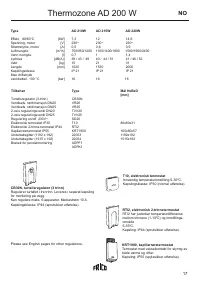

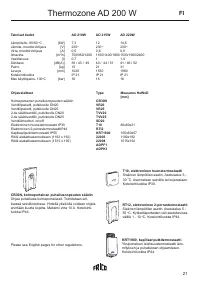


Thermozone AD 200 W
22
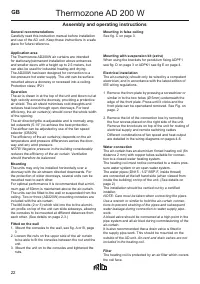
Assembly and operating instructions
General recommendations
Carefully read this instruction manual before installation
and use of the AD unit. Keep these instructions in a safe
place for future reference.
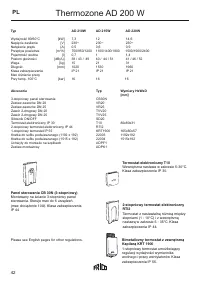
Application area
The Thermozone AD200W air curtains are intended
for stationary/permanent installation above entrances
and smaller doors with a height up to 2.5 meters, but
can also be used for industrial heating and drying.
The AD200W has been designed for connection to a
low-pressure hot water supply. The unit can be surface
mounted above a doorway or recessed into a ceiling.
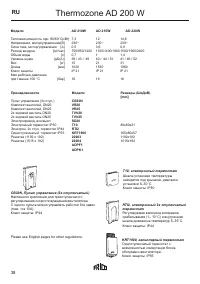
Protection class: IP21
Operation
The air is drawn in at the top of the unit and blown out at
high velocity across the doorway, providing a protective
air shield. The air shield minimises cold draughts and
reduces heat loss through open doorways. For best
eficiency, the air curtain(s) should cover the whole width
of the opening.
The air director/grille is adjustable and is normally ang-
led outwards (5-10°) to achieve the best protection.
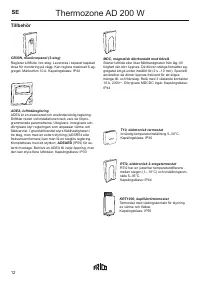
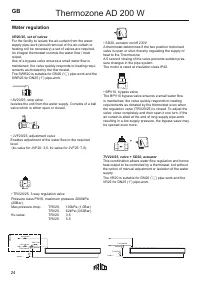
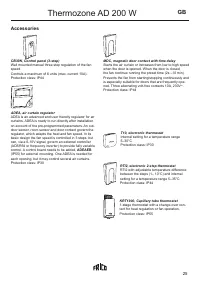
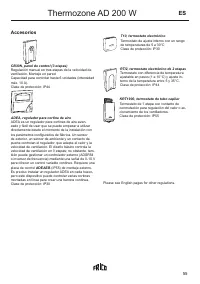
The airlow can be adjusted by use of the fan speed
selector (CB30N)
The eficiency of the air curtain(s) depends on the air
temperature and pressure differences across the door-
way and any wind pressure.
NOTE! Negative pressure in the building considerably
reduces the eficiency of the air curtain. Ventilation
should therefore be balanced.
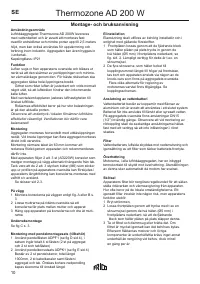
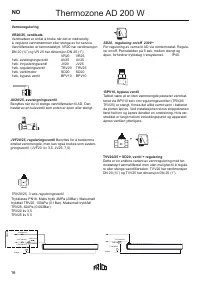
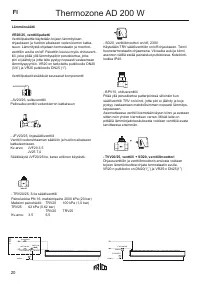
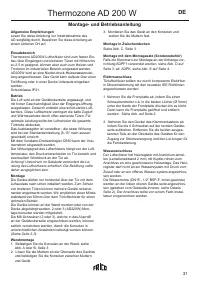
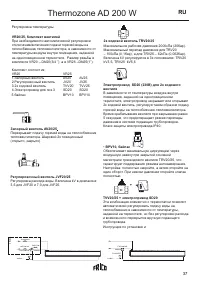
Mounting
The units may only be installed horizontally over a
doorway with the air-stream directed downwards. For
the protection of wider doorways, several units can be
mounted next to each other.
For optimal performance it is recommended that a mini-
mum gap of 60mm is maintained above the air-curtain.
The units can be itted to the wall or suspended from the
ceiling. Two or three (AD220W) mounting consoles are
included with the air-curtain.
The M6 bolts (2 or 3) which slot into the to the alumini-
um proile on top of the unit can slide sideways, allowing
the consoles to be mounted at different distances from
each other. (See details on page 2-3.)
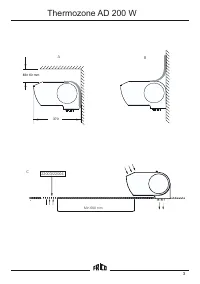
Fitted on the wall
1. Mount the consoles to the wall, see ig. A or B, page
3
2. Loosen the nuts on the upper side of the air curtain
to be able to it the consoles between the nut and the
unit.
3. Mount the unit on to the consoles and tightened the
nuts.
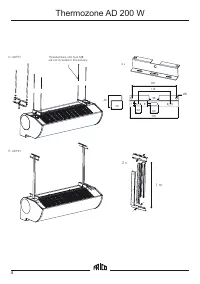
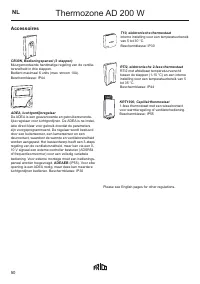
Mounting with suspension kit (extra)
When using the brackets for pendulum ixing ADPF1
see ig. D on page 3 or ADPK1 see ig E on page 4.
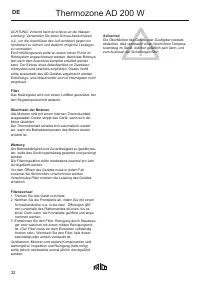
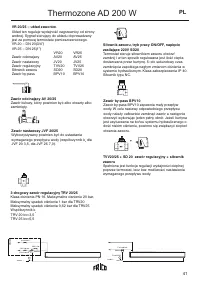
Electrical installation
The air-curtain(s) should only be wired by a competent
electrician, and in accordance with the latest edition of
IEE wiring regulations.
1 Remove the front plate by pressing a screwdriver or
similar in to the two holes (Ø 5mm) underneath the
edge of the front plate. Press until it clicks and the
front plate can be openedand removed. See Fig. on
page. 2
2. Remove the lid of the connection box by removing
the four screws placed on the right side of the unit.
Remove the knockouts on top of the unit for routing of
electrical supply and remote switching cables
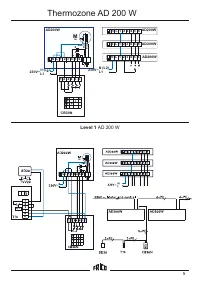
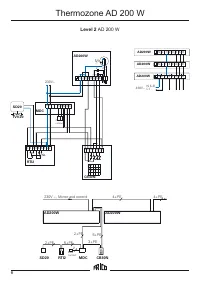
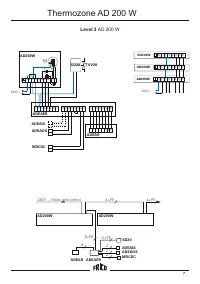
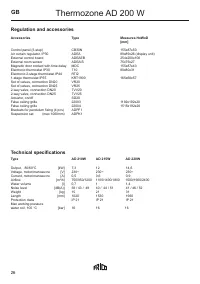
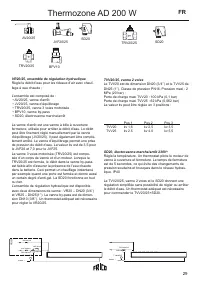
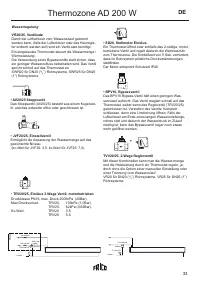
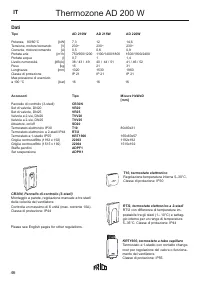
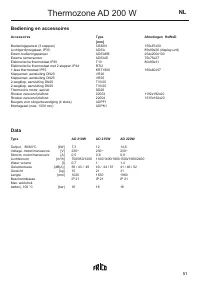
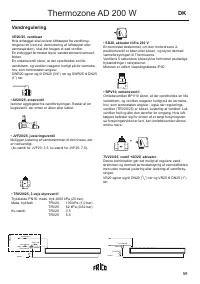
Different combinations of fan speed and heat output
are detailed in the wiring diagrams on pages 4-6.
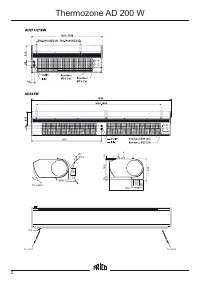
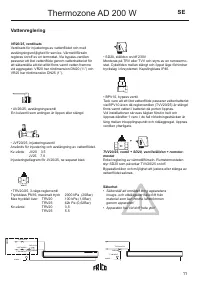
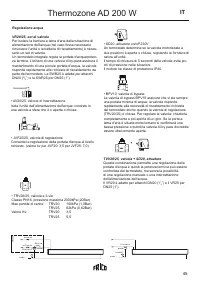
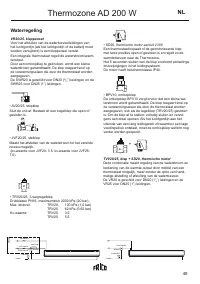
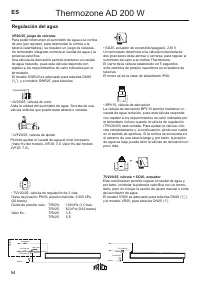
Water connection
The air-curtain has an aluminium inned heating coil (in
distance 2 mm) with copper tubes suitable for connec-
tion to a closed water heating system.
The heating coil must not be connected to a mains pres-
sure water system or an open water system.
The water pipes (DN15 - 1/2" BSP-F, inside thread)
are connected at the left hand side (when viewed from
inside the building) on top of the unit. (See details on
page 2)
The installation should be carried out by a certiied
installer.
NOTE: Care must be taken when connecting the pipes.
Use a wrench or similar to hold the air-curtain connec-
tions to prevent straining of the pipes and subsequent
water leakage during connection to water supply pipe-
work.
A bleed valve should be connected at a high point in the
pipe system and all air bled during commissioning of the
air-curtain.
It is also recommended that a drain valve is itted in
the supply pipe-work. This should be mounted on the
outside of the AD unit.
Air-vent and drain valves are not
included in the heating coil.
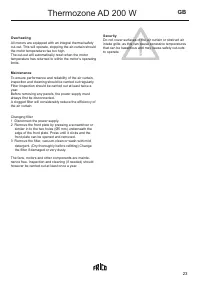
Filter
The heating coil is protected by an air ilter which covers
the coil face.
Mounting in false ceiling
See ig. C on page 3.
GB


