Магнитолы Pioneer FH-X360UB - инструкция пользователя по применению, эксплуатации и установке на русском языке. Мы надеемся, она поможет вам решить возникшие у вас вопросы при эксплуатации техники.
Если остались вопросы, задайте их в комментариях после инструкции.
"Загружаем инструкцию", означает, что нужно подождать пока файл загрузится и можно будет его читать онлайн. Некоторые инструкции очень большие и время их появления зависит от вашей скорости интернета.
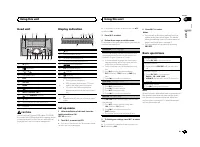
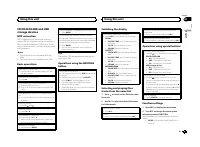
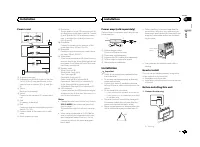
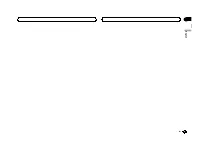
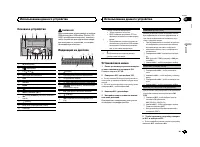

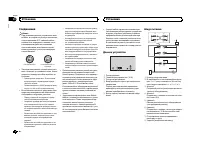
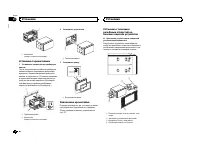
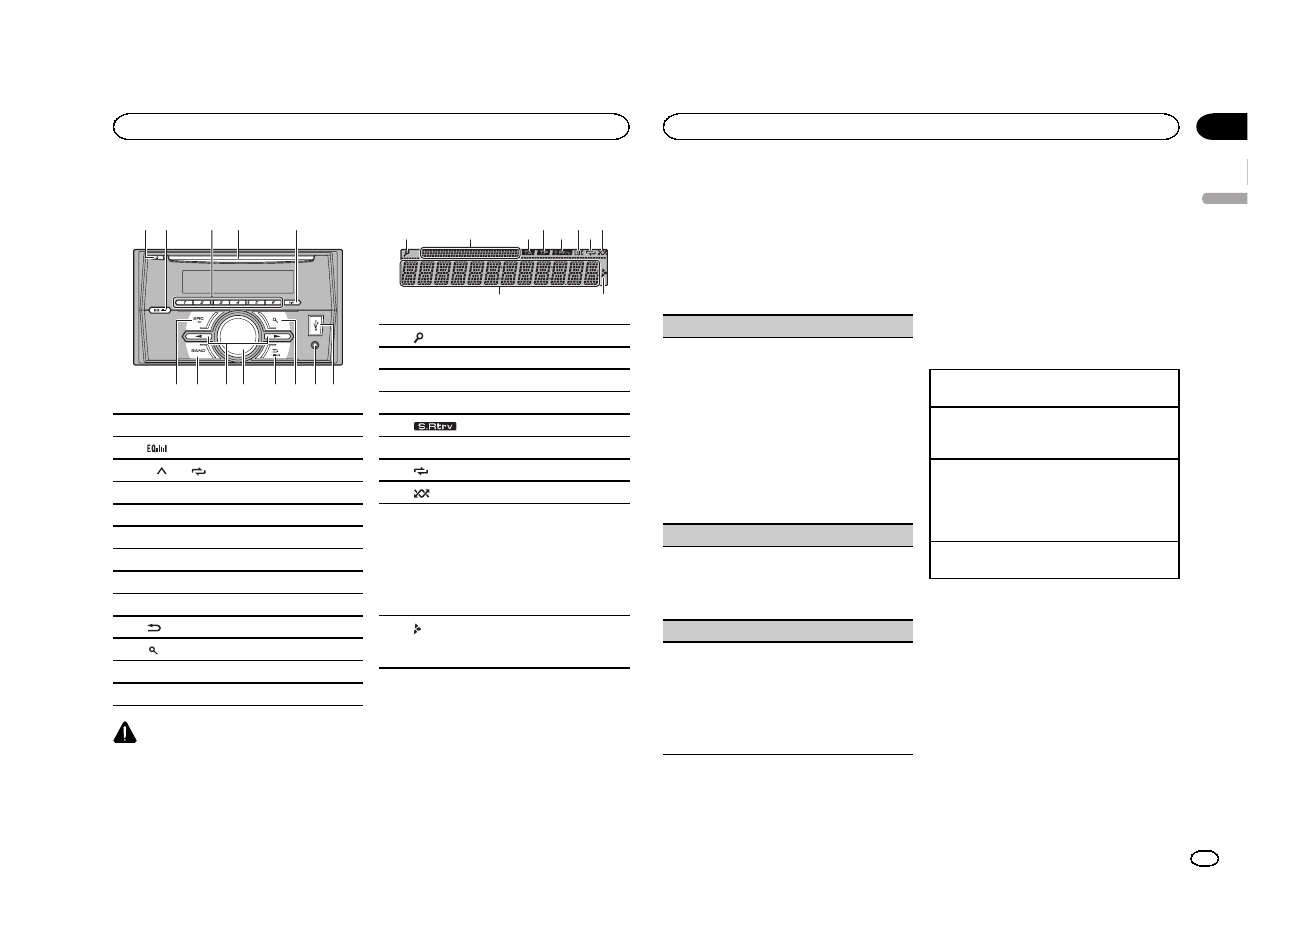
Head unit
1 2
4
5
8 9
7
a
c
6
b
d
3
1
h
(eject)
2
(equalizer)
3
1
/
to
6
/
4
Disc loading slot
5
DISP
6
SRC
/
OFF
7
BAND
8
c
/
d
9
MULTI-CONTROL
(
M.C.
)
a
(back)/
DIMMER
(dimmer)
b
(list)
c
AUX input jack (3.5 mm stereo jack)
d
USB port
CAUTION
Use an optional Pioneer USB cable (CD-U50E)
to connect the USB storage device as any device
connected directly to the unit will protrude out
from the unit, which could be dangerous.
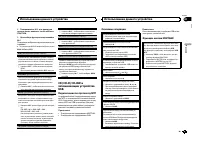
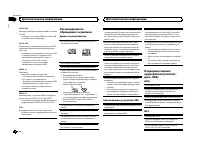
Display indication
2
1
3
7
5
9
4
6 8
a
1
(list)
2
Sub information section
3
TA (traffic announcements)
4
TP (traffic program identification)
5
(sound retriever)
6
LOC
(local seek tuning)
7
(repeat)
8
(random)
9
Main information section
!
Tuner: band and frequency
!
RDS: program service name, PTY infor-
mation and other literal information
!
CD player and USB storage device:
elapsed playback time and text informa-
tion
a
Appears when a lower tier of folder or menu
exists.
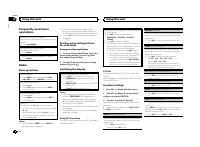
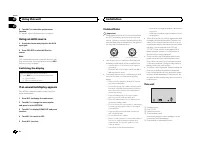
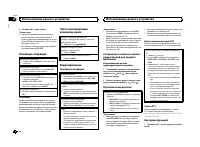
Set up menu
1
After installation of this unit, turn the
ignition switch to ON.
SET UP
appears.
2
Turn M.C. to switch to YES.
#
If you do not use the unit for 30 seconds, the set
up menu will not be displayed.
#
If you prefer not to set up at this time, turn
M.C.
to switch to
NO
.
3
Press M.C. to select.
4
Follow these steps to set the menu.
To proceed to the next menu option, you need to
confirm your selection.
LANGUAGE
(multi-language)
This unit can display the text information from a
compressed audio file even for information em-
bedded in English, Russian or Turkish.
!
If the embedded language and the selected
language setting are not the same, text infor-
mation may not display properly.
!
Some characters may not be displayed prop-
erly.
1
Turn
M.C.
to select the desired setting.
РУС
(Russian)
—
TUR
(Turkish)
—
ENG
(Eng-
lish)
2
Press
M.C.
to confirm the selection.
CLOCK SET
(setting the clock)
1
Turn
M.C.
to adjust hour.
2
Press
M.C.
to select minute.
3
Turn
M.C.
to adjust minute.
4
Press
M.C.
to confirm the selection.
FM STEP
(FM tuning step)
Use
FM STEP
to set FM tuning step options (seek
step settings).
1
Turn
M.C.
to select the FM tuning step.
100
(100 kHz)
—
50
(50 kHz)
2
Press
M.C.
to confirm the selection.
QUIT
appears.
!
The manual tuning step is fixed at 50 kHz.
5
To finish your settings, turn M.C. to select
YES.
#
If you prefer to change your setting again, turn
M.C.
to switch to
NO
.
6
Press M.C. to select.
Notes
!
You can set up the menu options from the
system menu and initial menu. For details
about the settings, refer to
page 6 and
!
You can cancel set up menu by pressing
SRC
/
OFF
.
Basic operations
Turning the unit on
1
Press
SRC
/
OFF
to turn the unit on.
Turning the unit off
1
Press and hold
SRC
/
OFF
until the unit turns
off.
Selecting a source
1
Press
SRC
/
OFF
to cycle between:
RADIO
—
CD
—
USB
—
AUX
!
USB MTP
displays while the MTP connection
is in use.
Adjusting the volume
1
Turn
M.C.
to adjust the volume.
Note
When this unit
’
s blue/white lead is connected to
the vehicle
’
s auto-antenna relay control termi-
nal, the vehicle
’
s antenna extends when this
unit
’
s source is turned on. To retract the anten-
na, turn the source off.
English
Using this unit
3
Section
Using this unit
En
02
Содержание
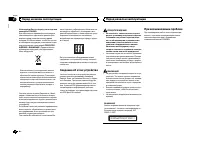
- 17 Основное устройство; ВНИМАНИЕ; USB; Индикация на дисплее; SET UP; YES; Использование данного устройства
- 18 Радиоприемник; Основные операции; SEEK; AF; AF; FREQUENCY; Использование функций; Список; PTY; Настройка функций
- 19 FUNCTION; запоминающие устройства; Подключение по протоколу; Android; Функции кнопки
- 20 Регулировки параметров звука; AUDIO
- 22 Меню системы; PW SAVE; Информация о; Меню
- 23 Стартовое меню; Меню систе
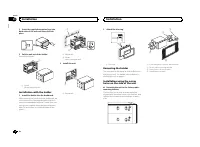
- 24 Соединения; Важно; Данное устройство; Установка
- 25 настройка выхода заднего канала и; Усилитель мощности; RCA; Порядок установки
- 26 Перед установкой данного устройства
- 27 Общие; Дополнительная информация
- 28 Диски и проигрыватель; компакт
- 29 WAV; USB MTP; Pioneer; Диск
- 30 Серийный номер
- 31 Технические характеристики


