Магнитолы Panasonic CQ-R223W - инструкция пользователя по применению, эксплуатации и установке на русском языке. Мы надеемся, она поможет вам решить возникшие у вас вопросы при эксплуатации техники.
Если остались вопросы, задайте их в комментариях после инструкции.
"Загружаем инструкцию", означает, что нужно подождать пока файл загрузится и можно будет его читать онлайн. Некоторые инструкции очень большие и время их появления зависит от вашей скорости интернета.


1
2
3
4
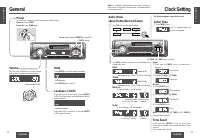
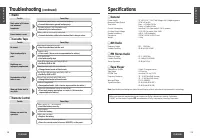
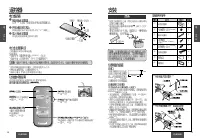
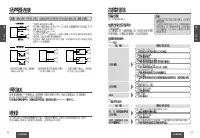
Mounting spring (L)
E
N
G
L
I
S
H
12
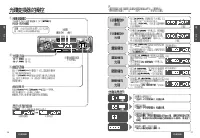
CQ-R223W
23
E
N
G
L
I
S
H
11
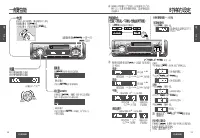
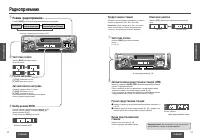
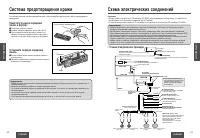
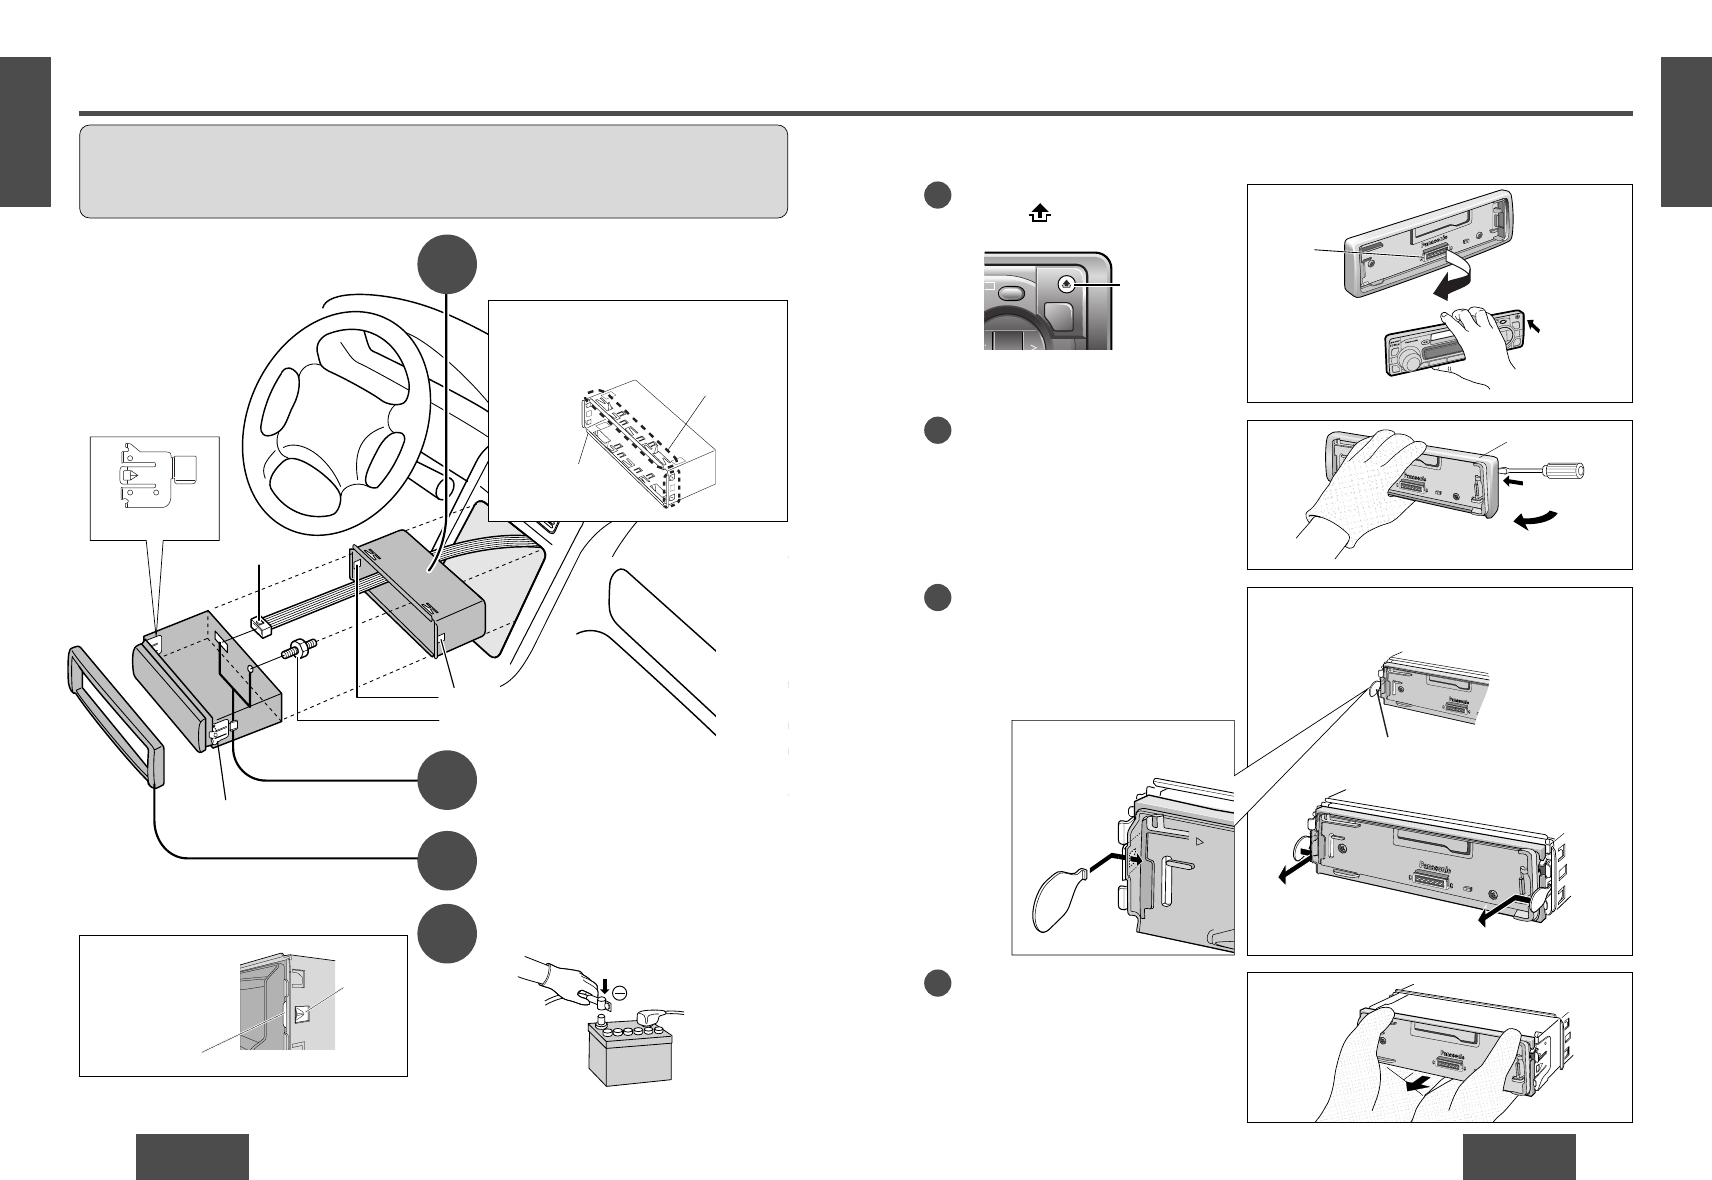
Installation
(Continued)
CQ-R223W
22
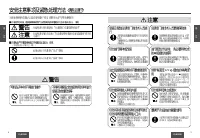
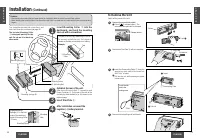
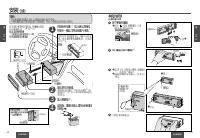
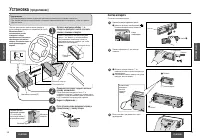
Cautions:
• We strongly recommend that you wear gloves for installation work to protect yourself from injuries.
• When bending the mounting tab of the mounting collar with a screwdriver, be careful not to injure your hands and
fingers.
Establish the rear of the unit.
After fixing Mounting Bolt
t
connection and
Power Connector
y
, fix the rear of the unit to the
car body by either method (a) or (b) shown on the
previous page.
Insert Trim Plate
i
.
After installation reconnect the
negative (–) battery terminal.
First complete the electrical connections, and
then check them for correctness.(
a
page 25)
I n s e r t M o u n t i n g C o l l a r
q
i n t o t h e
dashboard, and bend the mounting
tabs out with a screwdriver.
The included Mounting Collar
q
is designed specially for this
unit. Do not use it to attach any
other model.
y
Power Connector
Engage Mounting
Springs (
C
) in the both
sides of the mounting
holes of Mounting Collar
q
firmly.
Mounting Spring
Mounting
Hole
Tab
q
Mounting
Collar
Mounting Springs (R)
Mounting Holes
t
Mounting Bolt
The tabs to be bent vary depending on the car.
To s e c u r e l y i n s t a l l t h e u n i t , f u l l y b e n d a
number of the tabs so that there is no rattling.
Example:
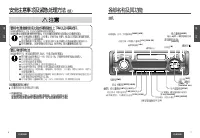
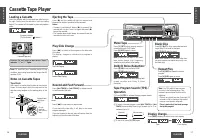
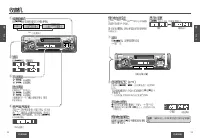
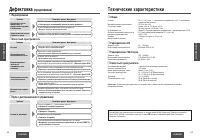
To Remove the Unit
Switch off the power of the unit.
Remove the removable face plate.
Press [
]. (release button). The
removable face plate will be released.
1
Remove the Trim Plate
i
with a screwdriver.
2
Insert the Dismounting Plates
u
along the
grooves on both sides of the main unit
until “click” is heard.
Pull out the unit while pushing the plates
further inside.
3
Remove the unit pulling with both hands.
4
CQ-R
223W
DOLB
Y B N
R
Push
Contact
i
Trim Plate
Screwdriver
u
Dismounting Plate
Insert
Pull out
MODE
NR
TUNE
REMOTE
Release button
Insert the tab
end in the
outer groove.
“Click”


