Кондиционеры Elenberg SPT-7090 - инструкция пользователя по применению, эксплуатации и установке на русском языке. Мы надеемся, она поможет вам решить возникшие у вас вопросы при эксплуатации техники.
Если остались вопросы, задайте их в комментариях после инструкции.
"Загружаем инструкцию", означает, что нужно подождать пока файл загрузится и можно будет его читать онлайн. Некоторые инструкции очень большие и время их появления зависит от вашей скорости интернета.


44
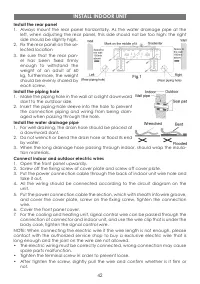
then use the wire clamp to ix the signal control wire, then connect the corre
-
sponding connector.
4. Ensure if wire has been ixed well.
5. Install handle or front side plate.
NOTE:
• Wrong wiring may cause spare parts malfunction.
• After the cable ixed, make sure there should be a free space between the
connection and ixing place on the lead wire.
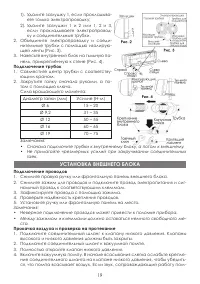
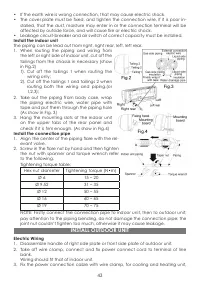
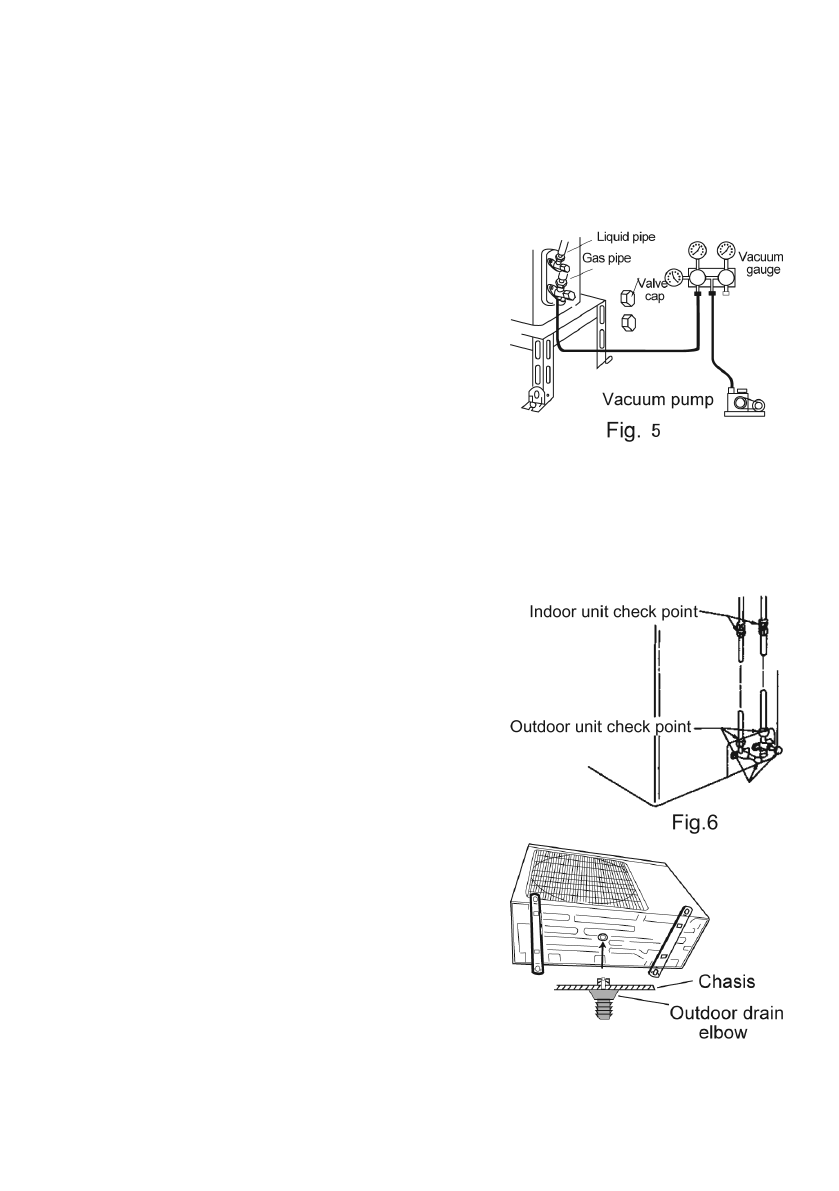
Air purging and leakage test
1. Connect charging hose of manifold valve to
charge end of low pressure valve (both high/
low pressure valves must be tightly shut).
2. Connect joint of charging hose to vacuum
pump.
3. Fully open handle of Lo manifold valve.
4. Open the vacuum pump to evacuate. At the
beginning, slightly loosen joint nut of low pres
-
sure valve to check if there is air coming inside.
(If noise of vacuum pump has been changed,
the reading of multimeter is 0) Then tighten the nut.
5. Keep evacuating for more than 15 mins and make sure the reading of multi-
meter is -1.0 x 10
5
Pa (-76 cmHg).
6. Fully open high/low pressure valves.
7. Remove charging hose from charging end of low pressure valve.
8. Tighten bonnet of low-pressure valve. (As shown in Fig. 5)
Leak hunting
Use soap water or leak hunting meter to check
whether the joints is leak.
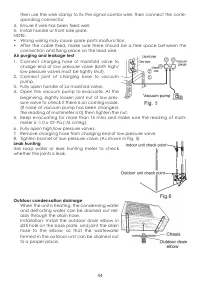
Outdoor condensation drainage
When the unit is heating, the condensing water
and defrosting water can be drained out reli
-
ably through the drain hose.
Installation: Install the outdoor drain elbow in
ø25 hole on the base plate, and joint the drain
hose to the elbow, so that the wastewater
formed in the outdoor unit can be drained out
to a proper place.
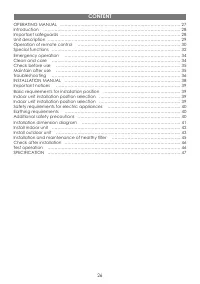
Содержание
- 4 Дополнительные положения; ВВЕДЕНИЕ
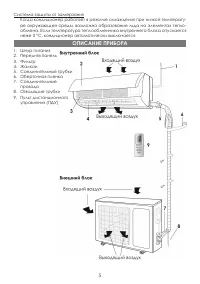
- 5 ОПИСАНИЕ ПРИБОРА
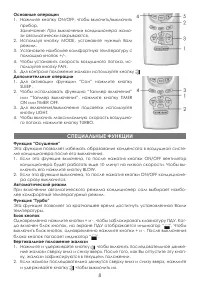
- 6 Описание кнопок ПДУ
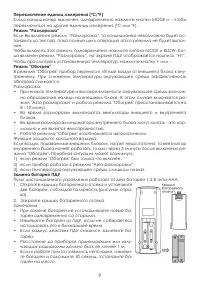
- 8 СПЕЦИАЛЬНЫЕ ФУНКЦИИ
- 9 Режим “Разморозка”; Замена батарей ПДУ
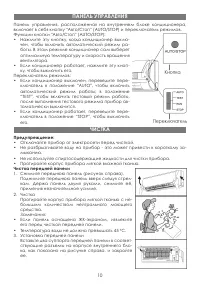
- 10 Чистка передней панели; ПАНЕЛЬ УПРАВЛЕНИЯ
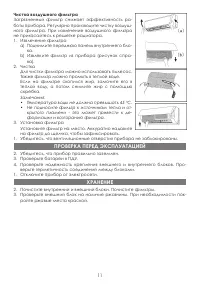
- 11 Чистка воздушного фильтра; ПРОВЕРКА ПЕРЕД ЭКСПЛУАТАЦИЕЙ
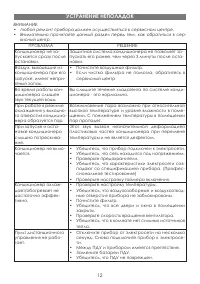
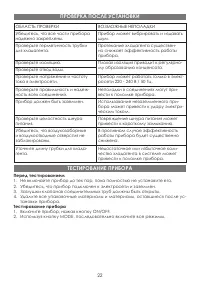
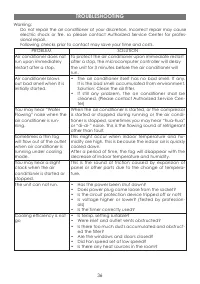
- 12 УСТРАНЕНИЕ НЕПОЛАДОК
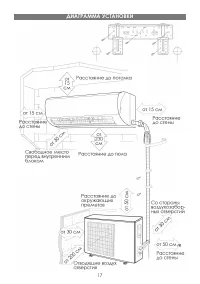
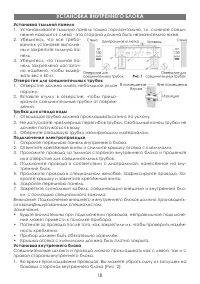
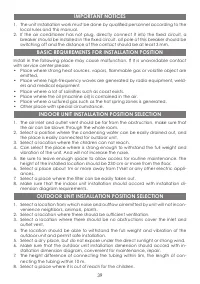
- 18 Установка внутреннего блока; УСТАНОВКА ВНУТРЕННЕГО БЛОКА
- 19 Подключение трубок; Подключение проводов; Прокачка воздуха и проверка на протекание; УСТАНОВКА ВНЕШНЕГО БЛОКА
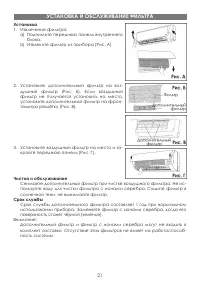
- 21 УСТАНОВКА И ОБСЛУЖИВАНИЕ ФИЛЬТРА
- 22 ПРОВЕРКА ПОСЛЕ УСТАНОВКИ
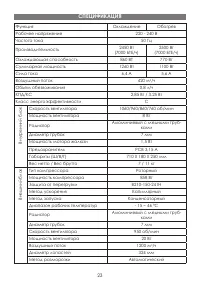
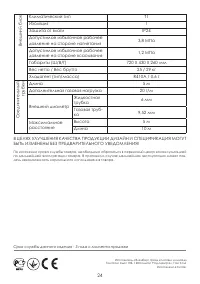
- 23 СПЕЦИФИКАЦИЯ

