Кондиционеры Elenberg PRT-9050 - инструкция пользователя по применению, эксплуатации и установке на русском языке. Мы надеемся, она поможет вам решить возникшие у вас вопросы при эксплуатации техники.
Если остались вопросы, задайте их в комментариях после инструкции.
"Загружаем инструкцию", означает, что нужно подождать пока файл загрузится и можно будет его читать онлайн. Некоторые инструкции очень большие и время их появления зависит от вашей скорости интернета.


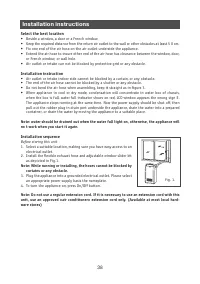
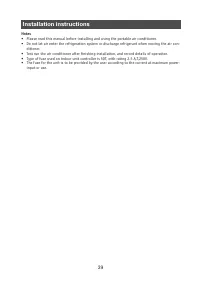
Installation instructions
38
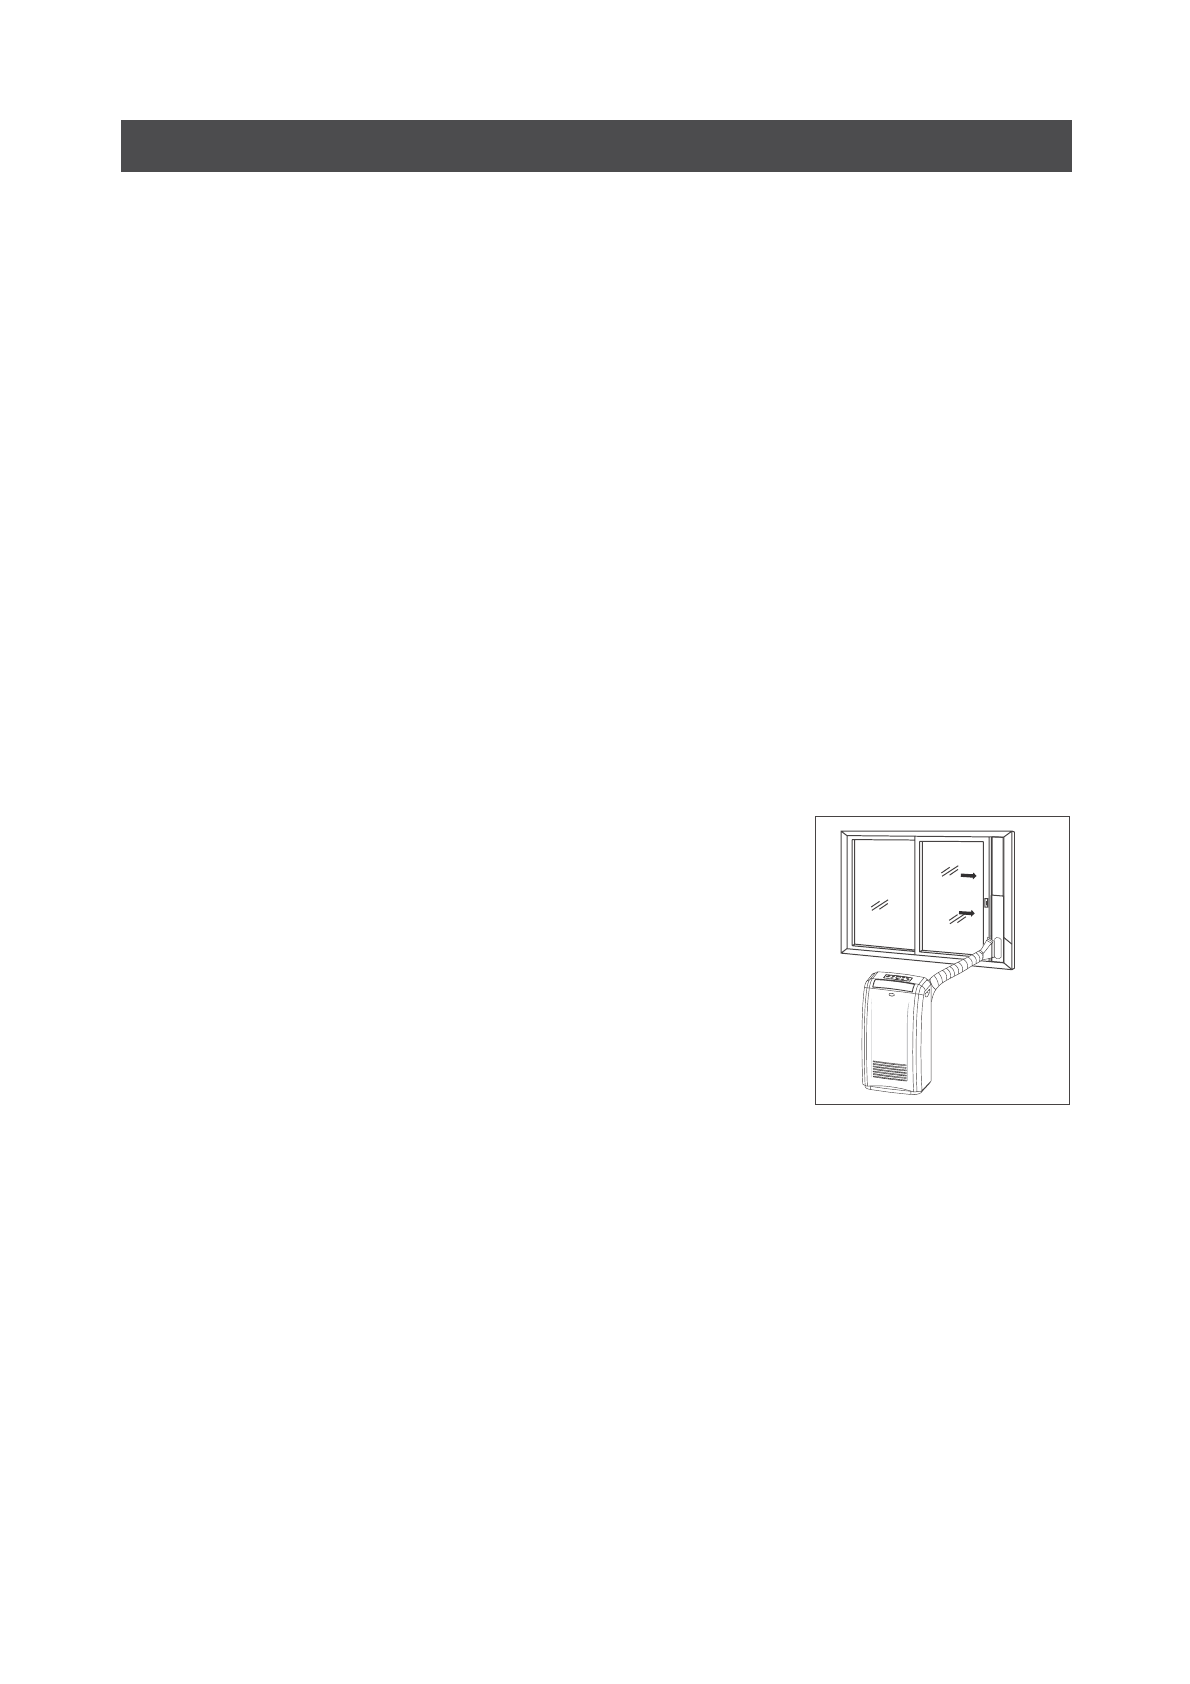
Select the best location
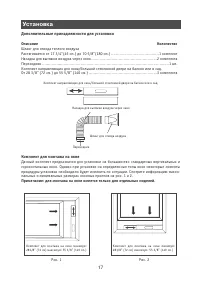
• Beside a window, a door or a French window.
• Keep the required distance from the return air outlet to the wall or other obstacles at least 5 0 cm.
• Fix one end of the air hose on the air outlet underside the appliance.
• Extend the air hose to insure other end of the air hose has clearance between the window, door,
or French window, or wall hole.
• Air outlet or intake can not be blocked by protective grid or any obstacle.
Installation instruction
• Air outlet or intake indoor side cannot be blocked by a curtain, or any obstacle.
• The end of the air hose cannot be blocked by a shutter or any obstacle.
• Do not bend the air hose when assembling, keep it straight as in figure 3.
• When appliance in cool or dry mode, condensation will concentrate in water box of chassis,
when the box is full, water full indicator shows on red, LCD window appears the wrong sign E.
The appliance stops running at the same time. Now the power supply should be shut off, then
pull out the rubber plug in drain port underside the appliance, drain the water into a prepared
container, or drain the water by moving the appliance to a suitable place.
Note: water should be drained out when the water full light on, otherwise, the appliance will
no t work when you start it again.
Installation sequence
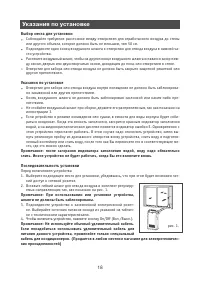
Before staring this unit
1. Select a suitable location, making sure you have easy access to an
electrical outlet.
2. Install the flexible exhaust hose and adjustable window slider kit
as depicted in Fig.1.
Note: While running or installing, the hoses cannot be blocked by
curtains or any obstacle.
3. Plug the appliance into a grounded electrical outlet. Please select
an appropriate power supply basis the nameplate.
4. To turn the appliance on, press On/Off button.
Note: Do not use a regular extension cord. If it is necessary to use an extension cord with this
unit, use an approved «air conditioner» extension cord only. (Available at most local hard
ware stores)
fig. 1.
Содержание
- 3 Введение; Электротехнические требования
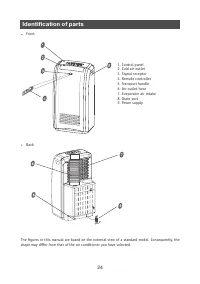
- 4 Описание
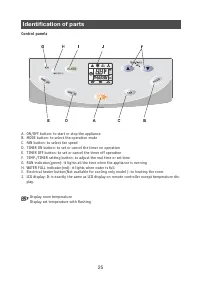
- 5 Панель управления; по таймеру или отменить его
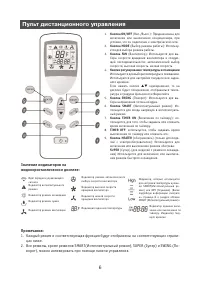
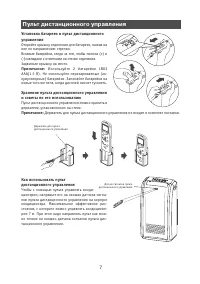
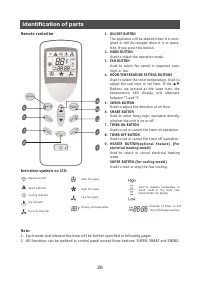
- 6 Пульт дистанционного управления
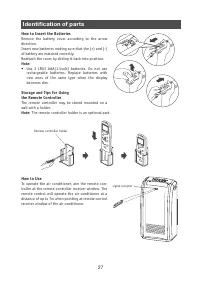
- 7 Используйте 2 батарейки LR03
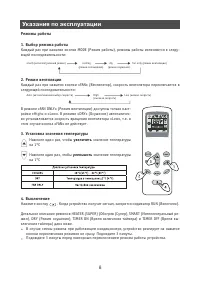
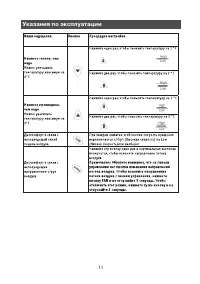
- 8 Указания по эксплуатации; Режимы работы; увеличить
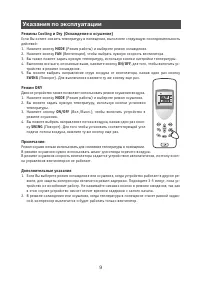
- 9 Режимы Cooling и Dry (Охлаждение и осушение); тройство в режиме охлаждения.; SWING; MODE; ку; SWING; подачи потока воздуха, нажмите ту же кнопку еще раз.; Дополнительные указания; ной, компрессор выключится и будет работать только вентилятор.
- 10 Нажмите кнопку; SMART; (Интеллектуальный режим/режим непрерывной
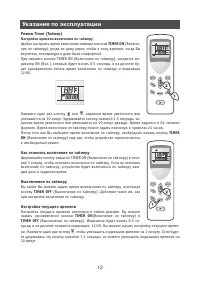
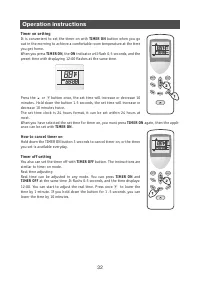
- 12 Настройка времени включения по таймеру; Как отменить включение по таймеру
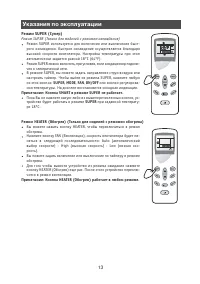
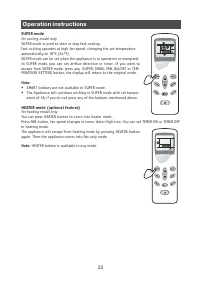
- 13 Режим SUPER (Только для моделей с режимом охлаждения); SUPER; или кнопки регулирова+; Примечание: Кнопка SMART в режиме SUPER не работает.; при заданной температу+
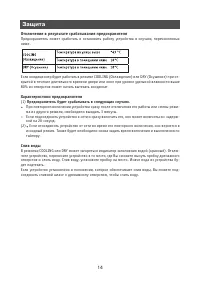
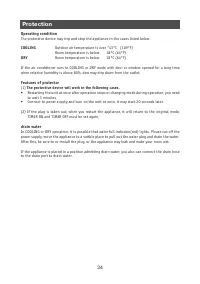
- 14 Защита; Отключение в результате срабатывания предохранителя; Предохранитель будет срабатывать в следующих случаях.; Слив воды
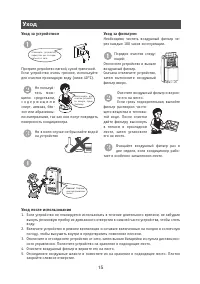
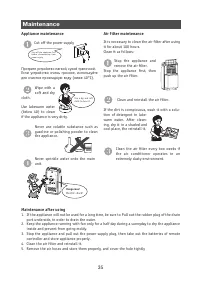
- 15 Уход; Уход за устройством; тает в особенно запыленном месте.; Уход после использования; погоду, чтобы высушить внутри и предотвратить появление плесени.
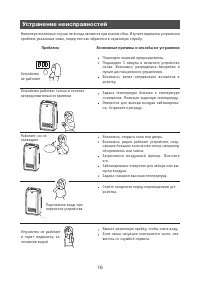
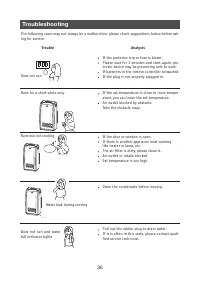
- 16 Устранение неисправностей; Проблема
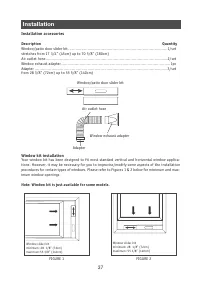
- 17 Установка; Дополнительные принадлежности для установки; Комплект для монтажа на окне
- 18 Указания по установке; Выбор места для установки; кий доступ к сетевой розетке.
- 19 Примечания

