Кондиционеры Daikin EKHTS-AC - инструкция пользователя по применению, эксплуатации и установке на русском языке. Мы надеемся, она поможет вам решить возникшие у вас вопросы при эксплуатации техники.
Если остались вопросы, задайте их в комментариях после инструкции.
"Загружаем инструкцию", означает, что нужно подождать пока файл загрузится и можно будет его читать онлайн. Некоторые инструкции очень большие и время их появления зависит от вашей скорости интернета.

EKHTS260AC6W1
Domestic hot water tank for air to water heat pump system
4PW73828-1 – 2012.05
Installation manual
7
8
Connection of electric heater
9
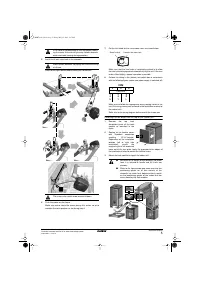
Reattach the drain plate on the indoor unit.
10
Commissioning
Follow the next steps to fill up the tank:
1 Open each hot water tap in turn to expel air from the system
pipe work.
2 Open the cold water supply valve. Make sure the decoration
panels of both the domestic hot water tank and the indoor
unit are aligned.
3 Close all water taps after all air is expelled.
4 Check for leaks.
5 Manually operate the temperature and pressure relief valve
to ensure free water flow through the discharge pipe (turn
knob counterclockwise). Refer to "Main components" on
page 2 for location of the temperature and pressure relief
valve.
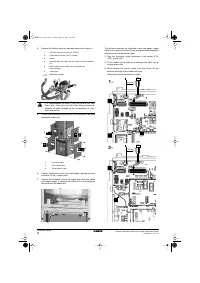
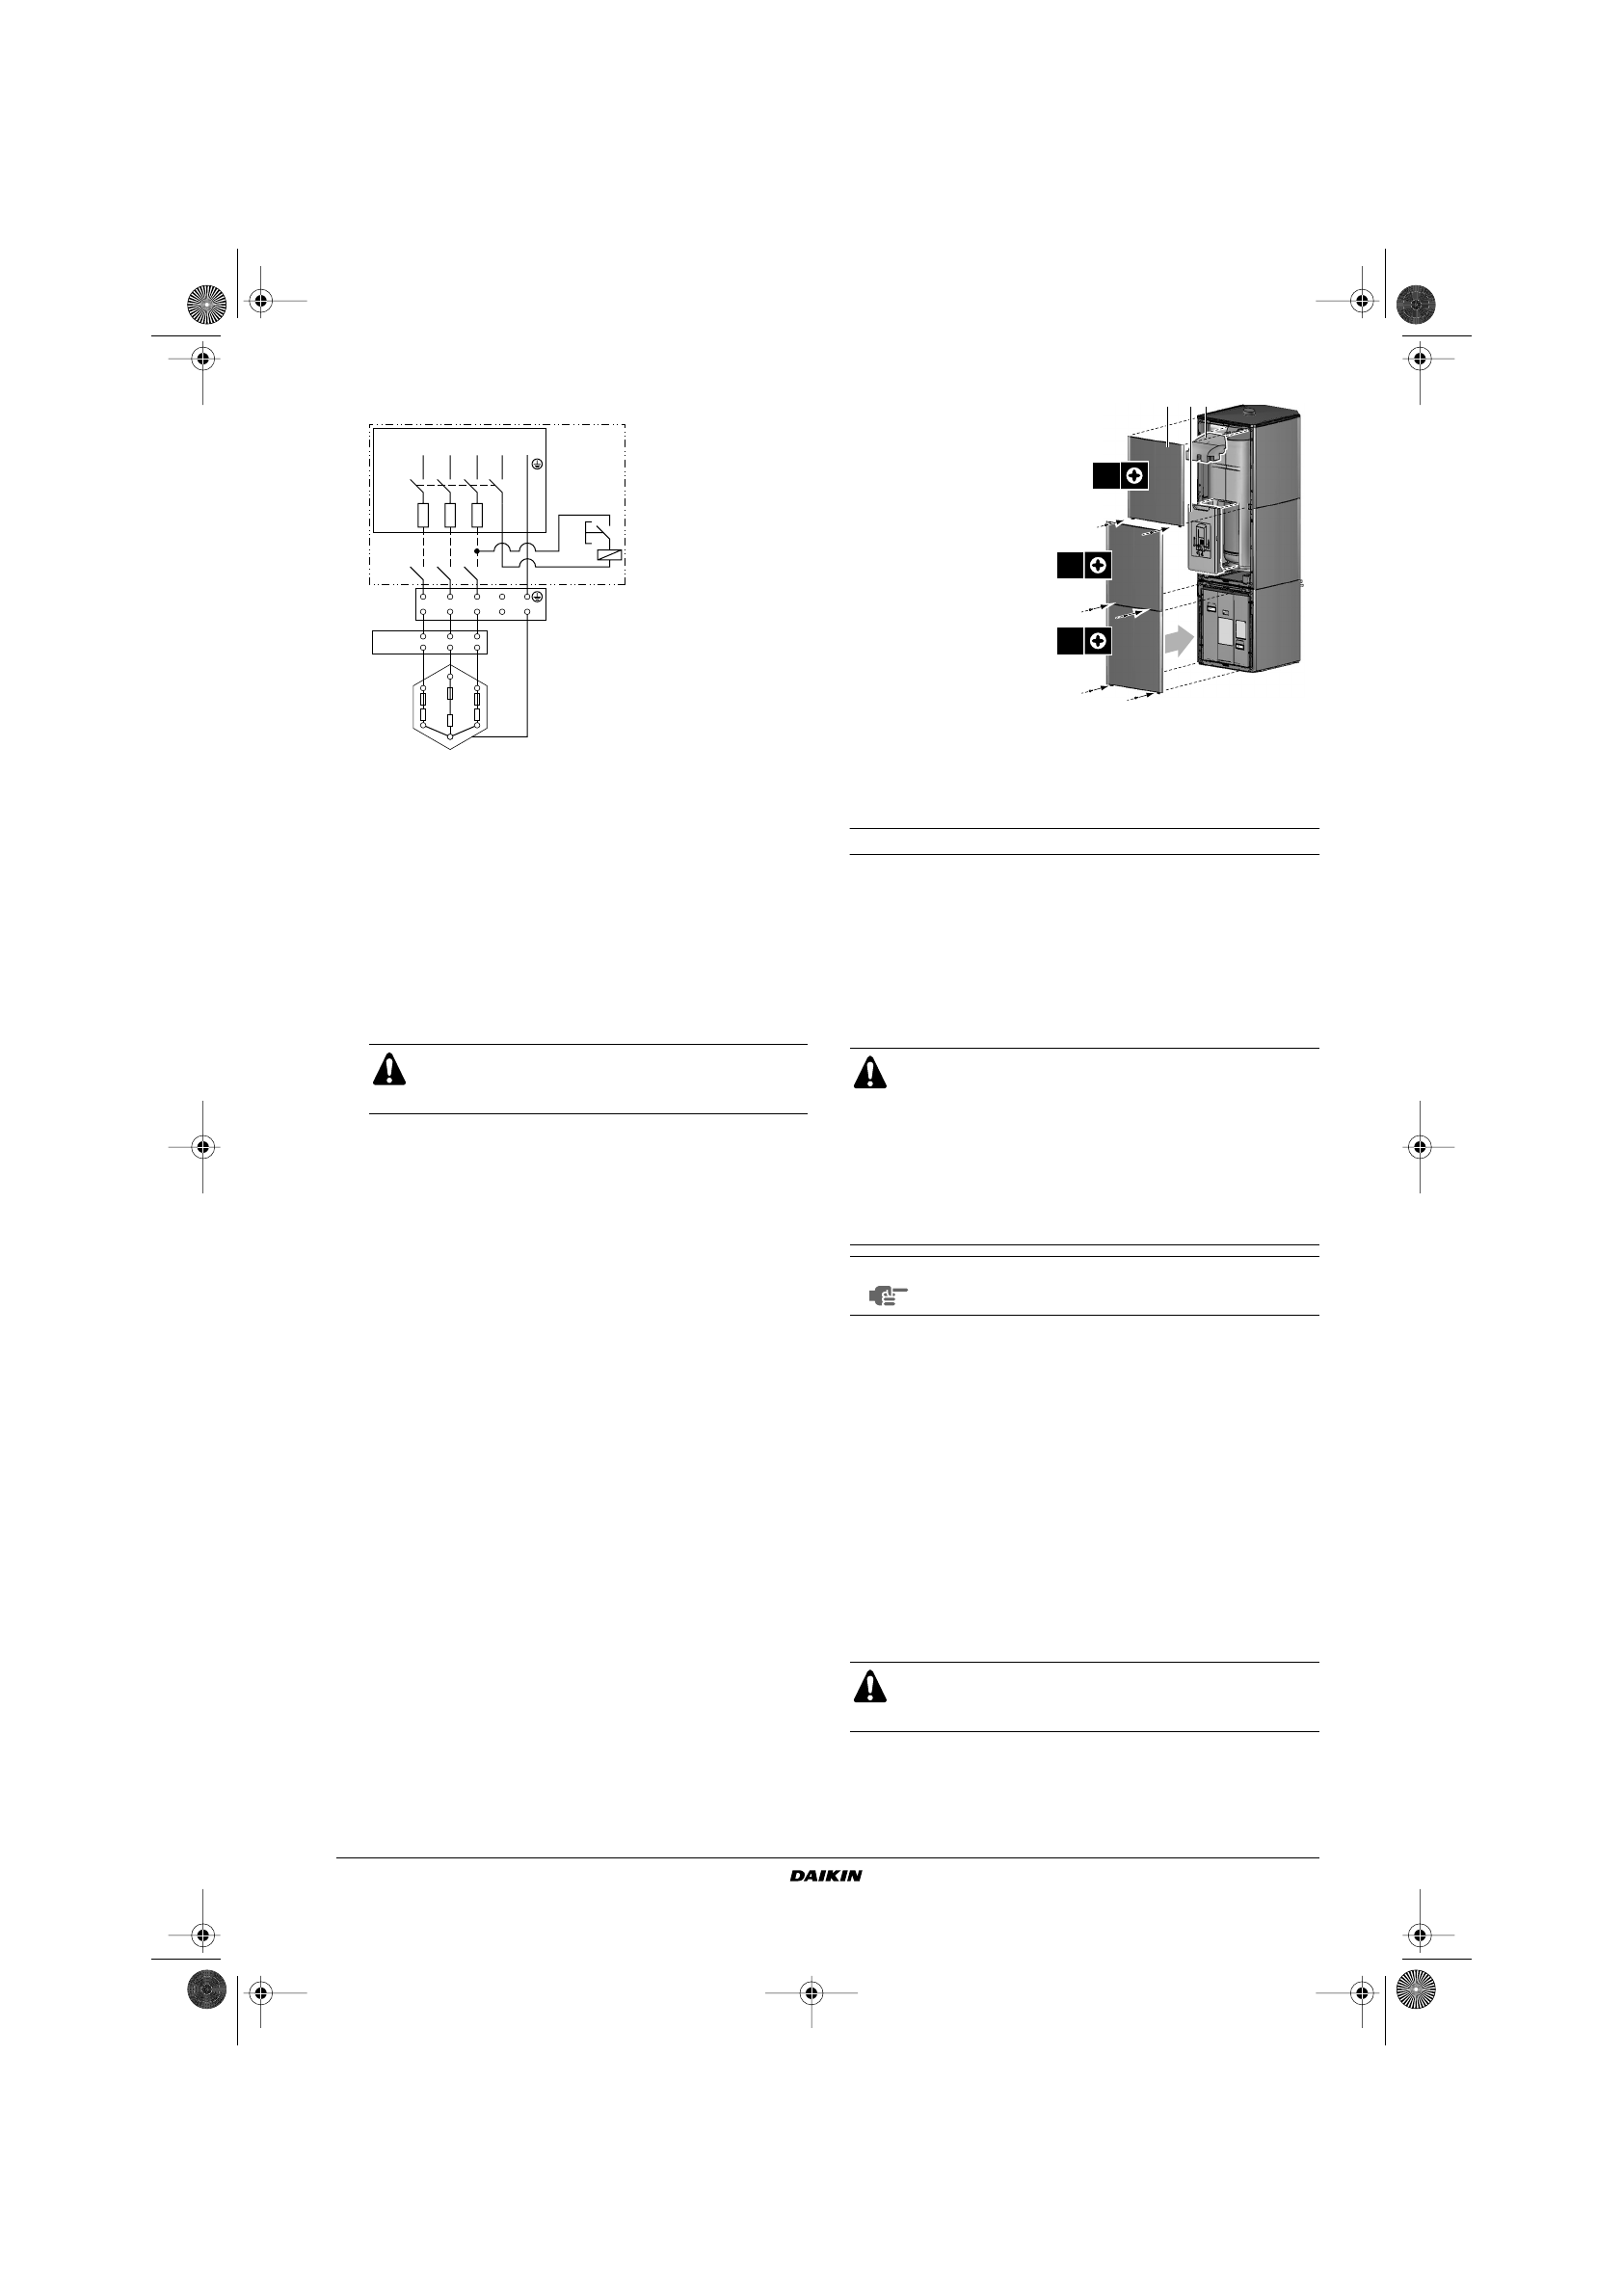
11
Reattach the front
decoration panels of
the domestic hot water
tank.
12
Reattach the front
decoration panel of
the indoor unit.
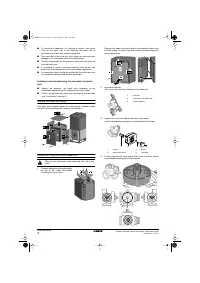
Installing the hot water tank by the side of the indoor unit
Refer to the manual delivered with the kit EKFMAHTB.
M
AINTENANCE
In order to ensure optimal availability of the unit, a number of checks
and inspections on the unit and the field wiring have to be carried out
at regular intervals.
The described checks must be executed at least once a year by a
licensed technician.
1
Domestic hot water tank pressure relief valve (field supply)
Check for correct operation of the pressure relief valve on the
domestic hot water tank.
2
Remove the bottom front panel of the water tank to check for
water leaks (first remove the front panel of the indoor unit when
the water tank is mounted on top of the unit).
Descaling
Depending on the water quality and set temperature, scale can
deposit on the heat exchanger inside the domestic hot water tank
and can restrict heat transfer. For this reason, descaling of the heat
exchanger may be required at certain intervals.
Q*DI
Earth leakage protector (field supply)
F1
Fuse (field supply)
SI
Emergency switch (field supply)
KIM
Contactor (field supply)
Tc
Thermostat (78°C)
Tco
Thermal cut out (92~99°C)
TF
Thermal fuse
R
Resistor
The domestic hot water tank coil must be filled with
water at the indoor unit water inlet. This to avoid that
dirt enters the system.
3~ 400 V 50 Hz
L1
L1
L2
L2
L3
L3
N
N
SI
KIM
F1
Q
*
DI
KIM
R
TF
T
C
/T
CO
■
Each inspection has to be carried out by a licensed
technician and not by the user.
■
Before carrying out any maintenance or repair activity,
always switch off the circuit breaker on the supply
panel, remove the fuses or open the protection
devices of the unit.
■
Make sure that before starting any maintenance or
repair activity, also the power supply to the outdoor
unit is switched off.
NOTE
The flexible hoses are designed for a 13 year lifetime.
It is adviced to replace them after this period.
When using means for descaling, it must be ensured that
the water quality remains compliant with the requirements
of EU directive 98/83/EC.
2x
2x
2x
1 2 3
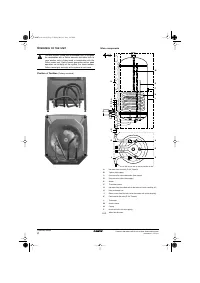
1
Decoration panel
2
Insulation piece
3
Temperature and pressure
relief valve insulation piece
4PW73828-1.book Page 7 Friday, May 25, 2012 2:27 PM


