Кондиционеры Daikin EKHTS-AC - инструкция пользователя по применению, эксплуатации и установке на русском языке. Мы надеемся, она поможет вам решить возникшие у вас вопросы при эксплуатации техники.
Если остались вопросы, задайте их в комментариях после инструкции.
"Загружаем инструкцию", означает, что нужно подождать пока файл загрузится и можно будет его читать онлайн. Некоторые инструкции очень большие и время их появления зависит от вашей скорости интернета.

Installation manual
4
EKHTS260AC6W1
Domestic hot water tank for air to water heat pump system
4PW73828-1 – 2012.05
■
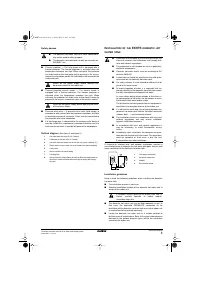
To avoid back siphonage it is advised to install a non-return
valve on the water inlet of the domestic hot water tank in
accordance with local and national regulations.
■
Take care that in the event of a leak, water can not cause any
damage to the installation space and surroundings.
■
Provide a connection for the pressure relief valve and drain on
the cold water inlet.
■
It is advised to install a pressure reducing valve on the cold
water inlet in accordance with local and national regulations.
■
An expansion vessel should be installed on the cold water inlet
in accordance with local and national regulations.
Installing and commissioning the domestic hot water
tank
■
Unpack the domestic hot water tank according to the
instructions mentioned on the unpacking instruction sheet.
■
Check if all domestic hot water tank accessories are enclosed
(see "Accessories" on page 1).
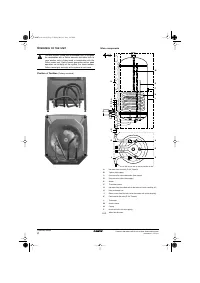
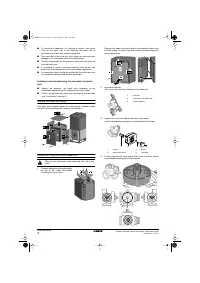
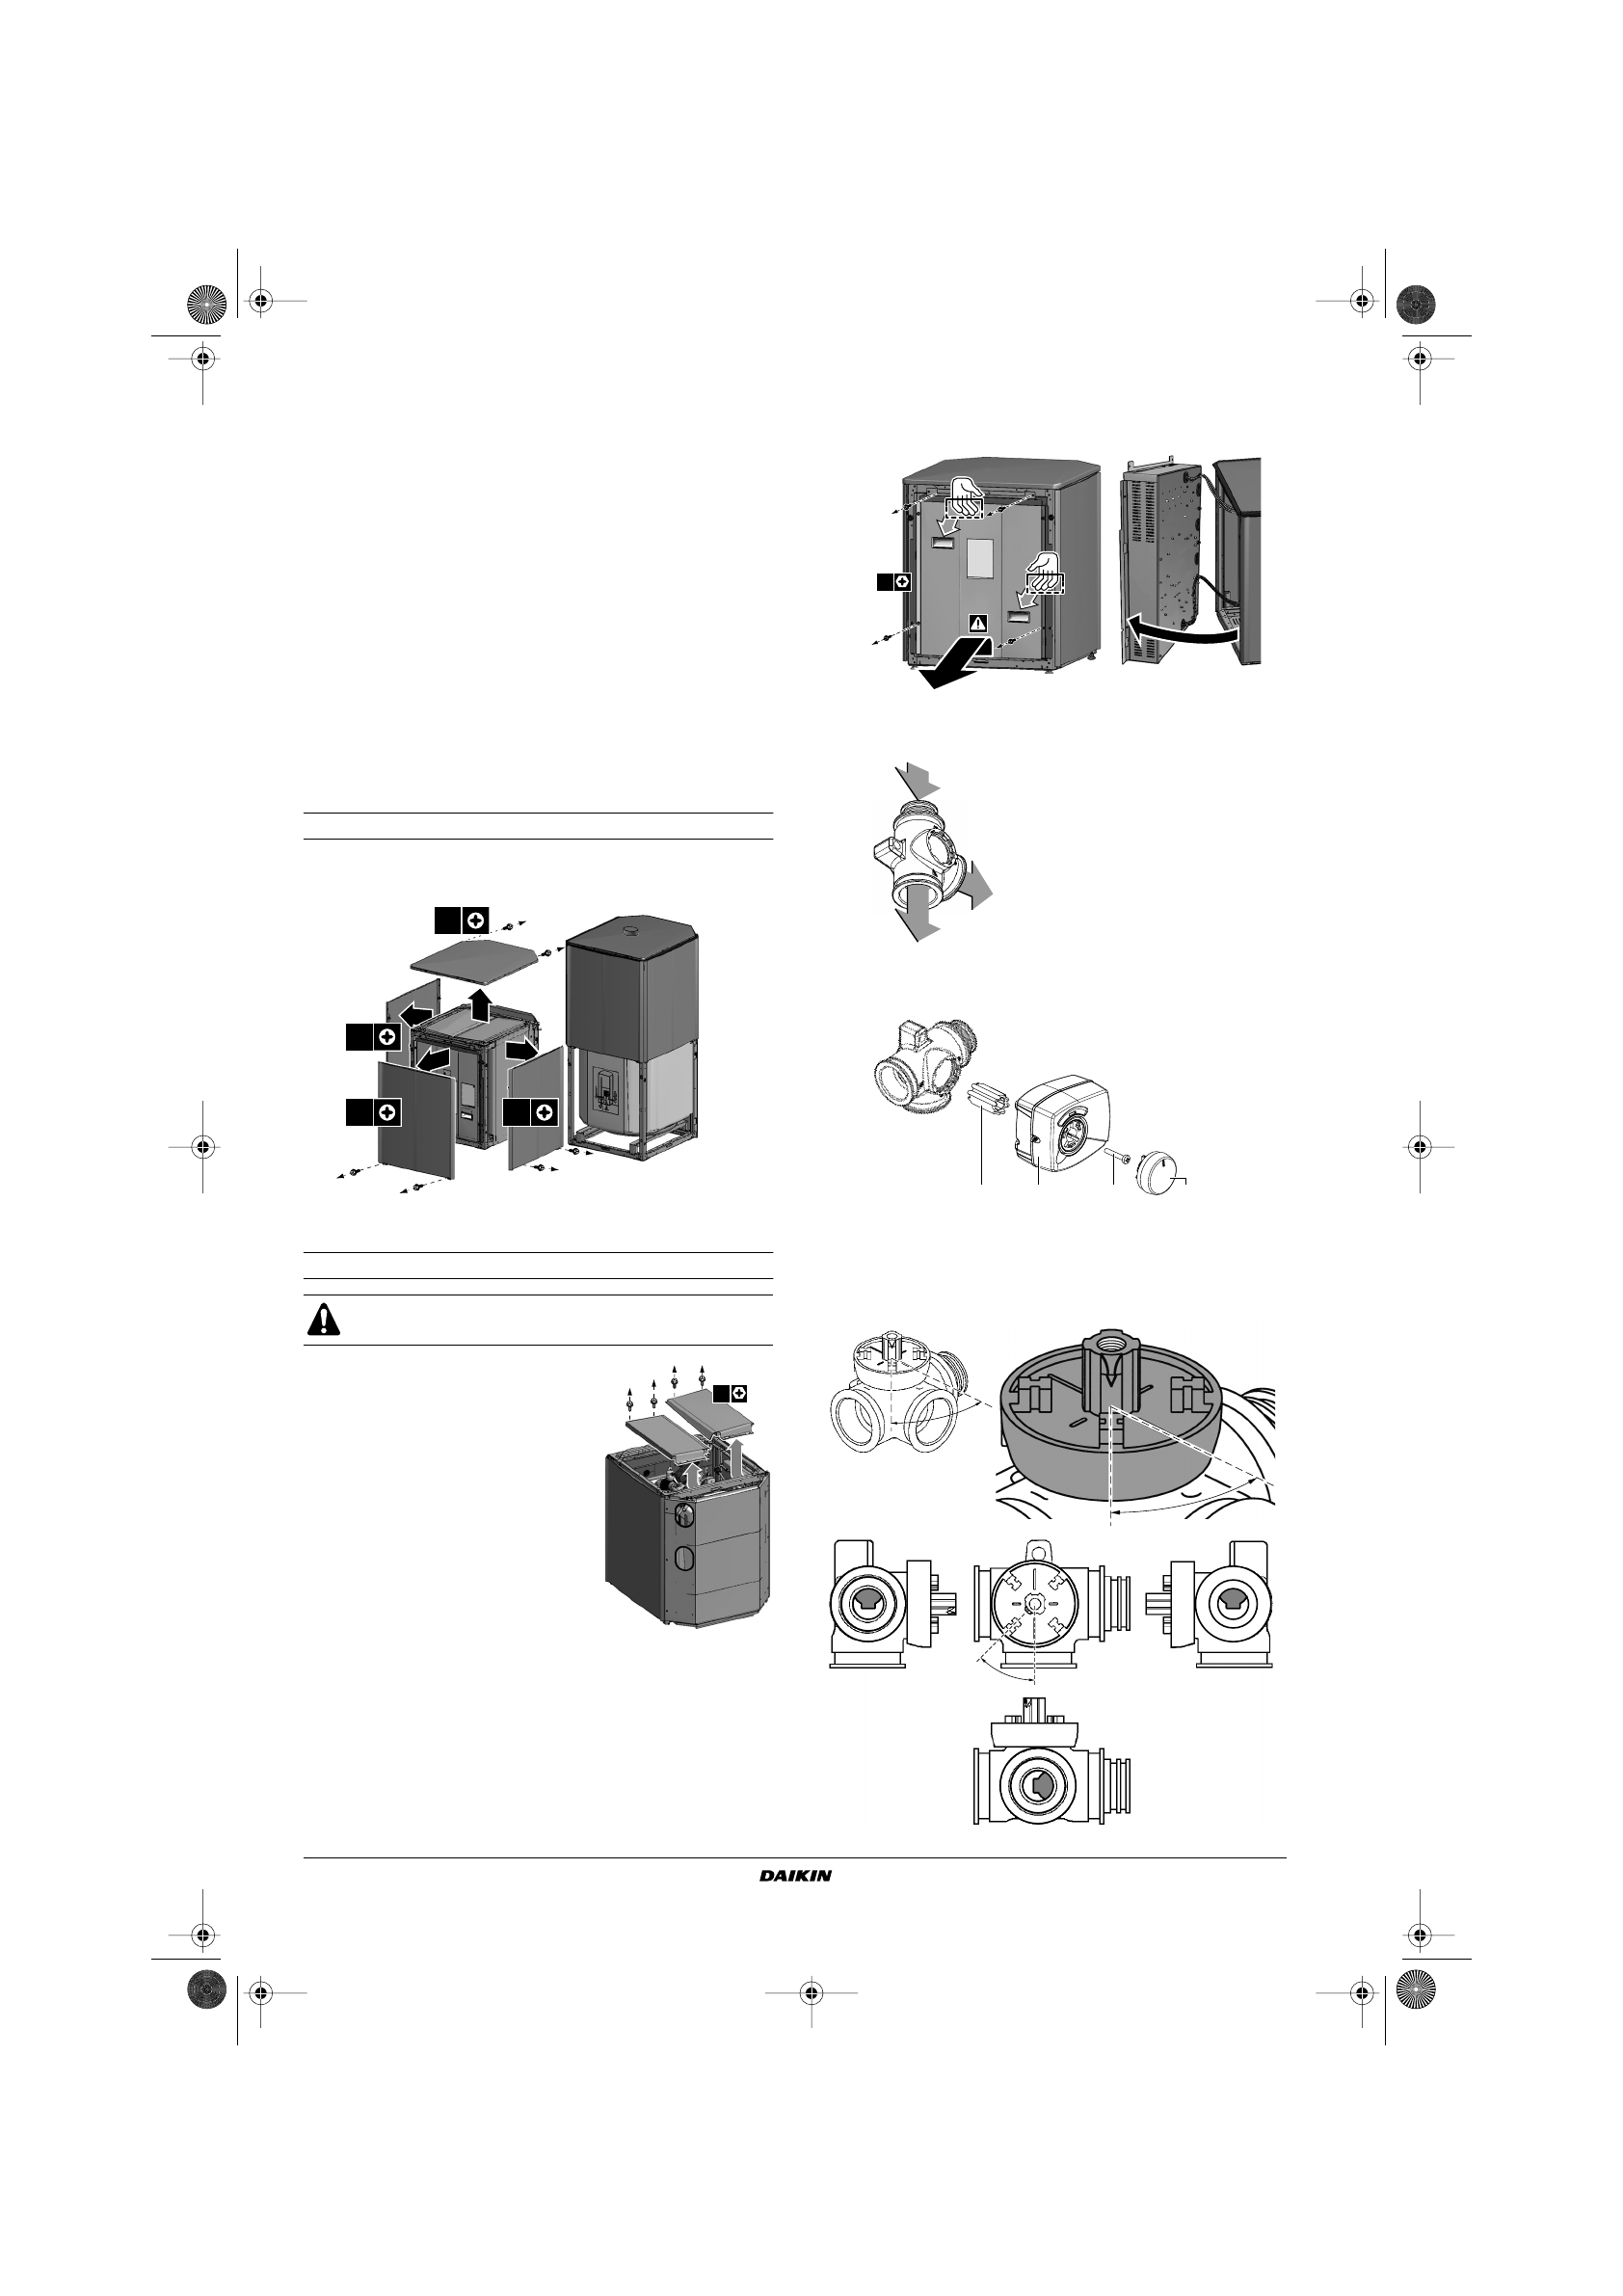
Remove the indoor unit casing.
Take away the decoration panels by removing the 2 bottom screws
and then unhitching the panel. Remove the top panel.
Connect the 3-way valve to the indoor unit
1
Remove both parts of the drain plate
on top of the indoor unit before
installing the 3-way valve.
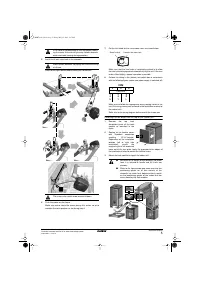
Remove the indoor unit switch box by unscrewing fixations and
by then sliding the switch box aside without disconnecting any
wiring connections.
2
Installation position.
This 3-way valve must be installed in the indoor unit.
3
Unpack the 3-way valve body and 3-way valve motor.
Verify that following accessories are provided with the motor.
4
Put the sleeve on the valve and turn the valve so that the sleeve
is positioned according to the figure below.
Refer to the instruction sheet delivered with the 3-way
valve.
2x
2x
2x
3
1
1
1
2x
4x
4x
1
Sleeve
3
Screw
2
Valve motor cover
4
Turn knob
4x
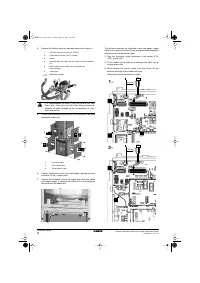
MAX.
15 cm
1
3
2
1
From unit
2
To domestic hot water tank
3
To room heating
1
2
3
4
45
45
°
45
°
45
°
45
45
°
45
°
4PW73828-1.book Page 4 Friday, May 25, 2012 2:27 PM


