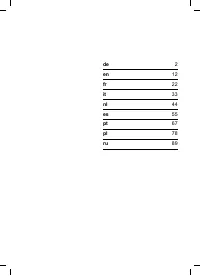
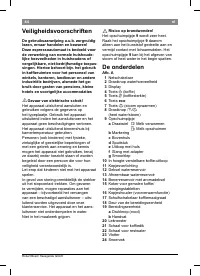
Кофемашина Bosch TCA 5809 - инструкция пользователя по применению, эксплуатации и установке на русском языке. Мы надеемся, она поможет вам решить возникшие у вас вопросы при эксплуатации техники.
Если остались вопросы, задайте их в комментариях после инструкции.
"Загружаем инструкцию", означает, что нужно подождать пока файл загрузится и можно будет его читать онлайн. Некоторые инструкции очень большие и время их появления зависит от вашей скорости интернета.


18
Robert Bosch Hausgeräte GmbH
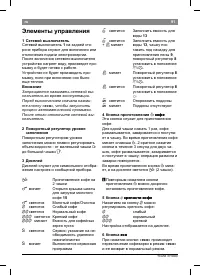
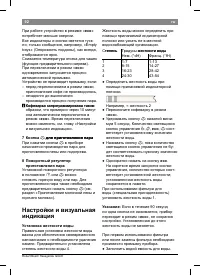
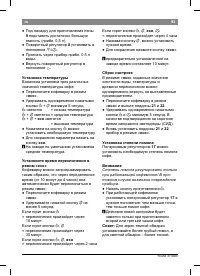
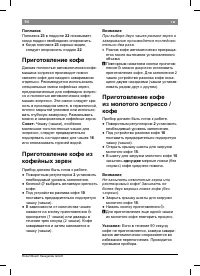
en
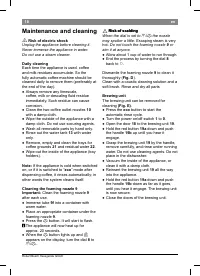
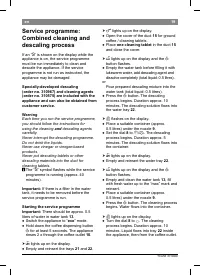
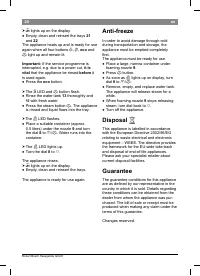
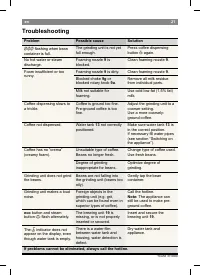
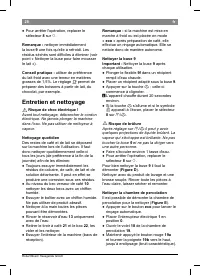
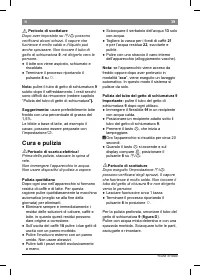
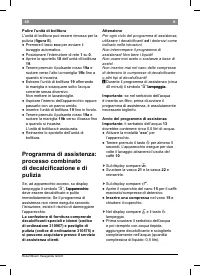
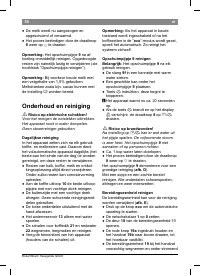
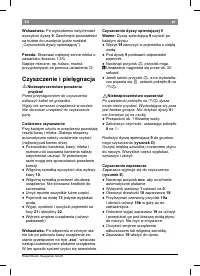
Maintenance and cleaning
!
Risk of electric shock
Unplug the appliance before cleaning it.
Never immerse the appliance in water.
Do not use a steam cleaner.
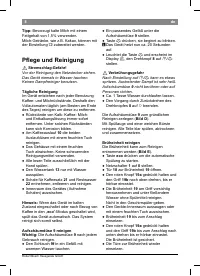
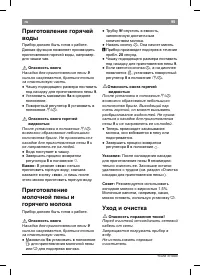
Daily cleaning
Each time the appliance is used, coffee
and milk residues accumulate. So the
fully automatic coffee machine should be
cleaned daily to remove them (preferably at
the end of the day).
Always remove any limescale,
МШППОО, mТХФ Шr НОsМaХТЧР luТН rОsТНuО
immediately. Such residue can cause
corrosion.
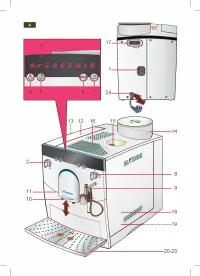
Clean the two coffee outlet nozzles
10
with a damp cloth.
Wipe the outside of the appliance with a
damp cloth. Do not use scouring agents.
Wash all removable parts by hand only.
Rinse out the water tank
13
with water
only.
Remove, empty and clean the trays for
coffee grounds
1
and residual water
.
Wipe out the inside of the appliance (tray
holders).
Note:
If the appliance is cold when switched
on, or if it is switched to “
eco
” mode after
НТspОЧsТЧР МШППОО, Тt rТЧsОs autШmatТМaХХвś ТЧ
other words the system cleans itself.
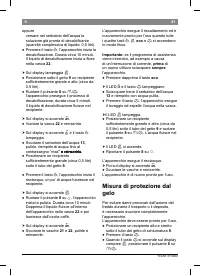
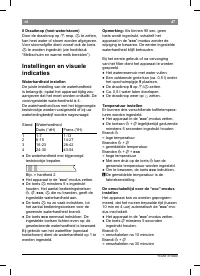
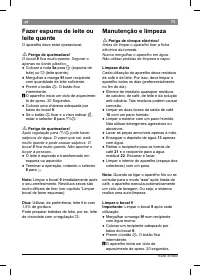
Cleaning the foaming nozzle 9
Important:
Clean the foaming nozzle
9
after each use.
Immerse tube
9f
into a container with
warm water.
Place an appropriate container under the
foaming nozzle
9
.
Press the
h
buttШЧ. It аТХХ start tШ lasС.
i
The appliance will now heat up for
approx. 20 seconds.
When the
h
button lights up and
J
appears on the display, turn the dial
8
to
g
/
h
.
●
●
●
●
●
●
●
●
●
●
●
!
Risk of scalding
Risk of scalding
When the dial is set to
g
/
h
the nozzle
may sputter a little.
Escaping steam is very
hot.
Do not touch the foaming nozzle
9
or
aim it at anyone.
Allow about 1 cup of water to run through.
End the process by turning the dial
8
back to
○
.
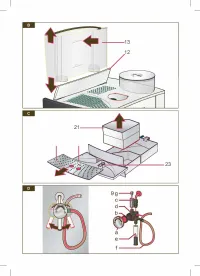
Dismantle the foaming nozzle
9
to clean it
thoroughly (
Fig. D
).
Clean with a caustic cleaning solution and a
soft brush. Rinse and dry all parts
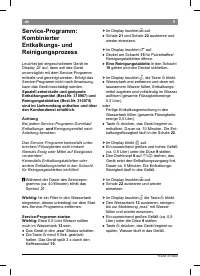
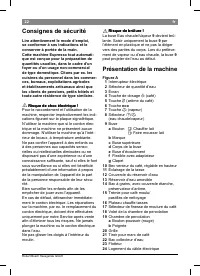
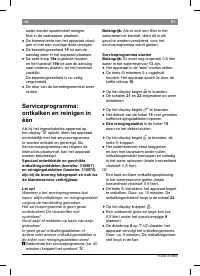
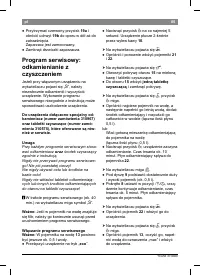
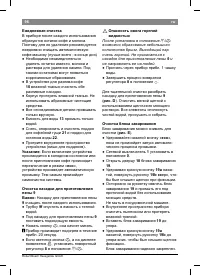
Brewing unit
The brewing unit can be removed for
cleaning
(Fig. E)
.
Press the
eco
button to start the
automatic rinse cycle.
Turn the power on/off switch
1
to
0
.
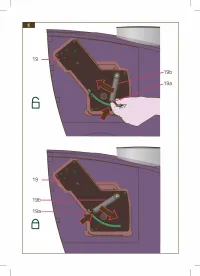
Open the door
18
to the brewing unit
19
.
Hold the red button
19a
down and push
the handle
19b
up until you hear it
engage.
Grasp the brewing unit
19
by the handle,
remove carefully, and rinse under running
water. Do not use cleaning agents. Do not
place in the dishwasher.
Vacuum the inside of the appliance, or
clean it with a damp cloth.
Reinsert the brewing unit
19
all the way
into the appliance.
Hold the red button
19a
down and push
the handle
19b
down as far as it goes,
until you hear it engage. The brewing unit
is now secure.
Close the doors of the brewing unit.
●
●
●
●
●
●
●
●
●
●
●


