Кофемашина Bosch TCA 5309 - инструкция пользователя по применению, эксплуатации и установке на русском языке. Мы надеемся, она поможет вам решить возникшие у вас вопросы при эксплуатации техники.
Если остались вопросы, задайте их в комментариях после инструкции.
"Загружаем инструкцию", означает, что нужно подождать пока файл загрузится и можно будет его читать онлайн. Некоторые инструкции очень большие и время их появления зависит от вашей скорости интернета.


19
TCA53 03/2012
en
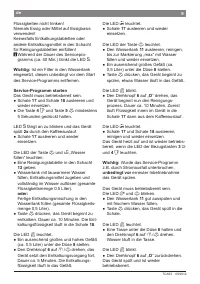
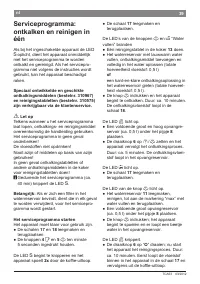
Starting the service programme
The appliance must be ready for use.
● Empty and replace the trays
17
and
18
.
● Press and hold the buttons
4
F
and
5
h
for at least 5 seconds.
The
S
LED starts to lash and the appliance
rinses the coffee dispenser through
twice
.
● Empty and reinsert the grounds tray
17
.
The LEDs for button
h
and
H
“Add water”
light up.
● Place one cleaning tablet in the duct
13
.
● Fill the water tank with lukewarm water,
add descaling agent and dissolve com
pletely (total liquid 0,5 litres)
or
pour prepared descaling mixture into the
water tank (total liquid 0,5 litres).
● Press the steam button
h
. The descaling
process begins. Duration approx. 10 min
utes. The descaling solution lows into the
water tray
18
.
The
J
LED lights up.
● Place a suitable container (approx.
0,5 litres) under the nozzle
8
.
● Set the dial
6
to
g
/
h
. The descaling
process begins. Duration approx. 5 min
utes. The descaling solution lows into the
container.
The
I
LED lights up.
● Empty and reinsert the grounds tray
17
.
The steam button LED
h
lights up.
● Empty and clean the water tank
11
, ill
with fresh water up to the “max” mark and
reinsert.
● Place a suitable container (approx.
0,5 litres) under the nozzle
8
.
● Press the steam button
h
. The clean
ing process begins. Water lows into the
container.
The
J
LED lashes.
● Turn the dial
6
to “
O
”. The cleaning proc
ess begins. Duration approx. 10 minutes.
Liquid lows into the coffee grounds tray
17
inside the appliance, then out through
the coffee outlet.
The
I
LED lights up.
● Empty, clean and reinsert the trays
17
and
18
.
The appliance starts to heat up and is
ready for use once the LEDs for dispensing
buttons
3
E
and
4
F
light up.
Important:
If the service programme is
interrupted, e.g. due to a power cut,
it is
vital
that the appliance be rinsed before it is
used again.
The appliance must be ready for use.
The
â
and steam button
h
LEDs lash.
● Rinse the water tank
11
thoroughly and ill
with fresh water.
● Press the steam button
h
. The appliance
is rinsed and liquid lows into the tray.
The
J
LED lights up.
● Hold a cup under the nozzle
8
and turn
the dial
6
to
g
/
h
. Water runs into the
cup.
The
J
LED lashes.
● Turn the dial
6
back to “
O
”.
The appliance rinses and is ready for use
again.


