
Газонокосилки STIGA Combi 55 SVQ H 294557838/ST2 - инструкция пользователя по применению, эксплуатации и установке на русском языке. Мы надеемся, она поможет вам решить возникшие у вас вопросы при эксплуатации техники.
Если остались вопросы, задайте их в комментариях после инструкции.
"Загружаем инструкцию", означает, что нужно подождать пока файл загрузится и можно будет его читать онлайн. Некоторые инструкции очень большие и время их появления зависит от вашей скорости интернета.


6
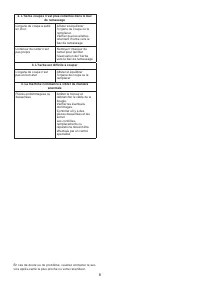
3.3 Mowing the lawn
The appearance of the lawn will improve if you alternate
cutting in both directions at the same height.
When the grass catcher is too full, grass collection is no
longer efficient and the sound of the lawnmower changes.
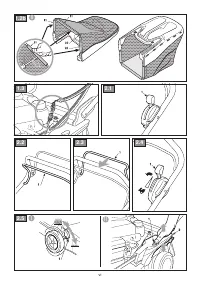
To remove and empty the grass catcher,
– stop the engine and wait for the cutting means to stop;
– lift the rear discharge guard, grasp the handle and re-
move the grass catcher keeping it in an erect position.
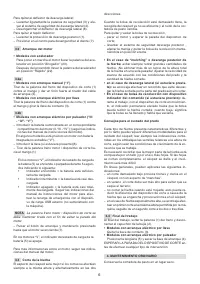
• For mulching or rear grass discharge:
always avoid
removing a large quantity of grass. Never cut more
than one third of the total grass height per single pass!
Regulate the forward speed according to the lawn condi
-
tions and the amount of grass removed.
• For side discharge (if applicable):
it is best to mow in
a pattern where cut grass is not discharged on the grass
still to be cut.
• For a grass catcher with contents indicator device
(if applicable):
while working with the cutting means
running, the indicator remains raised for as long as the
grass catcher is able to hold cut grass; when it lowers, it
means that the grass catcher is full and must be emptied.
Lawn care recommendations
Each type of grass has different characteristics and may
thus require different ways of caring for the lawn; always
read the instructions on seed boxes for mowing height for
the growing conditions in the work area.
Keep in mind that most grass is made up of a stem and one
or more leaves. If leaves are fully cut, the lawn is damaged
and growth is more difficult.
The following indications generally apply:
– cutting too low tears and uproots the grass, giving it a
“spotted” appearance;
– in the summer, cutting must be higher to prevent the
ground from drying;
– do not cut wet grass; this could reduce cutting means ef
-
ficiency due to sticky grass and tear the lawn.
– for particularly high grass, initially mow at the maximum
height allowed by the machine then mow again after two
or three days.
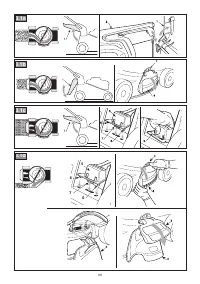
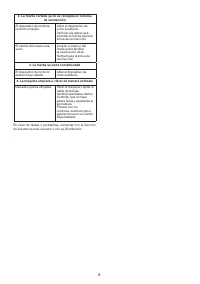
3.4
When work is finished
When work has been completed, release the brake lever (1)
and disconnect the spark plug cap (2).
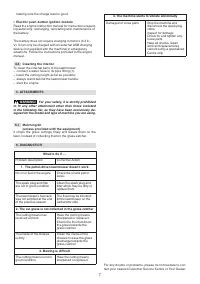
• Electric key ignition models
Remove the ignition key (3).
• Electric push-button ignition models
Press the tab (5) and remove the consent key (4).
WAIT UNTIL THE CUTTING MEANS STOPS before pro-
ceeding any further.
4. ROUTINE MAINTENANCE
Store the lawnmower in a dry place.
IMPORTANT
Routine and accurate maintenance, at least
once a year, is essential in maintaining original machine safe
-
ty and performance levels.
Adjustments or maintenance operations must only be per
-
formed with the engine switched off and the spark plug ca
-
ble disconnected.
1) Wear strong protective gloves before cleaning, main
-
taining or adjusting the machine.
2) Accurately wash the machine with water after cutting;
remove grass debris and mud accumulated in the chas
-
sis to prevent it from drying and causing problems the
next time the lawnmower is used.
3) Paint on internal chassis parts may start to flake over
time due to the abrasive action of cut grass; if this hap
-
pens, promptly touch-up with rust-proof paint to prevent
rusting that could corrode the metal.
4) If accessing the lower part is necessary, only tilt the ma
-
chine on the side indicated in the engine manual, follow
-
ing the relevant instructions, making sure that the ma
-
chine is perfectly stable before performing any interven
-
tions. On side discharge models, remove the discharge
chute (if installed – see 3.1.d).
5) Do not drip petrol onto the plastic parts of the engine or
the machine to prevent damaging them and remove all
traces of spilled petrol immediately. The warranty does
not cover damage to plastic parts caused by petrol.
6) To ensure that the machine will function prop
-
erly over time, it is highly recommended to
change the engine oil regularly, following the tim
-
ing indicated in the engine’s Instruction Manual.
The oil can be discharged at a specialised ser-
vicing centre, or by using a syringe to suc
-
tion the oil out through the filler spout, bearing in
mind you may need to repeat the operation sever
-
al times in order to completely empty the tank.
Remember to top-up with oil before using the ma
-
chine again.
4.1 Cutting means maintenance
All interventions on the cutting means must be done at a
specialised Centre that has the most appropriate tools and
equipment.
Only cutting means bearing the code indicated in the table
on page ix must be used on this machine.
Given product evolution, the above mentioned cutting
means may be replaced in time with others having similar
interchangeable and operating safety features.
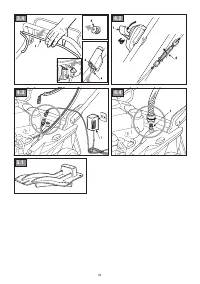
4.2
Adjusting the converter cable (if fitted)
This adjustment is necessary when the lever (1) tends not
to remain in the «
» position.
With the lever (1) in the «
» position, turn the cable ad-
juster (2) in the direction indicated by the arrow as needed
to ensure the lever remains in position.
IMPORTANT
The adjustment must be made when the
engine is off.
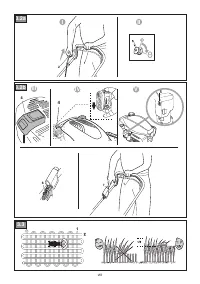
4.3
Battery recharging (where applicable)
• Electric key ignition models
To recharge a flat battery, connect it to the battery
charger (1) following the instructions in the battery main
-
tenance manual.
Do not connect the battery charger directly to the engine
terminal. It is not possible to ignite the engine using the
battery charger as a power source, as it may get dam
-
aged.
If you do not use the lawnmower for a long period of
time, disconnect the battery from the engine wiring,


