
Газонокосилки STIGA Combi 55 SVQ H 294557838/ST2 - инструкция пользователя по применению, эксплуатации и установке на русском языке. Мы надеемся, она поможет вам решить возникшие у вас вопросы при эксплуатации техники.
Если остались вопросы, задайте их в комментариях после инструкции.
"Загружаем инструкцию", означает, что нужно подождать пока файл загрузится и можно будет его читать онлайн. Некоторые инструкции очень большие и время их появления зависит от вашей скорости интернета.


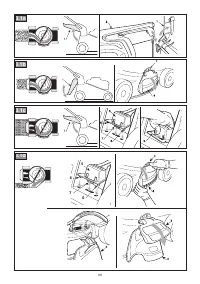


5
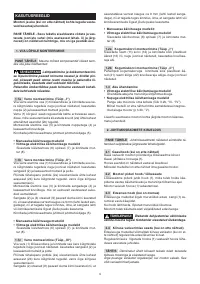
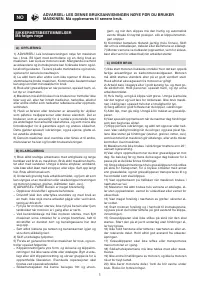
WARNING!
To prevent damage to the transmis-
sion, do not pull the machine backwards with the trans-
mission engaged.
2.4
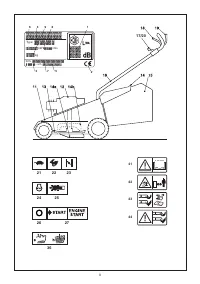
Converter control lever (if fitted)
In the models with drive systems, the converter
control
lever (if fitted) allows the operator to regulate forward gear
speed. To do so, move the lever (1) following the indications
provided near the control lever.
IMPORTANT
The engine must be running and the drive
engaged when switching from one speed to another.
Do not touch the converter control when the engine is
stopped. Doing this could damage the converter.
NOTE
If the machine does not move forward with the le-
ver in the «
» position, simply move the lever to «
» and
then immediately return to the «
» position.
IMPORTANT
The engine must be running and the drive
engaged when switching from one speed to another.
Do not touch the converter control when the engine is
stopped. Doing this could damage the converter.
2.5 Cutting height adjustment
• Type “I”
The cutting height is adjusted by the specific lever (1).
DO THIS WHEN THE CUTTING MEANS IS STATIONARY.
• Type “II”
The cutting height is adjusted by pressing the button (1)
and, using the handgrip (2), lifting or lowering the chassis
to the desired position.
DO THIS WHEN THE CUTTING MEANS IS STATIONARY.
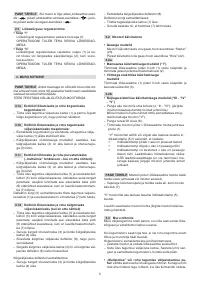
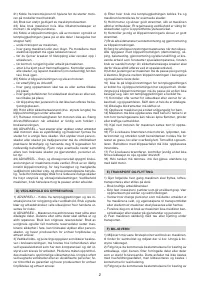
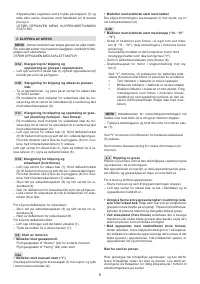
3. GRASS CUTTING
NOTE
This machine can be used to mow lawns in a num-
ber of different ways; before starting work, prepare the ma
-
chine based on how the lawn is to be mowed.
DO THIS WHEN THE ENGINE IS OFF.
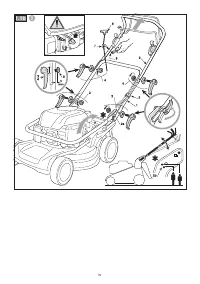
3.1a
Preparation for mowing and grass collection
by the grass catcher:
– Lift the rear discharge guard (1) and fasten the grass
catcher (2) correctly as shown in the illustration.
3.1b
Preparation for mowing and rear grass
discharge on the ground
– Remove the grass catcher and check that the rear dis
-
charge guard (1) maintains its lowered position.
– On models with a side discharge: make sure that the
side discharge guard 4) is lowered and blocked by the
safety lever (3).
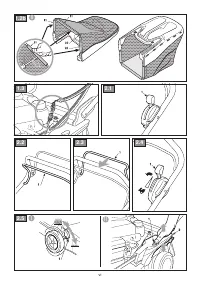
3.1c
Preparation for mowing and
mulching (where applicable)
– On models with a side discharge: make sure that the
side discharge guard 4) is lowered and blocked by the
safety lever (3).
– Lift the rear discharge guard (1) and fit the chute cap (5)
in the discharge opening, keeping it slightly tilted to the
right. Fasten it by fitting the two pins (6) into the holes pro
-
vided until the fastener tooth (7) clicks into place.
To remove the deflector cap (5), lift the rear discharge
guard (1) and push in the middle to release the tooth (7).
3.1d
Preparation for mowing and side discharge of
grass (where applicable)
– Lift the rear discharge guard (1) and fit the chute cap (5)
in the discharge opening, keeping it slightly tilted to the
right. Fasten it by fitting the two pins (6) into the holes pro
-
vided until the fastener tooth (7) clicks into place.
– Push the safety lever (3) slightly and lift the side dis
-
charge guard (4).
– Insert the side discharge chute (8) as shown in the figure.
– Close the side discharge guard (4) so that the side dis
-
charge chute (8) is locked in place.
To remove the side discharge chute:
– Push the safety lever (3) slightly and lift the side dis
-
charge guard (4).
– Release the side discharge chute (8).
To remove the chute flap:
– Lift the rear discharge guard (1).
– Push in the middle to release the tooth (7).
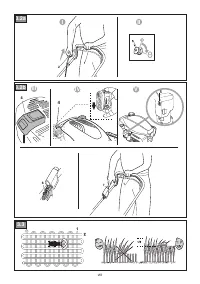
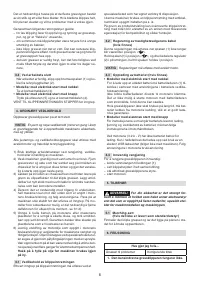
3.2 Engine ignition
• Models with throttle
To start the engine, set the throttle control to “Starter”
(23).
When the engine is running, set the throttle control to
“Fast” (22).
3.2a
• Manual ignition models (“I”)
Pull the cutting means brake lever (1) against the handle
and firmly tug the knob on the ignition cable (2).
• Electric key ignition models
Pull the cutting means brake lever (1) against the handle
and turn the ignition key (3).
3.2b
• Electric push-button ignition models (“III - “IV” -
“V”)
– Insert the supplied battery in the relative engine compart
-
ment (4,
“III - “IV”
); (follow the instructions provided in the
engine manual).
A motor with non-removable built-in battery is included
on some models (“V”).
– Insert the key as far as possible (if fitted) (6).
– Pull the engine cutting means brake lever towards the
handle (1).
In “V” motors, the battery charge indicator (5) turns on
or flashes for 5 seconds to indicate:
•
Indicator on = the battery is charged
•
Indicator flashing = the battery is low
•
Indicator off = the battery is dead Follow the in
-
structions in the motor instruction manual for
emergency charging using the external USB
charging device (not supplied with the machine).
NOTE
Keep pulling the engine / cutting means brake or
the engine will stop.
– Press and hold the starter button until the engine switch
-
es on (7).
The battery charge status indicator (5) turns off in “V”
motors.
Follow the instructions in the engine manual for further
details on the engine.


