
Газонокосилки Husqvarna LC 356VP - инструкция пользователя по применению, эксплуатации и установке на русском языке. Мы надеемся, она поможет вам решить возникшие у вас вопросы при эксплуатации техники.
Если остались вопросы, задайте их в комментариях после инструкции.
"Загружаем инструкцию", означает, что нужно подождать пока файл загрузится и можно будет его читать онлайн. Некоторые инструкции очень большие и время их появления зависит от вашей скорости интернета.


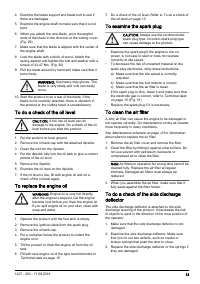


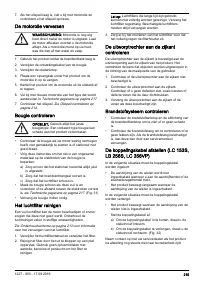


4. Examine the blade support and blade bolt to see if
there are damages.
5. Examine the engine shaft to make sure that it is not
bent.
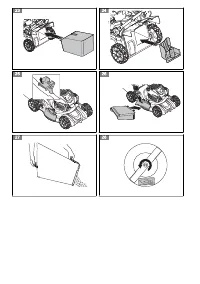
6. When you attach the new blade, point the angled
ends of the blade in the direction of the cutting cover.
(Fig. 29)
7. Make sure that the blade is aligned with the center of
the engine shaft.
8. Lock the blade with a block of wood. Attach the
spring washer and tighten the bolt and washer with a
torque of 43-47 Nm. (Fig. 30)
9. Pull the blade around by hand and make sure that it
turns freely.
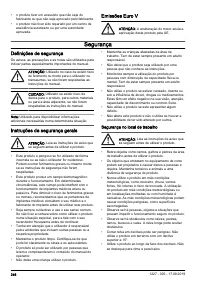
WARNING: Use heavy duty gloves. The
blade is very sharp and cuts can easily
occur.
10. Start the product to do a test of the blade. If the
blade is not correctly attached, there is vibration in
the product or the cutting result is unsatisfactory.
To do a check of the oil level
CAUTION: A too low oil level can do
damage to the engine. Do a check of the oil
level before you start the product.
1. Put the product on level ground.
2. Remove the oil tank cap with the attached dipstick.
3. Clean the oil from the dipstick.
4. Put the dipstick fully into the oil tank to give a correct
picture of the oil level.
5. Remove the dipstick.
6. Examine the oil level on the dipstick.
7. If the oil level is low, fill with engine oil and do a
check of the oil level again.
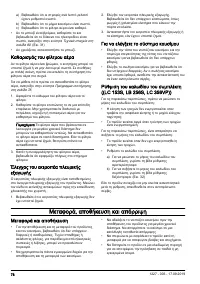
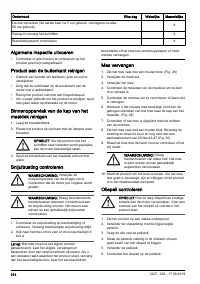
To replace the engine oil
WARNING: Engine oil is very hot directly
after the engine is stopped. Let the engine
become cool before you drain the engine oil.
If you spill engine oil on your skin, clean with
soap and water.
1. Operate the product until the fuel tank is empty.
2. Remove the ignition cable from the spark plug.
3. Remove the oil tank cap.
4. Put a container below the product to collect the
engine oil in.
5. Tilt the product to drain the engine oil from the oil
tank.
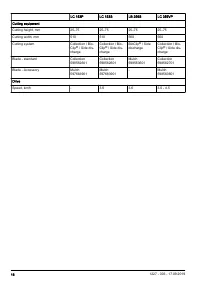
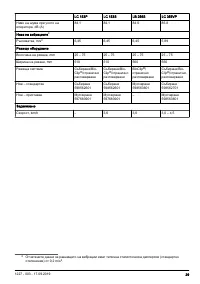
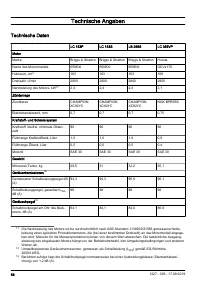
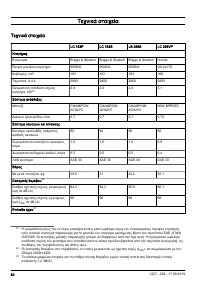
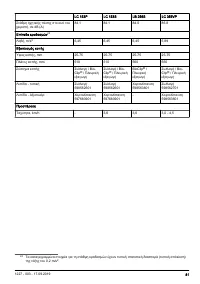
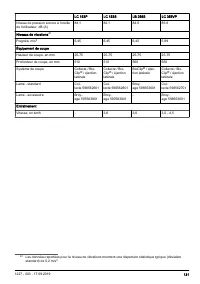
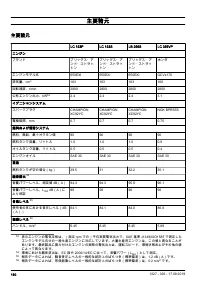
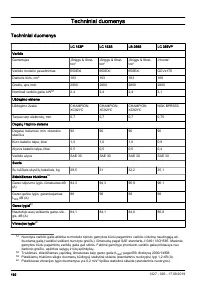
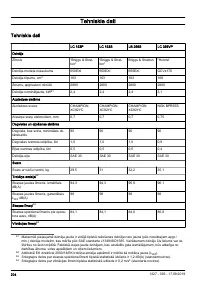
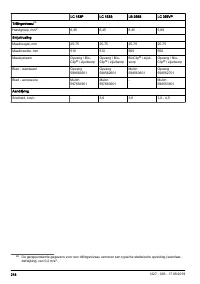
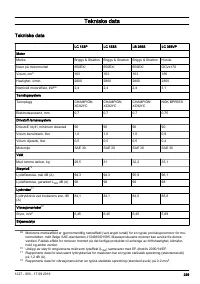
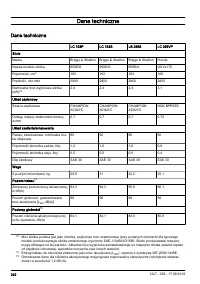
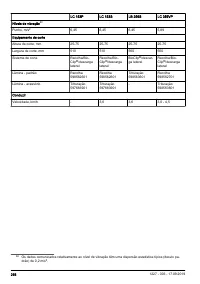
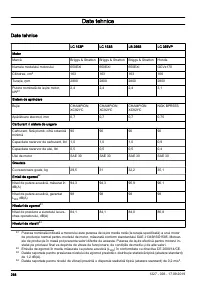
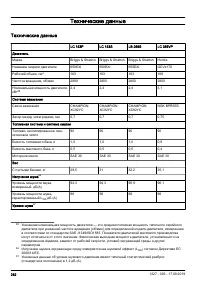
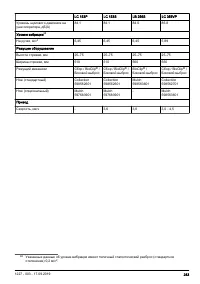
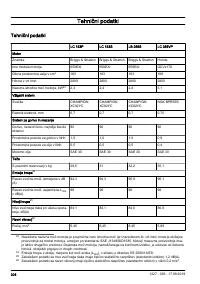
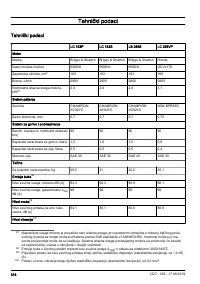
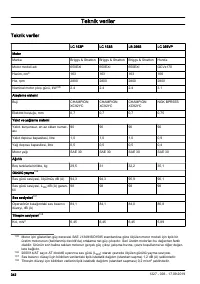
6. Fill with new engine oil of the type recommended in
Technical data on page 15.
7. Do a check of the oil level. Refer to
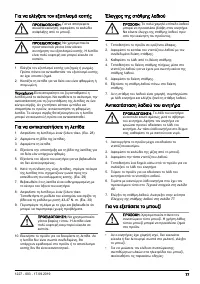
To examine the spark plug
CAUTION: Always use the recommended
spark plug type. Incorrect spark plug type
can cause damage to the product.
• Examine the spark plug if the engine is low on
power, is not easy to start or does not operate
correctly at idle speed.
• To decrease the risk of unwanted material on the
spark plug electrodes, obey these instructions:
a) Make sure that the idle speed is correctly
adjusted.
b) Make sure that the fuel mixture is correct.
c) Make sure that the air filter is clean.
• If the spark plug is dirty, clean it and make sure that
the electrode gap is correct, refer to
on page 15. (Fig. 31)
• Replace the spark plug if it is necessary.
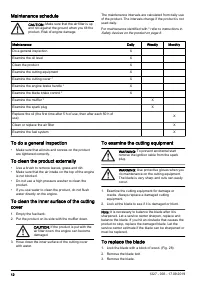
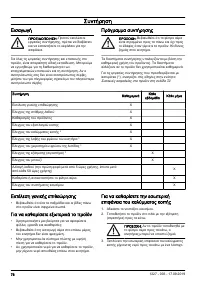
To clean the air filter
A dirty air filter can cause the engine to be damaged or
not operate correctly. Do maintenance on the air cleaner
more frequently in dusty conditions.
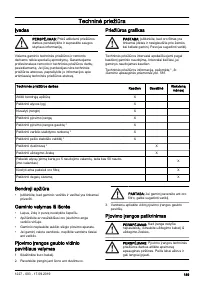
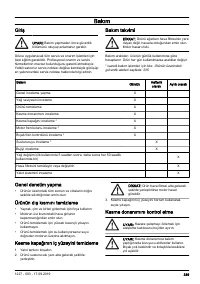
See
Maintenance schedule on page 12 for information
about when to replace the air filter.
1. Remove the air filter cover and remove the filter.
2. Clean the filter by hitting it against a flat surface. Do
not use solvent with petroleum, kerosene or
compressed air to clean the filter.
Note: Air filters in operation for a long time cannot be
cleaned fully. Replace the air filter at regular
intervals. Damaged air filters must always be
replaced.
3. When you assemble the air filter, make sure that it
fully seals against the filter holder.
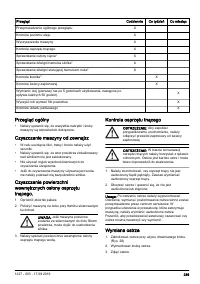
To do a check of the side discharge
deflector
The side discharge deflector is attached to the side
discharge opening of the product. It decreases the risk
of objects to eject in the direction of the mow position of
the operator.
1. Make sure that the side discharge deflector is not
damaged.
2. Examine the side discharge deflector. Make sure
that you do not see defects, such as cracks or
broken springs that push the door to close.
3. Replace the side discharge deflector or the springs if
they are damaged.
1227 - 003 - 17.09.2019
13
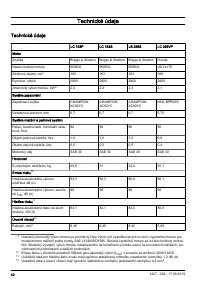
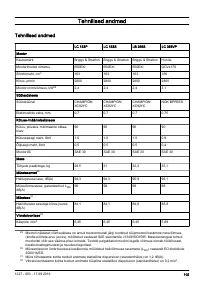
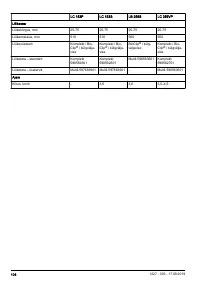
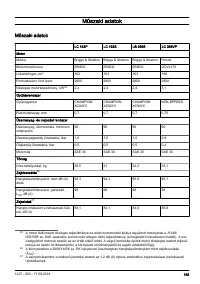
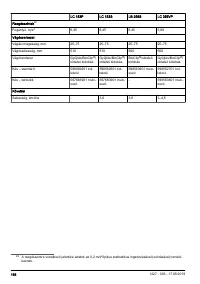
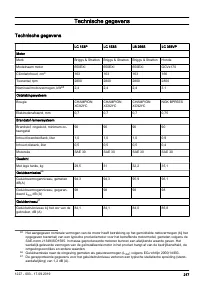
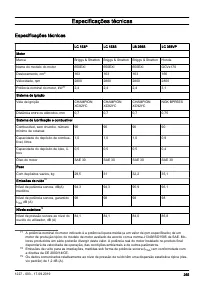
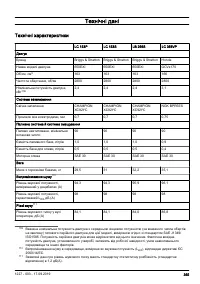
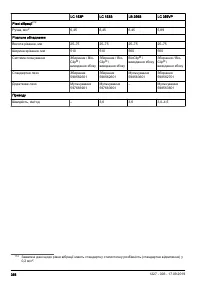
Характеристики

Остались вопросы?Не нашли свой ответ в руководстве или возникли другие проблемы? Задайте свой вопрос в форме ниже с подробным описанием вашей ситуации, чтобы другие люди и специалисты смогли дать на него ответ. Если вы знаете как решить проблему другого человека, пожалуйста, подскажите ему :)


Когда залил масло в первый раз через сколько его менять