
Электропилы Makita DUC204Z - инструкция пользователя по применению, эксплуатации и установке на русском языке. Мы надеемся, она поможет вам решить возникшие у вас вопросы при эксплуатации техники.
Если остались вопросы, задайте их в комментариях после инструкции.
"Загружаем инструкцию", означает, что нужно подождать пока файл загрузится и можно будет его читать онлайн. Некоторые инструкции очень большие и время их появления зависит от вашей скорости интернета.


15 ENGLISH
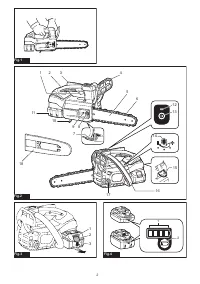
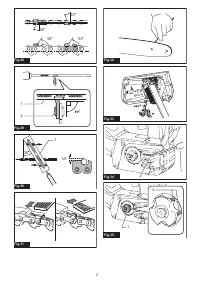
Removing or installing saw chain
CAUTION:
The saw chain and the guide bar
are still hot just after the operation. Let them cool
down enough before carrying out any work on
the tool.
CAUTION:
Carry out the procedure of install-
ing or removing saw chain in a clean place free
from sawdust and the like.
To remove the saw chain, perform the following steps:
1.
Release the chain brake by pulling the front hand
guard.
2.
Loosen the chain adjusting screw, then the retain
-
ing nut.
►
Fig.9:
1.
Chain adjusting screw
2.
Retaining nut
3.
Remove the sprocket cover then remove the saw
chain and guide bar from the chain saw body.
To install the saw chain, perform the following steps:
1.
Check the direction of the saw chain. Match the
direction of the saw chain with that of the mark on the
chain saw body.
2.
Fit one end of the saw chain on the top of the
guide bar.
3.
Fit the other end of the saw chain around the
sprocket, then attach the guide bar to the chain saw
body, aligning the hole on the guide bar with the pin on
the chain saw body.
►
Fig.10:
1.
Sprocket
2.
Hole
4.
Insert the protrusion on the sprocket cover to the
chain saw body, and then close the cover so that the
bolt and pins on the chain saw body meet their counter-
parts on the cover.
►
Fig.11:
1.
Protrusion
2.
Sprocket cover
3.
Bolt
4.
Pin
5.
Tighten the retaining nut to secure the sprocket
cover, then loosen it a bit for tension adjustment.
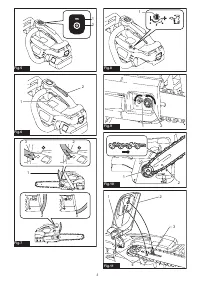
►
Fig.12:
1.
Retaining nut
Adjusting saw chain tension
CAUTION:
Do not tighten the saw chain too
much.
Excessively high tension of saw chain may
cause breakage of saw chain, wear of the guide bar
and breakage of the adjusting dial.
CAUTION:
A chain which is too loose can
jump off the bar and it may cause an injury
accident.
The saw chain may become loose after many hours
of use. From time to time check the saw chain tension
before use.
1.
Release the chain brake by pulling the front hand
guard.
2.
Loosen the retaining nut a bit to loosen the
sprocket cover lightly.
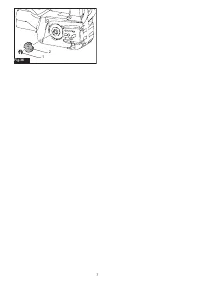
►
Fig.13:
1.
Retaining nut
3.
Lift up the guide bar tip slightly and adjust the
chain tension. Turn the chain adjusting screw clockwise
to tighten, turn it counterclockwise to loosen.
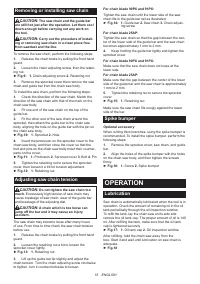
For chain blade 90PX and 91PX:
Tighten the saw chain until the lower side of the saw
chain fits in the guide bar rail as illustrated.
►
Fig.14:
1.
Guide bar
2.
Saw chain
3.
Chain adjust
-
ing screw
For chain blade 25AP:
Tighten the saw chain so that the gap between the cen-
ter of the lower side of the guide bar and the saw chain
becomes approximately 1 mm to 2 mm.
4.
Keep holding the guide bar lightly and tighten the
sprocket cover.
For chain blade 90PX and 91PX:
Make sure that the saw chain does not loose at the
lower side.
For chain blade 25AP:
Make sure that the gap between the center of the lower
side of the guide bar and the saw chain is approximately
1 mm to 2 mm.
5.
Tighten the retaining nut to secure the sprocket
cover.
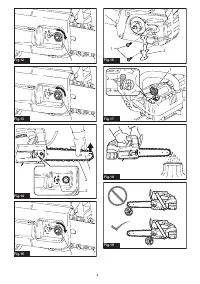
►
Fig.15:
1.
Retaining nut
Make sure the saw chain fits snugly against the lower
side of the bar.
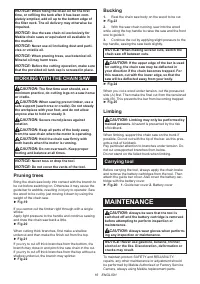
Spike bumper
Optional accessory
When cutting thick branches, using the spike bumper is
recommended. To install the spike bumper, perform the
following steps:
1.
Remove the sprocket cover, saw chain, and guide
bar.
2.
Align the holes of the spike bumper with the holes
on the chain saw body, and then tighten the screws
firmly.
►
Fig.16:
1.
Screw
2.
Spike bumper
OPERATION
Lubrication
Saw chain is automatically lubricated when the tool is in
operation. Check the amount of remaining oil in the oil
tank periodically through the oil inspection window.
To refill the tank, lay the chain saw on its side and
remove the oil tank cap. The proper amount of oil is 140
ml. After refilling the tank, make sure that the oil tank
cap is tightened securely.
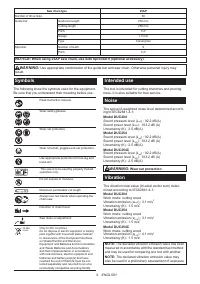
►
Fig.17:
1.
Oil tank cap
2.
Oil inspection window
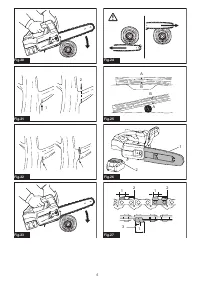
After refilling, hold the chain saw away from the
tree. Start it and wait until lubrication on saw chain is
adequate.
►
Fig.18
Содержание
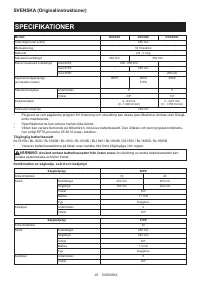
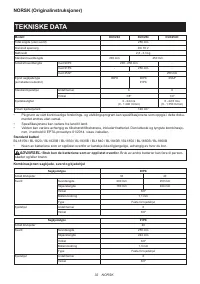
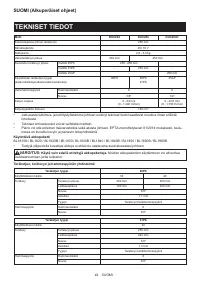
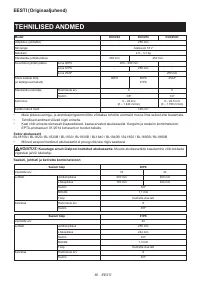
- 92 ТЕХНИЧЕСКИЕ ХАРАКТЕРИСТИКИ
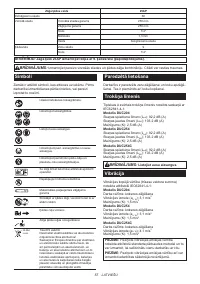
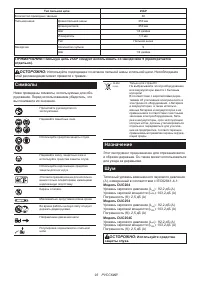
- 93 Символы
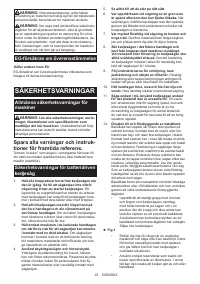
- 94 МЕРЫ БЕЗОПАСНОСТИ; Сохраните брошюру с инструк
- 96 СОХРАНИТЕ ДАННЫЕ; Важные правила техники
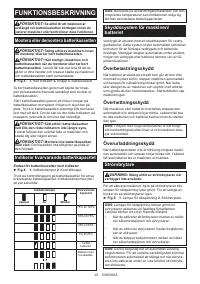
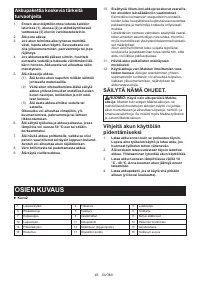
- 97 ОПИСАНИЕ ДЕТАЛЕЙ
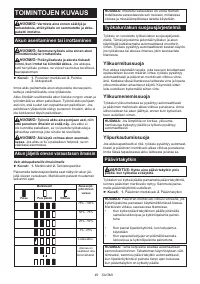
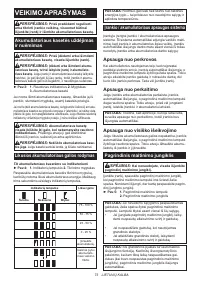
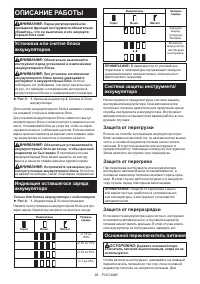
- 98 ОПИСАНИЕ РАБОТЫ; Защита от перегрузки
- 100 СБОРКА
- 101 Зубчатый бампер; ЭКСПЛУАТАЦИЯ; Смазка
- 102 ОБСЛУЖИВАНИЕ; Заточка пильной цепи
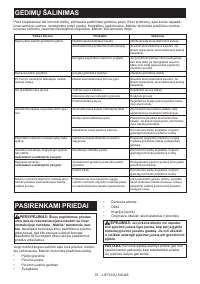
- 105 ПОИСК И УСТРАНЕНИЕ НЕИСПРАВНОСТЕЙ
Характеристики

Остались вопросы?Не нашли свой ответ в руководстве или возникли другие проблемы? Задайте свой вопрос в форме ниже с подробным описанием вашей ситуации, чтобы другие люди и специалисты смогли дать на него ответ. Если вы знаете как решить проблему другого человека, пожалуйста, подскажите ему :)


