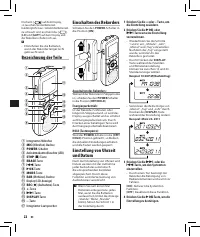
Диктофоны Olympus VN-750 - инструкция пользователя по применению, эксплуатации и установке на русском языке. Мы надеемся, она поможет вам решить возникшие у вас вопросы при эксплуатации техники.
Если остались вопросы, задайте их в комментариях после инструкции.
"Загружаем инструкцию", означает, что нужно подождать пока файл загрузится и можно будет его читать онлайн. Некоторые инструкции очень большие и время их появления зависит от вашей скорости интернета.


6
EN
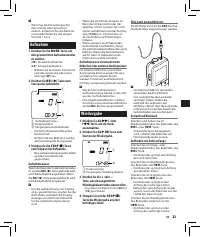
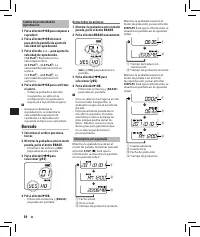
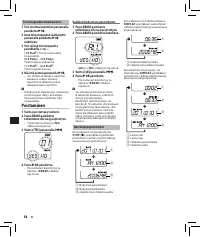
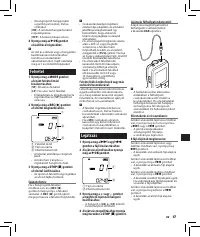
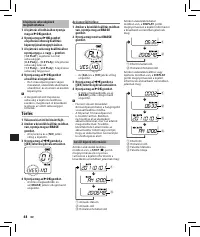
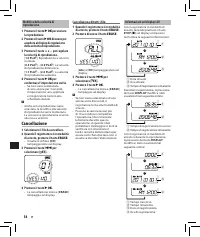
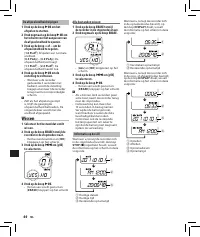
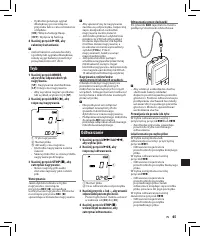
Changing the playback speed
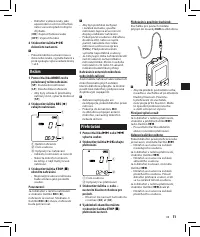
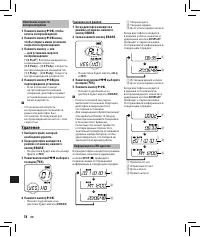
1
Press the
`
OK
button to start
playback.
2
Press the
`
OK
button again to open
the playback speed adjustment
display.
3
Press the
+
or
−
button to adjust
the playback speed.
[
1.0 PLAy
]: Playback at normal
speed.
[
0.5 PLAy
] – [
0.9 PLAy
]: Playback
speed slows down.
[
1.1 PLAy
] – [
2.0 PLAy
]: Playback
speed becomes faster.
4
Press the
`
OK
button to complete
the setting.
• If you leave the recorder for
3 seconds, the setting will be
applied and the recorder will
return back to the original screen.
"
• Even if playback is stopped, the
changed playback speed will be
retained. The next playback will be
at that speed.
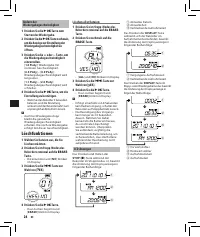
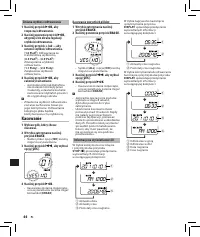
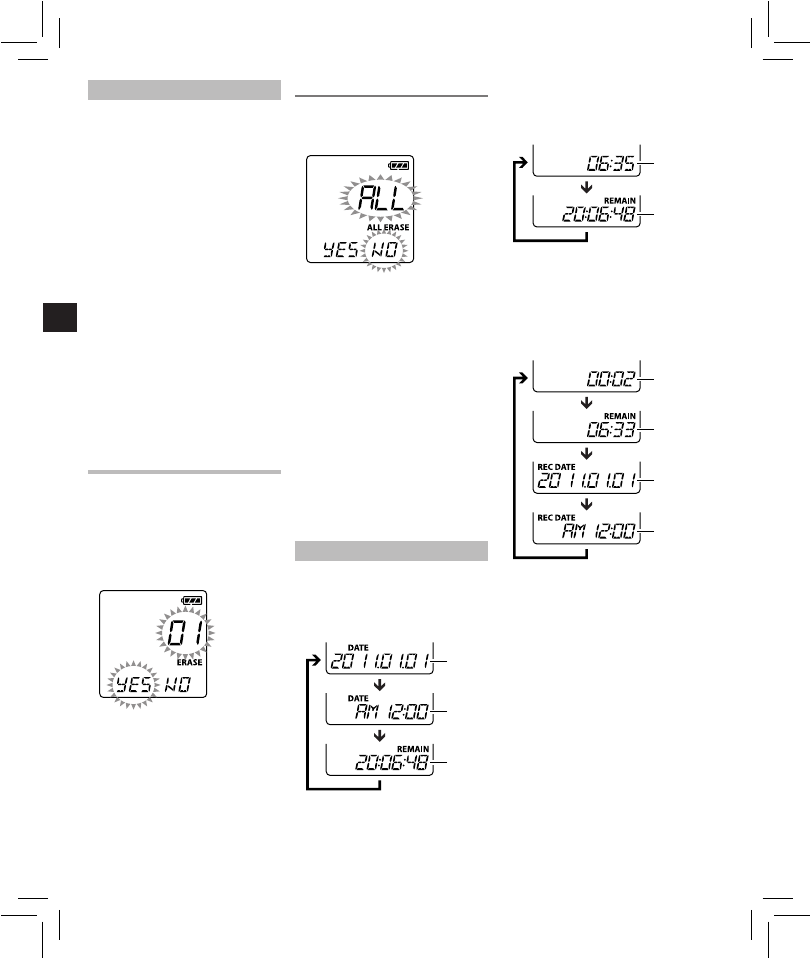
Erasing
1
Select the file you want to erase.
2
While the recorder is during stop
mode, press the
ERASE
button.
• File number and [
NO
] will flash
on the display.
3
Press the
0
button to select
[
yES
].
4
Press the
`
OK
button.
• Erasing begins and [
ERASE
]
flashes on the display.
Erasing all files:
1
While the recorder is during stop
mode, press the
ERASE
button.
2
Press the
ERASE
button again.
• [
ALL
] and [
NO
] will flash on the
display.
3
Press the
0
button to select
[
yES
].
4
Press the
`
OK
button.
• Erasing begins and [
ERASE
]
flashes on the display.
"
• If an action is not selected within 8
seconds, the recorder will return to
stop mode.
• It may take over 10 seconds to
complete processing. Never
remove batteries during this time
because data may be corrupted.
In addition, carefully check the
remaining batter y level in order to
ensure that the batter y will not run
out while processing.
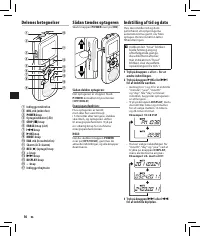
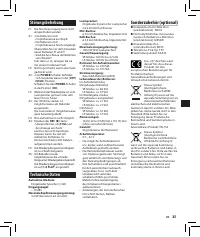
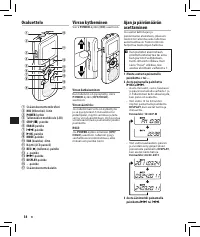
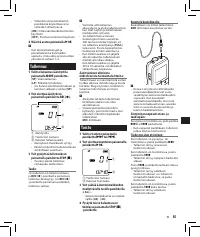
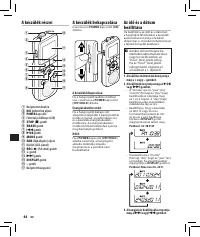
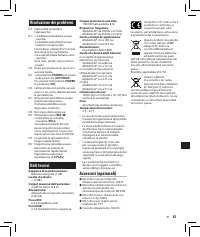
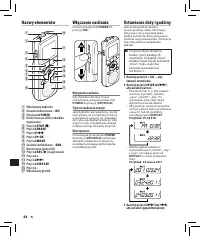
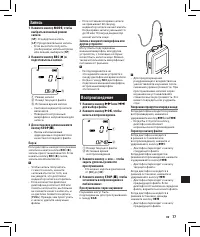
LCD display information
While the recorder is during stop
mode, pressing and holding the
STOP
(
4
) button will make the
display switch information in the
following order:
1
2
3
1
Current date
2
Current time
3
Remaining recording time
While the recorder is during recording
mode, pressing the
DISPLAY
button will make the display switch
information in the following order:
1
2
1
Elapsed recording time
2
Remaining recording time
While the recorder is during stop
mode or playback mode, pressing the
DISPLAY
button will make the display
switch information in the following
order:
1
2
3
4
1
Count up
2
Count down
3
Recording date
4
Recording time

