Janome DC 3050 - инструкции и руководства
Швейная машина Janome DC 3050 - инструкции пользователя по применению, эксплуатации и установке на русском языке читайте онлайн в формате pdf
Инструкции:
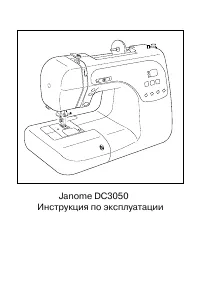
Инструкция по эксплуатации Janome DC 3050
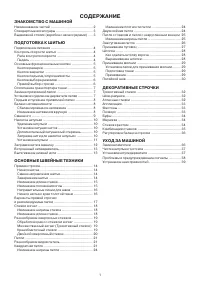


Краткое содержание
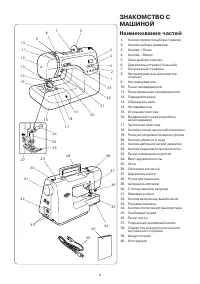
2 2 1 2 3 4 5 6 7 8 9 1 0 1 1 1 2 1 3 1 4 1 5 1 6 1 7 1 8 1 9 2 0 2 1 2 2 2 3 2 4 2 5 2 6 2 7 2 8 2 9 3 0 3 1 3 2 3 3 3 4 3 5 3 6 3 7 3 8 3 9 4 0 KNOW YOUR MACHINE Name of Parts 1. Direct pattern selection buttons 2. Mode selection button 3. Plus (+) button 4. Minus (–) button 5. Indicator window 6....
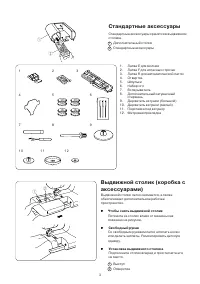
3 3 q w q w 1 2 3 4 5 6 7 8 9 1 1 1 2 1 0 Standard Accessories The standard accessories are stored in the extension table. q Extension table w Standard accessories 1. Zipper Foot E 2. Satin Stitch Foot F 3. Automatic Buttonhole Foot R 4. Screwdriver 5. Bobbins 6. Set of Needles 7. Seam Ripper 8. Add...
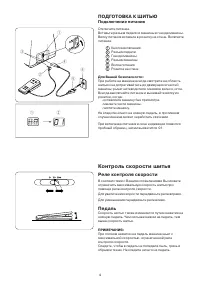
4 w q e r t y q w GETTING READY TO SEW Connecting the Power Supply Turn off the power switch.Insert the foot control plug into the machine socket.Insert the machine plug into the machine socket.Insert the power supply plug into the wall outlet.Turn on the power switch. q Power Switch w Foot Control ...
Janome Швейные машины Инструкции
-
 Janome 1543
Инструкция по эксплуатации
Janome 1543
Инструкция по эксплуатации
-
 Janome 1547
Инструкция по эксплуатации
Janome 1547
Инструкция по эксплуатации
-
 Janome 2016
Инструкция по эксплуатации
Janome 2016
Инструкция по эксплуатации
-
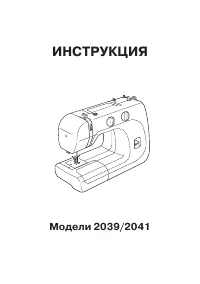 Janome 2039
Инструкция по эксплуатации
Janome 2039
Инструкция по эксплуатации
-
Janome 2041
Инструкция по эксплуатации
-
Janome 2055
Инструкция по эксплуатации
-
 Janome 4045
Инструкция по эксплуатации
Janome 4045
Инструкция по эксплуатации
-
 Janome 5117
Инструкция по эксплуатации
Janome 5117
Инструкция по эксплуатации
-
 Janome 1108 JB
Инструкция по эксплуатации
Janome 1108 JB
Инструкция по эксплуатации
-
Janome 1225s
Инструкция по эксплуатации
-
 Janome 1522PG
Инструкция по эксплуатации
Janome 1522PG
Инструкция по эксплуатации
-
 Janome 1522RD
Инструкция по эксплуатации
Janome 1522RD
Инструкция по эксплуатации
-
 Janome 2049S
Инструкция по эксплуатации
Janome 2049S
Инструкция по эксплуатации
-
 Janome 3112M
Инструкция по эксплуатации
Janome 3112M
Инструкция по эксплуатации
-
 Janome 3112R
Инструкция по эксплуатации
Janome 3112R
Инструкция по эксплуатации
-
 Janome 311PG
Инструкция по эксплуатации
Janome 311PG
Инструкция по эксплуатации
-
 Janome 4100L
Инструкция по эксплуатации
Janome 4100L
Инструкция по эксплуатации
-
 Janome 450 MG
Инструкция по эксплуатации
Janome 450 MG
Инструкция по эксплуатации
-
 Janome Ami 15
Инструкция по эксплуатации
Janome Ami 15
Инструкция по эксплуатации
-
 Janome Ami 25s
Инструкция по эксплуатации
Janome Ami 25s
Инструкция по эксплуатации