
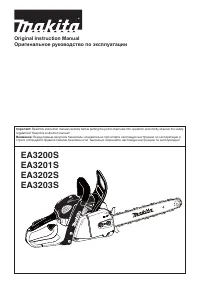
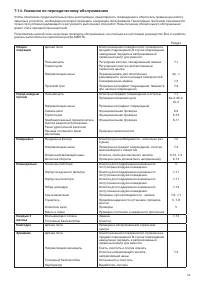
Бензопилы Makita EA3202S40B - инструкция пользователя по применению, эксплуатации и установке на русском языке. Мы надеемся, она поможет вам решить возникшие у вас вопросы при эксплуатации техники.
Если остались вопросы, задайте их в комментариях после инструкции.
"Загружаем инструкцию", означает, что нужно подождать пока файл загрузится и можно будет его читать онлайн. Некоторые инструкции очень большие и время их появления зависит от вашей скорости интернета.


28
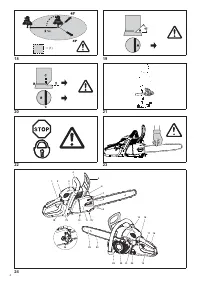
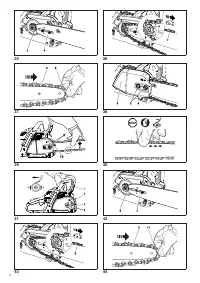
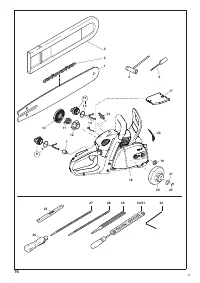
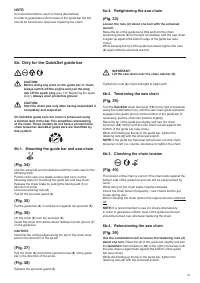
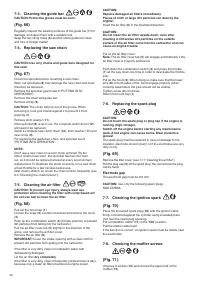
7-3. Cleaning the guide bar
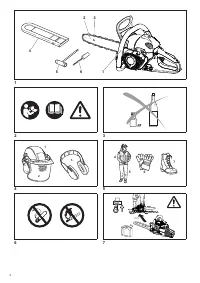
CAUTION: Protective gloves must be worn.
(Fig. 66)
Regularly inspect the bearing surfaces of the guide bar
Ƽ
7
) for
damage
Ɠ
and clean them with a suitable tool
Ɩ
Keep the two oiling holes
Ƽ
6
) and the entire guide bar clean
and free of foreign matter!
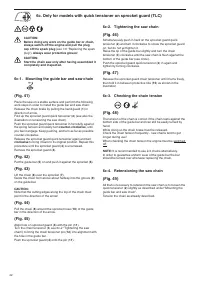
7-4. Replacing the saw chain
CAUTION: Use only chains and guide bars designed for
this saw!
(Fig. 67)
Chec
Ã
the sproc
Ã
et before mounting a new chain
Ɩ
Worn out sproc
Ã
ets
Ƽ
8
) may damage the new chain and must
therefore be replaced
Ɩ
Remove the sproc
Ã
et guard
Ƽ
see 6
ƣ
P
TTI
I
T
P
RATI
Ƥ
)
Ɩ
Remove the chain and guide bar
Ɩ
Remove circlip
Ƽ
9
)
Ɩ
CAUTION:
The circlip will pop out of the groove
Ɩ
When
removing it
Ɠ
hold your thumb against it to prevent it from
popping o
ŰƖ
Remove shim washer
Ƽ
11
)
Ɩ
If the sproc
Ã
et
Ƽ
8
) is worn out
Ɠ
the complete clutch drum
Ƽ
12
)
will need to be replaced
Ɩ
Install a complete new clutch drum
Ƽ
12
)
Ɠ
shim washer
Ƽ
11
) and
new circlip
Ƽ
9
)
Ɩ
or replacing the guide bar
Ɠ
chain
Ɠ
and sproc
Ã
et see 6
ƣ
P
TTI
I
T
P
RATI
ƤƖ
NOTE:
on
Ƣ
t use a new chain on a worn chain sproc
Ã
et
Ɩ
By the
time 2 chains have worn
Ɠ
the sproc
Ã
et has become worn
out
Ɠ
so it should be replaced at least at every second chain
replacement
Ɩ
To distribute the chain oil evenly
Ɠ
run a new chain
at half
Ƙ
throttle for a few minutes before use
Ɩ
ew chains stretch
Ɠ
so chec
Ã
the chain tension fre
É
uently
Ƽ
see
6
Ƙ
3
ƣ
Chec
Ã
ing the chain tension
Ƥ
)
Ɩ
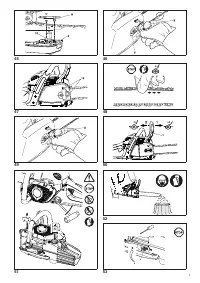
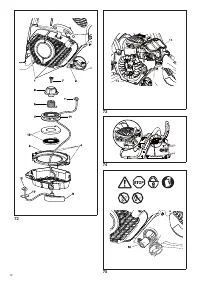
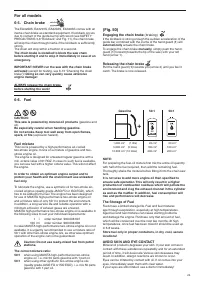
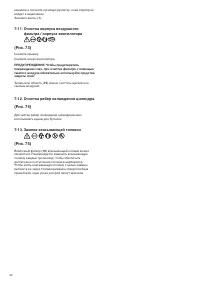
7-5. Cleaning the air
Ų
lter
CAUTION: To prevent eye injury, always wear eye
protection when cleaning the
Ų
lter with compressed air!
Do not use fuel to clean the air
Ų
lter.
(Fig. 68)
Pull out the hood cap
Ƽ
1
)
Ɩ
oosen the scew
Ƽ
2
) counter
Ƙ
cloc
Ã
wise and remove the hood
Ƽ
3
)
Ɩ
Push up the combination switch
Ƽ
4
)
Ƽ
Cho
Ã
e position) to prevent
dirt particles from falling into the carburetor
Ɩ
Pull the air
Ų
lter cover tab
Ƽ
5
) slightly in the direction of the
arrow
Ɠ
and remove the air
Ų
lter cover
Ɩ
Remove the air
Ų
lter
Ƽ
6
)
Ɩ
IMPORTANT:
Cover the inta
Ã
e opening with a clean cloth to
prevent dirt particles from getting into the carburetor
Ɩ
If the
Ų
lter is very dirty
Ɠ
clean it in lu
Ã
ewarm water with
dishwashing detergent
Ɩ
et the air
Ų
lter
dry completely
Ɩ
If the
Ų
lter is very dirty
Ɠ
clean it fre
É
uently
Ƽ
several times a day)
Ɠ
because only a clean air
Ų
lter provides full engine power
Ɩ
CAUTION:
Replace damaged air
Ų
lters immediately.
Pieces of cloth or large dirt particles can destroy the
engine!
Insert the air
Ų
lter
Ƽ
6
) in the illustrated direction
Ɩ
CAUTION:
Do not insert the air
Ų
lter upside-down, even after
cleaning it. Otherwise dirt particles on the outside
surface of the air
Ų
lter come into the carburetor and can
cause an engine trouble.
Put on the air
Ų
lter cover
Ɩ
Note:
The air
Ų
lter cover tab
Ƽ
5
) will engage automatically if the
air
Ų
lter cover is properly positioned
Ɩ
Push down the combination switch
Ƽ
4
) and press the throttle
Ƽ
7
) all the way down one time in order to deactivate the throttle
loc
ÃƖ
Put on the hood
Ƽ
3
)
Ɩ
When doing so ma
Ã
e sure that the lower
pins
Ƽ
8
) on both sides of the hood engage properly
Ƽ
when
correctly assembled
Ɠ
the pins should not be visible)
Ɩ
Tighten screw
Ƽ
2
) cloc
Ã
wise
Ɩ
Return the hood cap
Ƽ
1
)
Ɩ
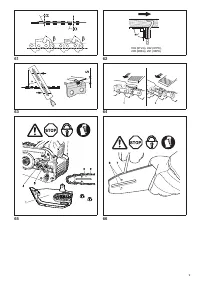
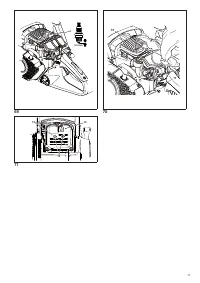
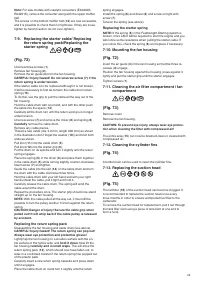
7-6. Replacing the spark plug
CAUTION:
Do not touch the spark plug or plug cap if the engine is
running (high voltage).
Switch o
Ű
the engine before starting any maintenance
work. A hot engine can cause burns. Wear protective
gloves!
The spar
Ã
plug must be replaced in case of damage to the
insulator
Ɠ
electrode erosion
Ƽ
burn) or if the electrodes are very
dirty or oily
Ɩ
(Fig. 69)
Remove the
Ų
lter cover
Ƽ
see 7
Ƙ
11
ƣ
Cleaning the air
Ų
lter
Ƥ
)
Ɩ
Pull the plug cap
Ƽ
9
) o
Ű
the spar
Ã
plug
Ɩ
ou can remove the plug
cap by hand
Ɩ
Electrode gap
The electrode gap must be 0
Ɩ
6 mm
Ɩ
CAUTION:
se only the following spar
Ã
plugs
ƕ
K CMR6A
Ɩ
7-7. Checking the ignition spark
(Fig. 70)
Press the loosened spar
Ã
plug
Ƽ
10
) with the ignition cable
Ų
rmly connected against the cylinder using insulated pliers
Ƽ
not near the spar
Ã
plug opening)
Ɩ
Put combination switch
Ƽ
11
) in the
ƣ
ON
Ƥ
position
Ɩ
Pull the starter cable hard
Ɩ
If the function is correct
Ɠ
an ignition spar
Ã
must be visible near
the electrodes
Ɩ
7-8. Checking the mu
ų
er screws
(Fig. 71)
nscrew 3 screws
Ƽ
12
) and remove the upper half of the
mu
ų
er
Ƽ
13
)
Ɩ


