
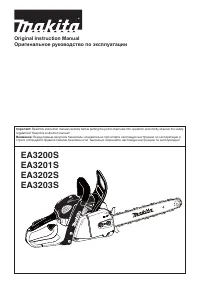
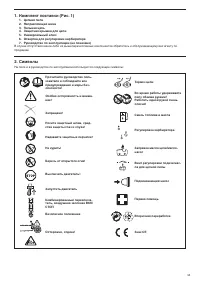
Бензопилы Makita EA3202S40B - инструкция пользователя по применению, эксплуатации и установке на русском языке. Мы надеемся, она поможет вам решить возникшие у вас вопросы при эксплуатации техники.
Если остались вопросы, задайте их в комментариях после инструкции.
"Загружаем инструкцию", означает, что нужно подождать пока файл загрузится и можно будет его читать онлайн. Некоторые инструкции очень большие и время их появления зависит от вашей скорости интернета.


22
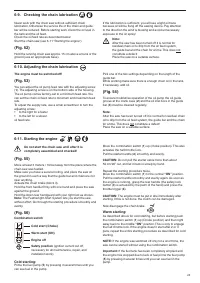
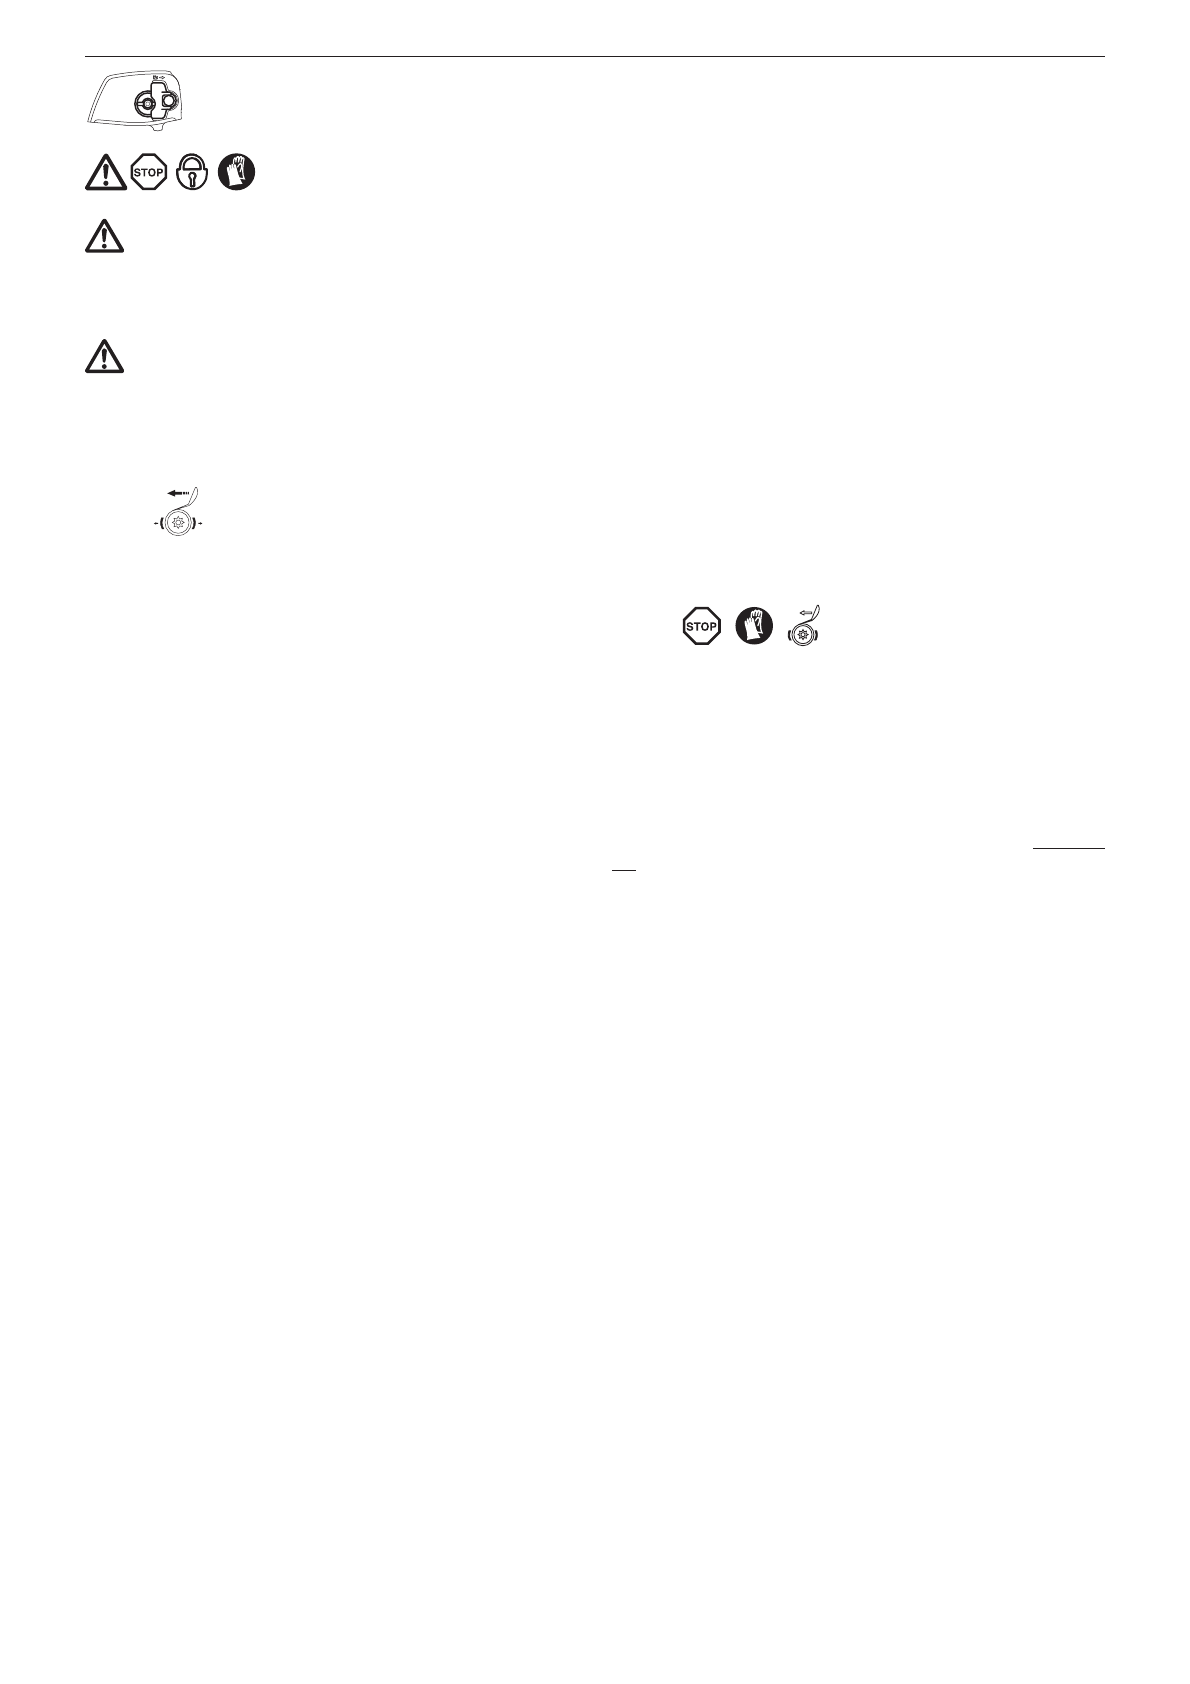
CAUTION:
Before doing any work on the guide bar or chain,
always switch o
Ű
the engine and pull the plug
cap o
Ű
the spark plug
Ƽ
see 7
Ƙ
6
ƣ
Replacing the spar
Ã
plug
Ƥ
)
. Always wear protective gloves!
CAUTION:
Start the chain saw only after having assembled it
completely and inspected.
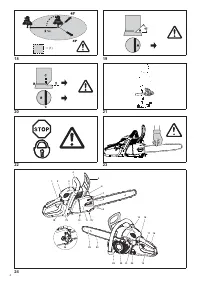
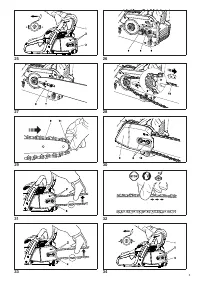
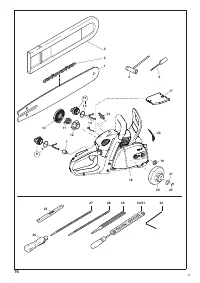
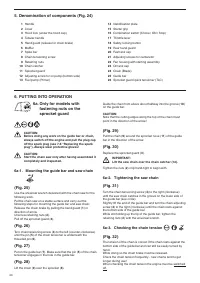
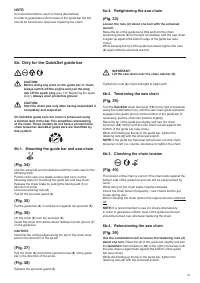
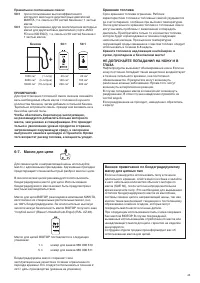
6c-1. Mounting the guide bar and saw chain
(Fig. 41)
Place the saw on a stable surface and perform the following
wor
Ã
steps in order to install the guide bar and saw chain
ƕ
Release the chain bra
Ã
e by pulling the hand guard
Ƽ
1
) in
direction of arrow
Ɩ
old up the sproc
Ã
et guard
É
uic
Ã
tensioner
Ƽ
2
)
Ƽ
see also the
illustration on tensioning the saw chain)
Ɩ
Push the sproc
Ã
et guard
É
uic
Ã
tensioner in forcefully against
the spring tension and slowly turn
counter-clockwise
Ɠ
until
you feel it engage
Ɩ
Keep pushing
Ɠ
and turn as far as possible
counter
Ƙ
cloc
Ã
wise
Ɩ
Release the sproc
Ã
et guard
É
uic
Ã
tensioner again and turn
clockwise
to bring it bac
Ã
to its original position
Ɩ
Repeat this
procedure until the sproc
Ã
et guard
Ƽ
4
) is unscrewed
Ɩ
Remove the sproc
Ã
et guard
Ƽ
4
)
Ɩ
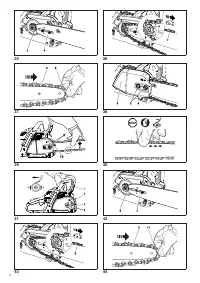
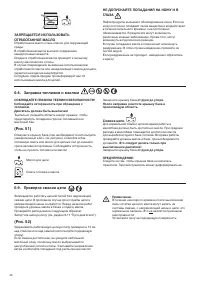
(Fig. 42)
Put the guide bar
Ƽ
5
) on and push it against the sproc
Ã
et
Ƽ
6
)
Ɩ
(Fig. 43)
ift the chain
Ƽ
8
) over the sproc
Ã
et
Ƽ
7
)
Ɩ
uide the chain from above about halfway into the groove
Ƽ
9
)
on the guide bar
Ɩ
CAUTION:
ote that the cutting edges along the top of the chain must
point in the direction of the arrow!
(Fig. 44)
Pull the chain
Ƽ
8
) around the sproc
Ã
et nose
Ƽ
10
) of the guide
bar in the direction of the arrow
Ɩ
(Fig. 45)
Align hole on sproc
Ã
et guard
Ƽ
4
) with the pin
Ƽ
11
)
Ɩ
Turn the chain tensioner
Ƽ
3
Ɠ
see 6c
Ƙ
2
ƣ
Tightening the saw
chain
Ƥ
) to bring the chain tensioner pin
Ƽ
12
) into alignment with
the hole in the guide bar
Ɩ
Push the sproc
Ã
et guard
Ƽ
4
) onto the pin
Ƽ
11
)
Ɩ
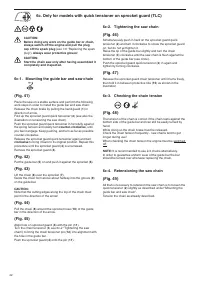
6c-2. Tightening the saw chain
(Fig. 46)
imultaneously push in hard on the sproc
Ã
et guard
É
uic
Ã
tensioner
Ƽ
2
) and turn it cloc
Ã
wise to screw the sproc
Ã
et guard
on
Ɠ
but do not yet tighten it
Ɩ
Raise the tip of the guide bar slightly and turn the chain
tensioner
Ƽ
3
) cloc
Ã
wise until the saw chain is
Ŵ
ush against the
bottom of the guide bar
Ƽ
see circle)
Ɩ
Push the sproc
Ã
et guard
É
uic
Ã
tensioner
Ƽ
2
) in again and
tighten by turning cloc
Ã
wise
Ɩ
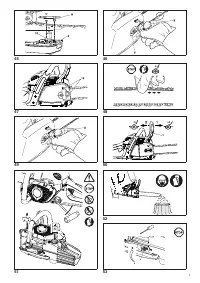
(Fig. 47)
Release the sproc
Ã
et guard chain tensioner until it turns freely
Ɠ
then fold it in between protective ribs
Ƽ
15
) as shown in the
illustration
Ɩ
6c-3. Checking the chain tension
(Fig. 48)
The tension of the chain is correct if the chain rests against the
bottom side of the guide bar and can still be easily turned by
hand
Ɩ
While doing so the chain bra
Ã
e must be released
Ɩ
Chec
Ã
the chain tension fre
É
uently
Ƙ
new chains tend to get
longer during use!
When chec
Ã
ing the chain tension the engine must be switched
o
ŰƖ
NOTE:
It is recommended to use 2
Ƙ
3 chains alternatively
Ɩ
In order to guarantee uniform wear of the guide bar the bar
should be turned over whenever replacing the chain
Ɩ
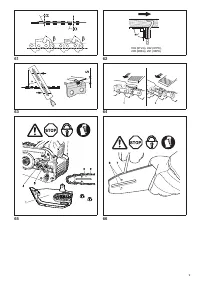
6c-4. Retensioning the saw chain
(Fig. 49)
All that is necessary to retension the saw chain is to loosen the
É
uic
Ã
tensioner
Ƽ
2
) slightly as described under
ƣ
Mounting the
guide bar and saw chain
ƤƖ
Tension the chain as already described
Ɩ
6c. Only for models with quick tensioner on sprocket guard (TLC)


