
Бензопилы Makita EA3202S40B - инструкция пользователя по применению, эксплуатации и установке на русском языке. Мы надеемся, она поможет вам решить возникшие у вас вопросы при эксплуатации техники.
Если остались вопросы, задайте их в комментариях после инструкции.
"Загружаем инструкцию", означает, что нужно подождать пока файл загрузится и можно будет его читать онлайн. Некоторые инструкции очень большие и время их появления зависит от вашей скорости интернета.


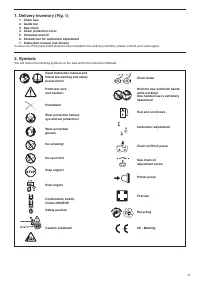


20
1
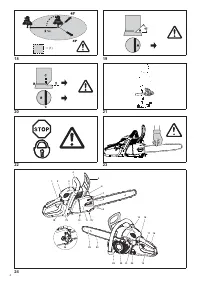
andle
2
Cover
3
ood loc
Ã
Ƽ
under the hood cap)
4
Tubular handle
5
and guard
Ƽ
release for chain bra
Ã
e)
6
Mu
ų
er
7
pi
Ã
e bar
8
Chain tensioning screw
9
Retaining nuts
10
Chain catcher
11
proc
Ã
et guard
12
Ad
Â
usting screw for oil pump
Ƽ
bottom side)
13
uel pump
Ƽ
Primer)
14
Identi
Ų
cation plate
15
tarter grip
16
Combination switch
Ƽ
Cho
Ã
e
Ư
Ư
top)
17
Throttle lever
18
afety loc
Ã
ing button
19
Rear hand guard
20
uel tan
Ã
cap
21
Ad
Â
usting screws for carburetor
22
an housing with starting assembly
23
il tan
Ã
cap
24
Chain
Ƽ
Blade)
25
uide bar
26
proc
Ã
et guard
É
uic
Ã
tensioner
Ƽ
T
C)
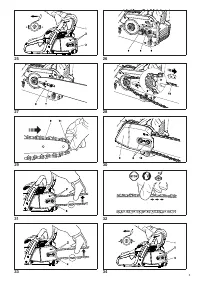
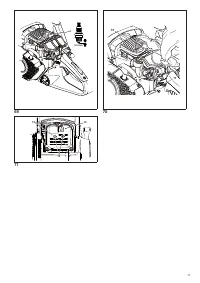
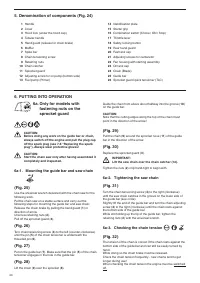
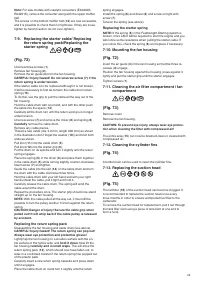
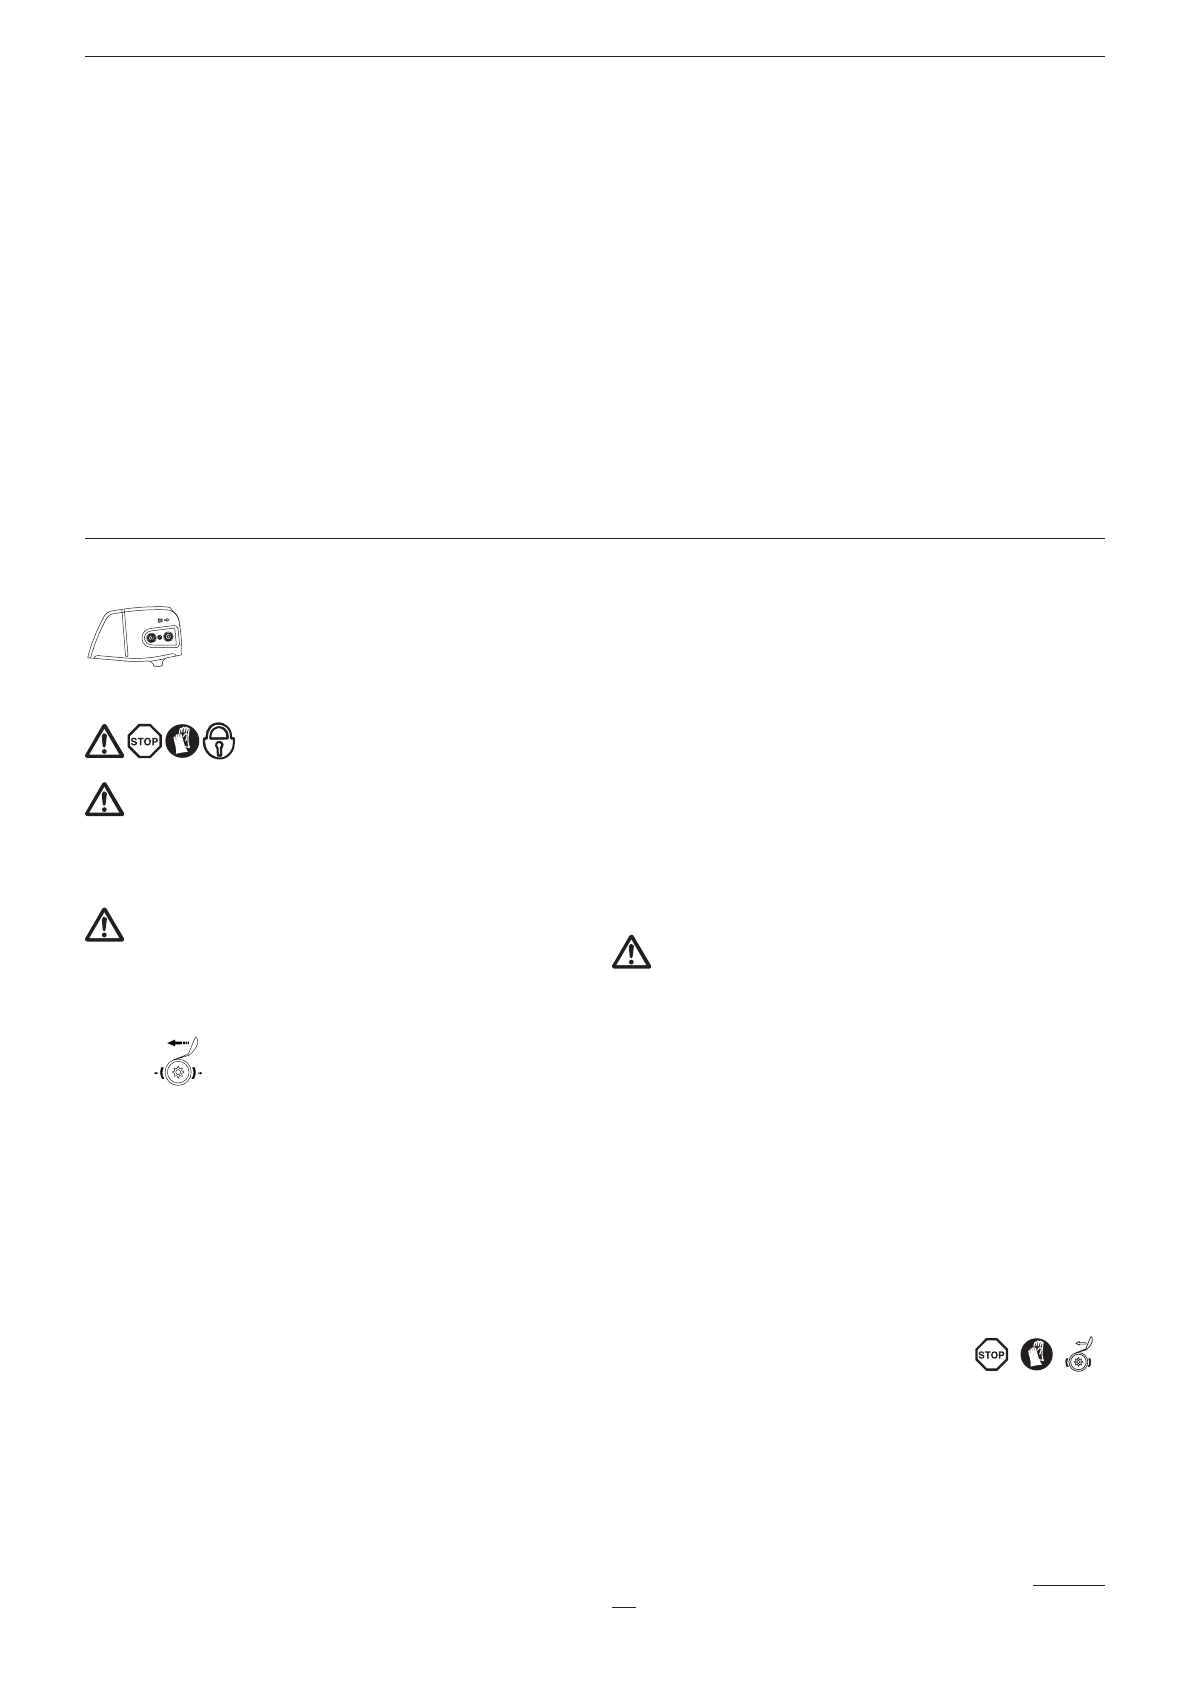
5. Denomination of components (Fig. 24)
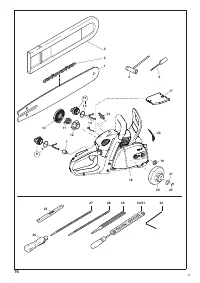
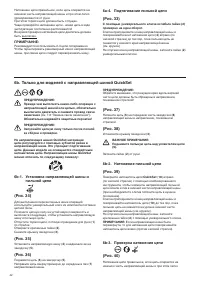
6. PUTTING INTO OPERATION
6a. Only for models with
fastening nuts on the
sprocket guard
CAUTION:
Before doing any work on the guide bar or chain,
always switch o
Ű
the engine and pull the plug cap
o
Ű
the spark plug (see 7-6
ƣ
Replacing the spark
plug”). Always wear protective gloves!
CAUTION:
Start the chain saw only after having assembled it
completely and inspected.
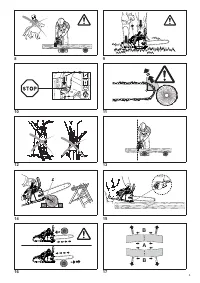
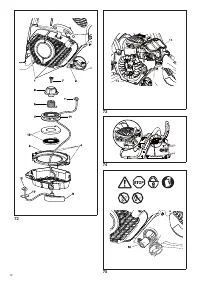
6a-1. Mounting the guide bar and saw chain
(Fig. 25)
se the universal wrench delivered with the chain saw for the
following wor
ÃƖ
Put the chain saw on a stable surface and carry out the
following steps for mounting the guide bar and saw chain
ƕ
Release the chain bra
Ã
e by pulling the hand guard
Ƽ
1
) in
direction of arrow
Ɩ
nscrew retaining nuts
Ƽ
2
)
Ɩ
Pull o
Ű
the sproc
Ã
et guard
Ƽ
3
)
Ɩ
(Fig. 26)
Turn chain tensioning screw
Ƽ
4
) to the left
Ƽ
counter
Ƙ
cloc
Ã
wise)
until the pin
Ƽ
5
) of the chain tensioner is underneath the
threaded pin
Ƽ
6
)
Ɩ
(Fig. 27)
Put on the guide bar
Ƽ
7
)
Ɩ
Ma
Ã
e sure that the pin
Ƽ
5
) of the chain
tensioner engages in the hole in the guide bar
Ɩ
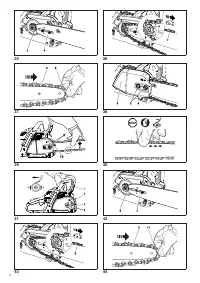
(Fig. 28)
ift the chain
Ƽ
9
) over the sproc
Ã
et
Ƽ
8
)
Ɩ
uide the chain from above about halfway into the groove
Ƽ
10
)
on the guide bar
Ɩ
CAUTION:
ote that the cutting edges along the top of the chain must
point in the direction of the arrow!
(Fig. 29)
Pull the chain
Ƽ
9
) around the sproc
Ã
et nose
Ƽ
11
) of the guide
bar in the direction of the arrow
Ɩ
(Fig. 30)
Replace the sproc
Ã
et guard
Ƽ
3
)
Ɩ
IMPORTANT:
Lift the saw chain over the chain catcher (12).
Tighten the nuts
Ƽ
2
) only hand
Ƙ
tight to begin with
Ɩ
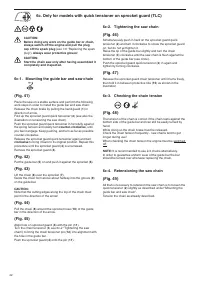
6a-2. Tightening the saw chain
(Fig. 31)
Turn the chain tensioning screw
Ƽ
4
) to the right
Ƽ
cloc
Ã
wise)
until the saw chain catches in the groove on the lower side of
the guide bar
Ƽ
see circle)
Ɩ
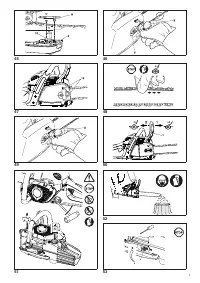
lightly lift the end of the guide bar and turn the chain ad
Â
usting
screw
Ƽ
4
) to the right
Ƽ
cloc
Ã
wise) until the chain rests against
the bottom side of the guide bar
Ɩ
While still holding up the tip of the guide bar
Ɠ
tighten the
retaining nuts
Ƽ
2
) with the universal wrench
Ɩ
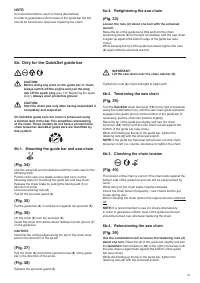
6a-3. Checking the chain tension
(Fig. 32)
The tension of the chain is correct if the chain rests against the
bottom side of the guide bar and can still be easily turned by
hand
Ɩ
While doing so the chain bra
Ã
e must be released
Ɩ
Chec
Ã
the chain tension fre
É
uently
Ƙ
new chains tend to get
longer during use!
When chec
Ã
ing the chain tension the engine must be switched
o
ŰƖ


