
Вытяжки Neff D99L11N0 - инструкция пользователя по применению, эксплуатации и установке на русском языке. Мы надеемся, она поможет вам решить возникшие у вас вопросы при эксплуатации техники.
Если остались вопросы, задайте их в комментариях после инструкции.
"Загружаем инструкцию", означает, что нужно подождать пока файл загрузится и можно будет его читать онлайн. Некоторые инструкции очень большие и время их появления зависит от вашей скорости интернета.


13
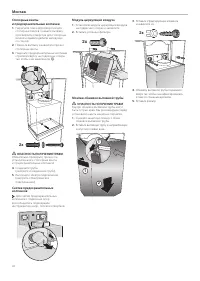
Electrical connection
Before connecting the appliance to the
power supply, always follow the instructions
and warnings in the chapter entitled ”Safety
instructions”!
The extractor hood may only be
connected by a qualified electrician who is
familiar with the regulations of the relevant
electricity supply company.
RISK OF INJURY
If the power cord of the extractor hood is
damaged, it must be replaced by the
manufacturer, his customer service or
a similarly qualified person to prevent
hazardous situations.
The power cord must be stowed away
securely following connection to the mains.
The extractor hood may be connected to
a correctly installed earthed socket only.
Attach the earthed socket as directly as
possible behind the flue duct.
– The earthed socket should be connected via
its own circuit.
– If the earthed socket is no longer
accessible following installation of the
extractor hood, a disconnector must be
fitted as for a permanent connection.
If a permanent connection is required
A disconnector must be provided on the
installation side. Switches with a contact
opening of more than 3 mm and all-pole
disconnection are regarded as
disconnectors. This includes LS switches,
fuses and contactors.
Electrical specifications
The required connection data can be found
on the rating plate inside the appliance
when the grease filters have been removed.
Length of the power cord: approx. 1.30 m
This extractor hood complies with the EC
interference suppression regulations.
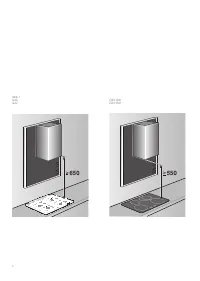
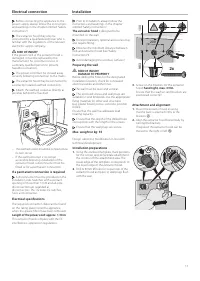
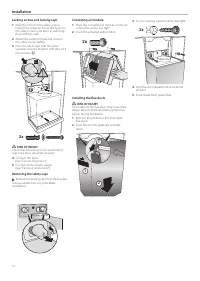
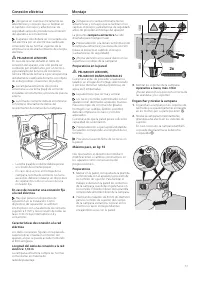
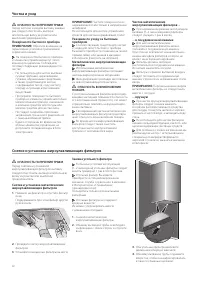
Installation
Prior to installation, always follow the
instructions and warnings in the chapter
entitled “Safety instructions”.
The extractor hood
is designed to be
mounted on the wall.
During installation, optional accessories may
also require fitting.
Observe the minimum distance between
hob and extractor hood (see “Safety
instructions”)!
Avoid damaging the sensitive surfaces!
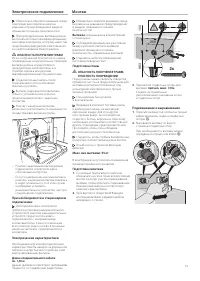
Preparing the wall
RISK OF INJURY,
DAMAGE TO PROPERTY
Before drilling the holes for the designated
installation location, check for concealed
electrical cables and other lines.
The wall must be level and vertical.
The enclosed screws and wall plugs are
suitable for solid brickwork. Use the appropriate
fixing materials for other wall structures
(e.g. plaster board, porous concrete, poroton
bricks).
Ensure that the wall has adequate load
bearing capacity.
Ensure that the depth of the drilled holes
corresponds with the length of the screws.
Ensure that the wall plugs are secure.
Max. weight in kg: 55
Design subject to modification in line with
technical development.
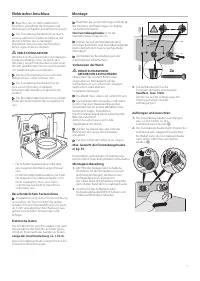
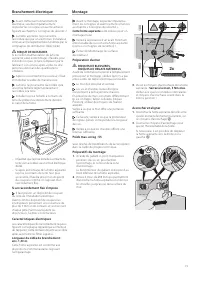
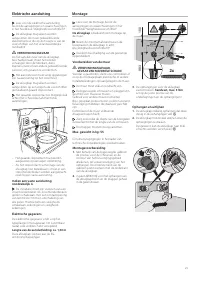
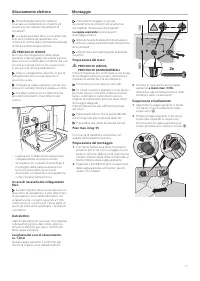
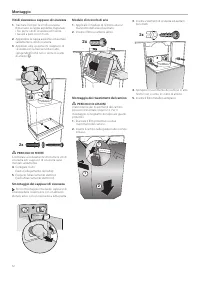
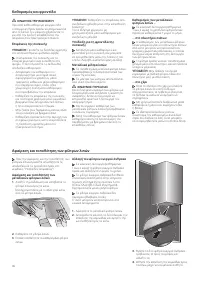
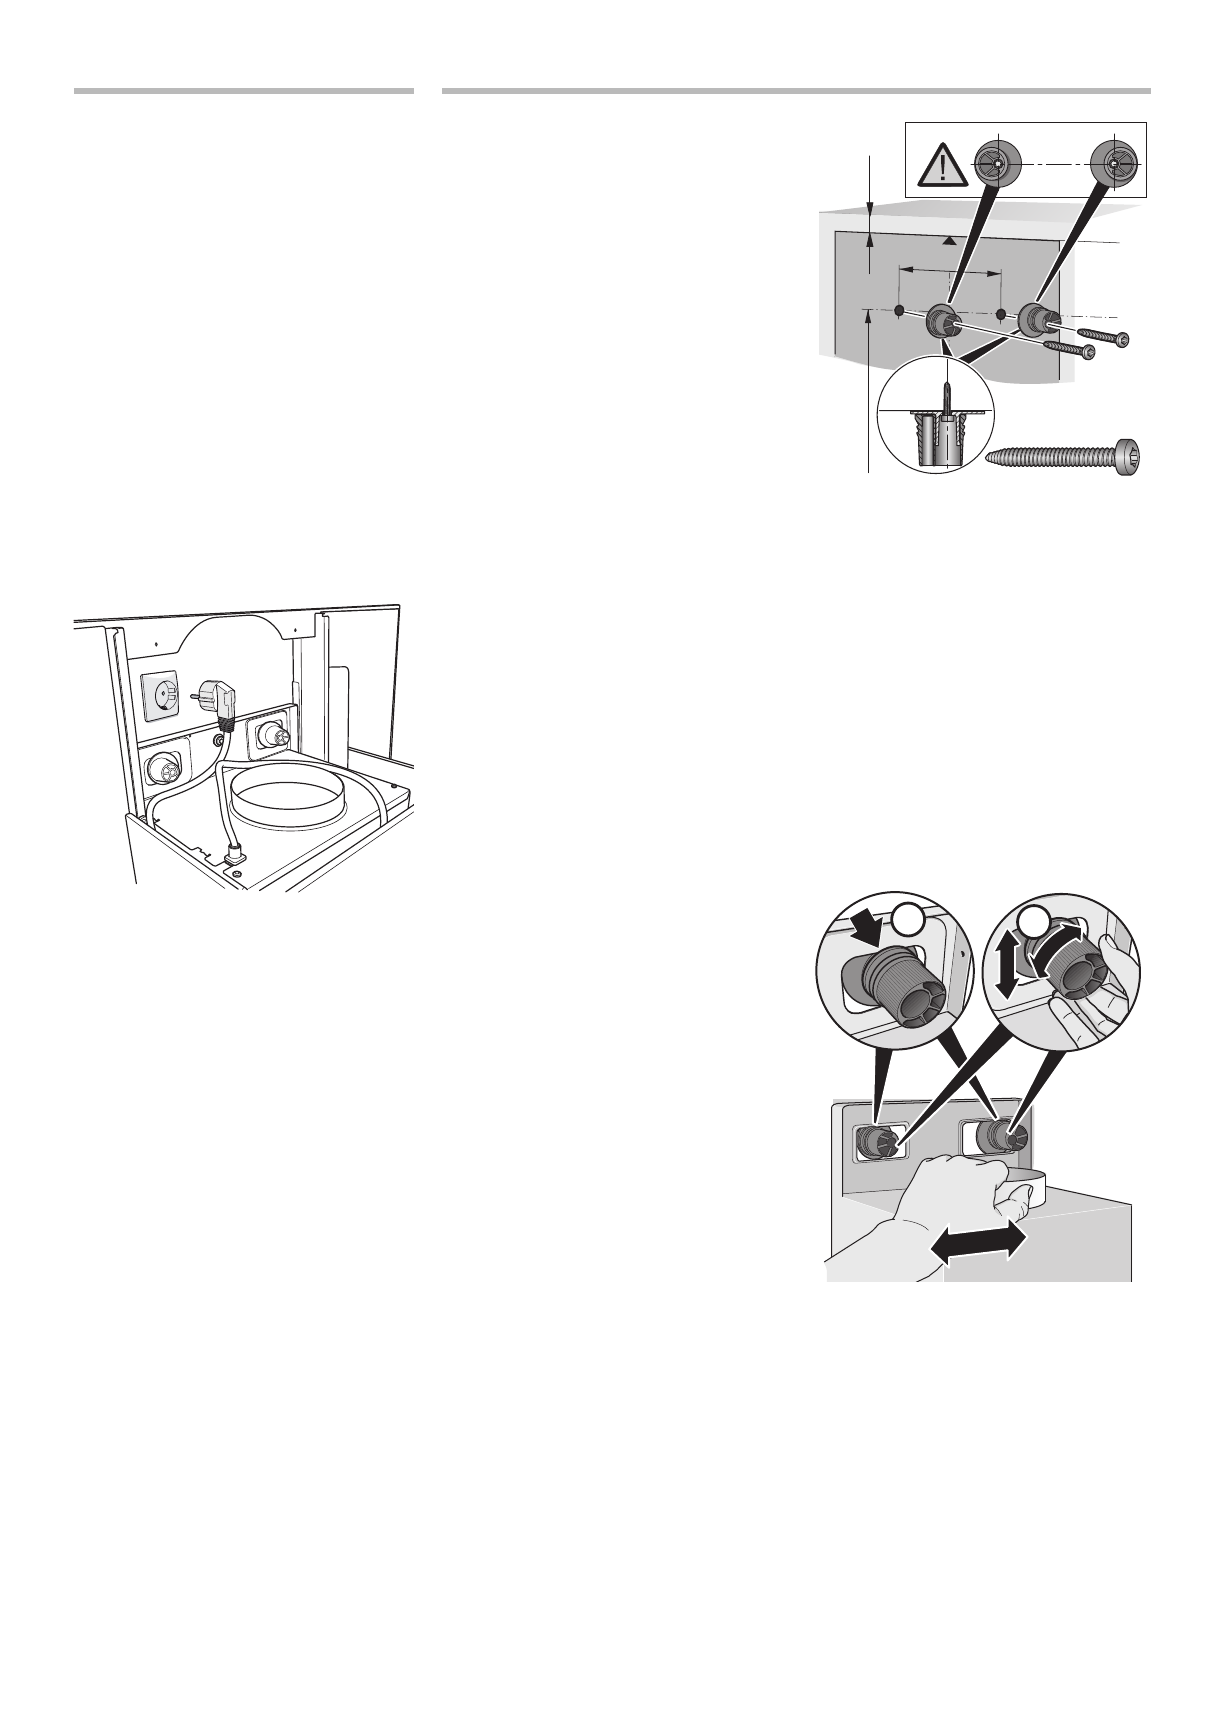
Installation preparations
1.
Using the enclosed template, mark positions
for the screws and, to facilitate attachment,
the contour of the attachment area. The
lower edge of the template corresponds to
the lower edge of the extractor hood.
2.
Drill 2x 8 mm Ø holes for suspension of the
extractor hood and press in wall plugs flush
with the wall.
.
3.
Screw on the brackets for the extractor
hood:
hand tight, max. 3 Nm
Ensure that the washers and brackets are
positioned correctly!
Attachment and alignment
1.
Mount the extractor hood, ensuring
that the back is attached firmly to the
brackets
Ⓐ
.
2.
Align the extractor hood horizontally by
turning the brackets.
If required, the extractor hood can be
moved to the right or left
Ⓑ
.
100
983
209
2x
A
B
Содержание
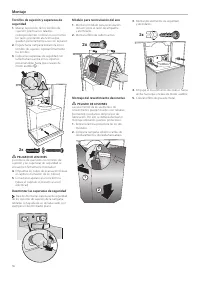
- 40 Указания по технике безопасности; Правильное использование; Техническая безопасность; ОПАСНОСТЬ ПОЛУЧЕНИЯ ОЖОГОВ; Правильное обращение; ОПАСНОСТЬ ВОЗНИКНОВЕНИЯ; Правильный монтаж
- 41 Управление вытяжкой; Регулирование вентилятора
- 42 Снятие и установка жироулавливающих фильтров; Замена угольного фильтра; Чистка и уход; Поверхности бытового прибора; ной машине
- 43 Электрическое подключение; Электрические характеристики; Монтаж; Вытяжка; Подготовка стены; ОПАСНОСТЬ ПОЛУЧЕНИЯ ТРАВМ,; Подготовка монтажа
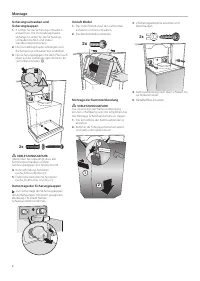
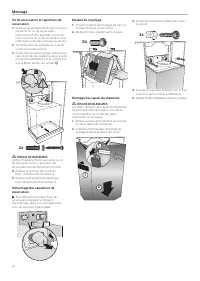
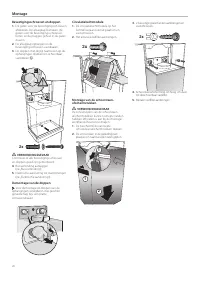
- 44 Для снятия предохранительных; Модуль циркуляции воздуха; Вставьте угольные фильтры.; Монтаж обшивок вытяжной трубы
Характеристики

Остались вопросы?Не нашли свой ответ в руководстве или возникли другие проблемы? Задайте свой вопрос в форме ниже с подробным описанием вашей ситуации, чтобы другие люди и специалисты смогли дать на него ответ. Если вы знаете как решить проблему другого человека, пожалуйста, подскажите ему :)


