
Вытяжки Jetair Leila 60/A/IX/BL - инструкция пользователя по применению, эксплуатации и установке на русском языке. Мы надеемся, она поможет вам решить возникшие у вас вопросы при эксплуатации техники.
Если остались вопросы, задайте их в комментариях после инструкции.
"Загружаем инструкцию", означает, что нужно подождать пока файл загрузится и можно будет его читать онлайн. Некоторые инструкции очень большие и время их появления зависит от вашей скорости интернета.
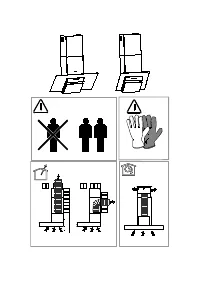

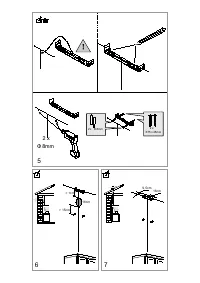
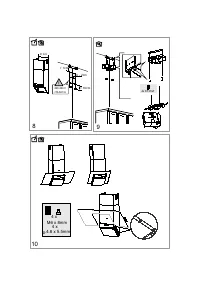
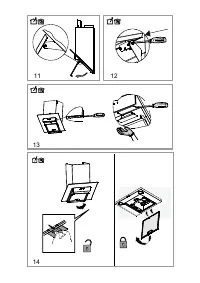
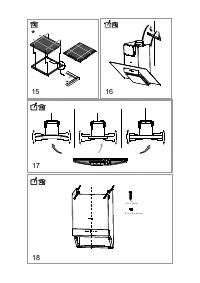
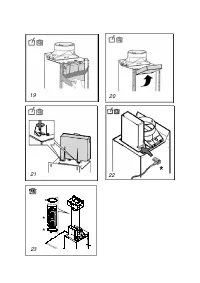
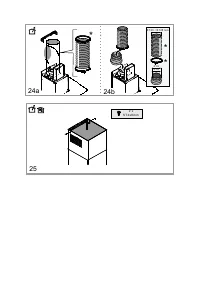


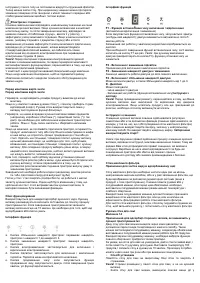
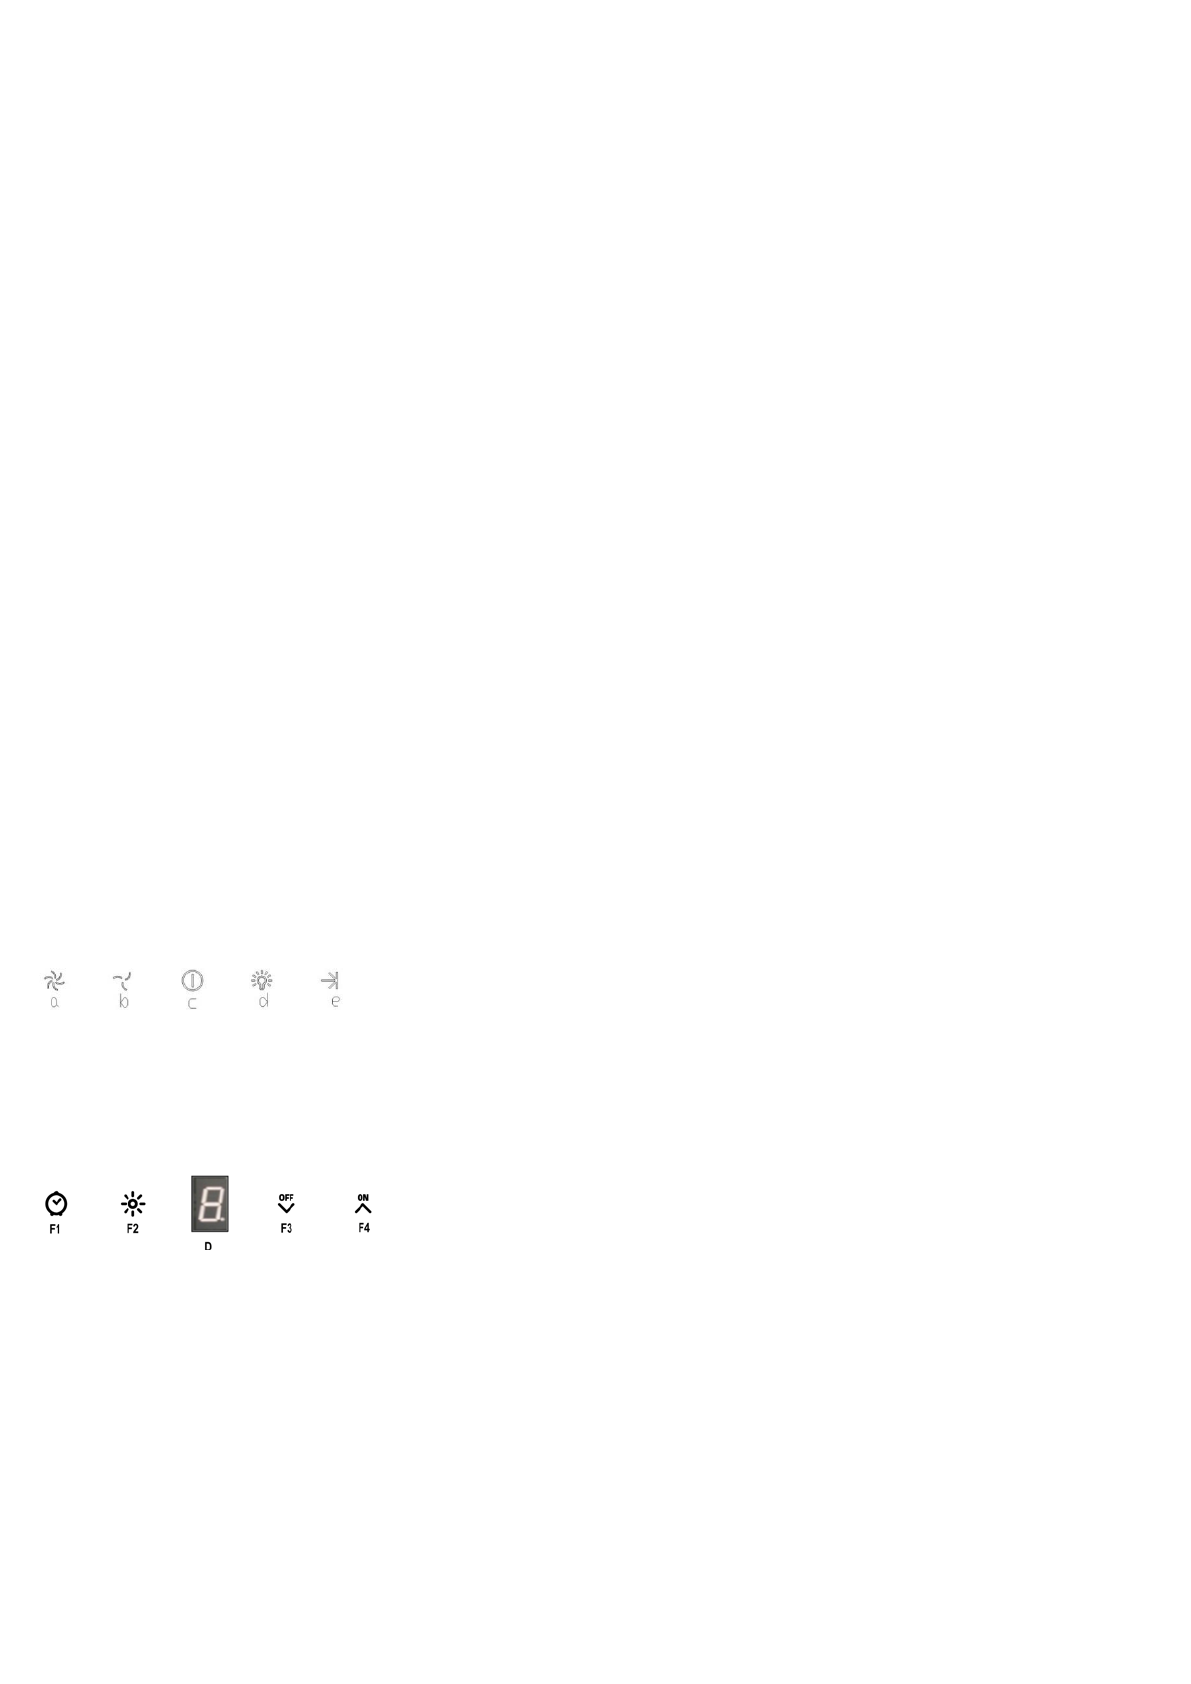
plate situated inside the hood. If provided with a plug connect the hood to
a socket in compliance with current regulations and positioned in an
accessible area, after installation. If it not fitted with a plug (direct mains
connection) or if the plug is not located in an accessible area, after
installation, apply a double pole switch in accordance with standards
which assures the complete disconnection of the mains under conditions
relating to over-current category III, in accordance with installation
instructions.
Warning!
Before re-connecting the hood circuit to the mains supply and
checking the efficient function, always check that the mains cable is
correctly assembled.
The hood is provided with a special power cable ; if the cable is damaged,
request a new one from Technical Service.
Mounting
Before beginning installation:
•
Check that the product purchased is of a suitable size for the chosen
installation area.
•
Remove the charcoal (*) filter/s if supplied (see also relative
paragraph). This/these is/are to be mounted only if you want lo use
the hood in the filtering version.
•
Check (for transport reasons) that there is no other supplied material
inside the hood (e.g. packets with screws (*), guarantees (*), etc.),
eventually removing them and keeping them.
•
If possible, disconnect and move freestanding or slide-in range from
cabinet opening to provide easier access to rear wall/ceiling.
Otherwise put a thick, protective covering over countertop, cooktop or
range to protect from damage and debris. Select a flat surface for
assembling the unit. Cover that surface with a protective covering and
place all canopy hood parts and hardware in it.
•
In addition check whether near the installation area of the hood (in the
area accessible also with the hood mounted) an electric socket is
available and it is possible to connect a fumes discharge device to the
outside (only suction version).
•
Carry out all the masonry work necessary (e.g. installation of an
electric socket and/or a hole for the passage of the discharge tube).
Expansion wall plugs are provided to secure the hood to most types of
walls/ceilings. However, a qualified technician must verify suitability of the
materials in accordance with the type of wall/ceiling. The wall/ceiling must
be strong enough to take the weight of the hood.
Do not tile, grout or
silicone this appliance to the wall. Surface mounting only.
Operation
Use the high suction speed in cases of concentrated kitchen vapours. It is
recommended that the cooker hood suction is switched on for 5 minutes
prior to cooking and to leave in operation during cooking and for another
15 minutes approximately after terminating cooking.
Functioning - Model with display
a.High Speed-Increase motor speed from 1 ° to 3 °
b.Low Speed-Decrease motor speed.
c.Power-Turn on and off power.
d.Light-Allow turning on and off lights. Enable control separately.
e.Time Delay-Enable the starup of the motor when turning on time delay
function and shut off all functions 3 minitues later.
Functioning - Model with display
F1 – ON/OFF Timer (Automatic Shut-off/Off)
The Timer function is activated with the engine running (at any speed);
after 5 minutes, the engine shuts down automatically.
During the timing phase, the display (D) shows the remaining working
time, in minutes (flashing).
To stop the timer function, before these 5 minutes, press again the F1 key.
Note: By turning off the engine manually (via F3), the timer function is
deactivated.
F2 - ON / OFF Lights
Allows turning on and off lights.
F3 – Engine Speed Decrease / OFF
Decreases the speed of the engine, until it shuts off.
F4 - ON / Engine Speed Increase
Enables the startup of the engine and the speed increase, from 1 ° to 3 °.
D - Display
Allows the viewing of:
- the motor speed status
- the remaining time to Automatic Shut-off, when the Timer function is
activated
Maintenance
ATTENTION!
Before performing any maintenance operation, isolate the
hood from the electrical supply by switching off at the connector and
removing the connector fuse.
Or if the appliance has been connected through a plug and socket, then
the plug must be removed from the socket.
Cleaning
The cooker hood should be cleaned regularly (at least with the same
frequency with which you carry out maintenance of the fat filters) internally
and externally. Clean using the cloth dampened with neutral liquid
detergent. Do not use abrasive products.
DO NOT USE ALCOHOL!
WARNING:
Failure to carry out the basic cleaning recommendations of
the cooker hood and replacement of the filters may cause fire risks.
Therefore, we recommend observing these instructions.
The manufacturer declines all responsibility for any damage to the motor
or any fire damage linked to inappropriate maintenance or failure to
observe the above safety recommendations.
Grease filter
Traps cooking grease particles.
This must be cleaned once a month (or when the filter saturation
indication system – if envisaged on the model in possession – indicates
this necessity) using non aggressive detergents, either by hand or in the
dishwasher, which must be set to a low temperature and a short cycle.
When washed in a dishwasher, the grease filter may discolour slightly, but
this does not affect its filtering capacity.
To remove the grease filter, pull the spring release handle.
Charcoal filter (filter version only)
Fig. 14
It absorbs unpleasant odours caused by cooking.
The charcoal filter can be washed once every two months using hot water
and a suitable detergent, or in a dishwasher at 65°C (if the dishwasher is
used, select the full cycle function and leave dishes out).
Eliminate excess water without damaging the filter, then put it in the oven
for 10 minutes at 100° C to dry completely. Replace the mattress every 3
years and when the cloth is damaged.
•
Montage
Install the carbon filter on the back of the grease filter and fix with 4
rods.
Attention!
The rods are included in the carbon filter packing and not
on the hood.
•
To dismantle the filter act in the reverse manner.
Replacing lamps
Disconnect the hood from the electricity.
Warning!
Prior to touching the light bulbs ensure they are cooled down.
Replace the old light bulb with the one of the same type as specified in the
feature label or near the light lamp on the hood.
1.
Using a small flat head screwdriver or equivalent tool, carefully pry
outwards and pull out connector plug.
2.
Remove the damaged light and replace with a new 12 Volt, 1 Watt
(Maximum) LED light made with same specification. Follow package
directions and do not touch new light with bare hands.
3.
Reinstall the light cover. (it will snap shut).
If the lights do not work, make sure that the lamps are fitted properly into
their housings before you call for technical assistance.
Model with LED light
The hood is equipped with a lighting system based on LED technology.
The LEDs guarantee an optimum lighting, a duration up to 10 times as
long as the traditional lamps and allow to save 90% electrical energy.
For replacement, contact the technical service.


