
Вытяжки Falmec CIRCLE.TECH Vega 115 - инструкция пользователя по применению, эксплуатации и установке на русском языке. Мы надеемся, она поможет вам решить возникшие у вас вопросы при эксплуатации техники.
Если остались вопросы, задайте их в комментариях после инструкции.
"Загружаем инструкцию", означает, что нужно подождать пока файл загрузится и можно будет его читать онлайн. Некоторые инструкции очень большие и время их появления зависит от вашей скорости интернета.


11
ENGLISH
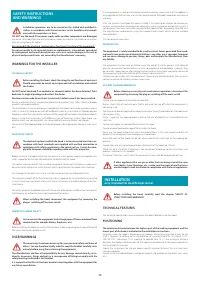
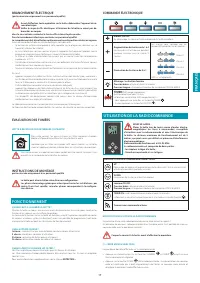
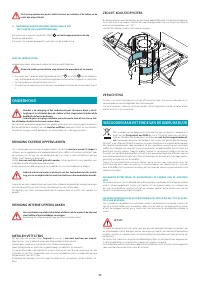
ELECTRICAL CONNECTION
(only intended for qualifi ed personnel)
Disconnect the equipment from electrical mains power supply before carry-
ing out any operations on the hood.
Ensure that the wires inside the hood are not disconnected or cut:
in the event of damage, contact your nearest Servicing Department.
Refer to qualifi ed personnel for electrical connections.
Connection must be carried out in compliance with the provisions of law in force.
Before connecting the hood to the electrical mains power supply, check that:
• voltage supply corresponds with what is reported on the data plate located inside the
hood;
•
the electrical system is compliant and can withstand the load (see the technical specifi -
cations located inside the hood);
•
the power supply plug and cable do not come into contact with temperatures exceed-
ing 70 °C;
• the power supply system is eff ectively and properly connected to earth in compliance
with regulations in force;
•
the socket used to connect the hood is within reach.
In case of:
•
devices fi tted with cables without a plug: the type of plug to use is a ''standardised'' one.
The wires must be connected as follows: yellow-green for earthing, blue for neutral and
brown for the phase. The plug must be connected to an adequate safety socket.
•
fi xed equipment not provided with a power supply cable and plug, or any other device
that ensures disconnection from the electrical mains, with an opening gap of the con-
tacts that enables total disconnection in overvoltage category III conditions.
Said disconnection devices must be provided in the mains power supply in compliance
with installation regulations.
The yellow/green earth cable must not be cut off by the switch.
The Manufacturer declines all responsibility for failure to comply with the safety regulations.
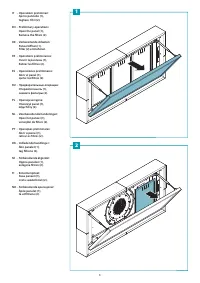
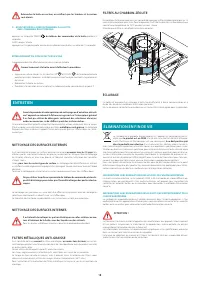
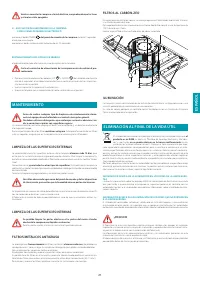
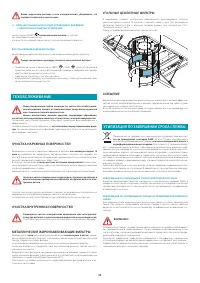
FUMES DISCHARGE
HOOD WITH INTERNAL RECIRCULATION (FILTERING)
In this model, the air passes through the zeolite-carbon fi lters to be
purifi ed and recycled in the environment.
Ensure that the active carbon fi lters are assembled into the hood, if not,
install them as indicated in the assembly instructions.
In this version the check valve must not be assembled: remove it if it is on the air
outlet fi tting of the motor.
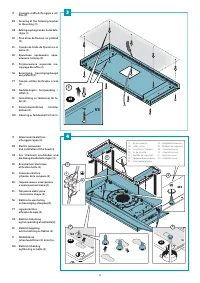
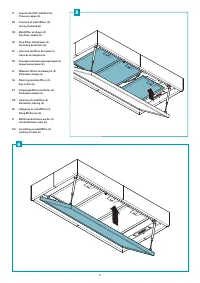
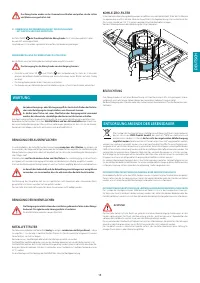
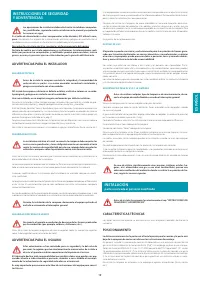
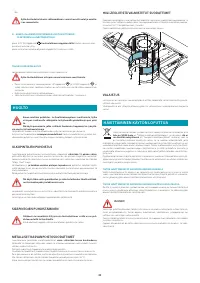
ASSEMBLY INSTRUCTIONS
only intended for qualifi ed personnel
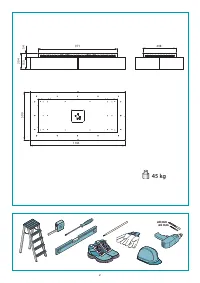
The hood can be installed in various confi gurations.
The generic assembly steps apply to all installations; for each case, follow
the specifi c steps provided for the required installation.
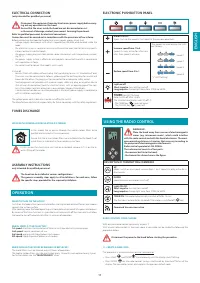
OPERATION
WHEN TO TURN ON THE HOOD?
Switch on the hood at least one minute before starting to cook to direct fumes and vapours
towards the suction surface.
After cooking, leave the hood operating until complete extraction of all vapours and odours.
By means of the Timer function, it is possible to set auto switch-off function which will allow
the hood to turn off automatically after 15 minutes of operation.
WHICH SPEED IS TO BE SELECTED?
1st speed:
maintains the circulation of clean air with low electricity consumption.
2nd speed:
normal conditions of use.
3rd speed:
presence of strong odours and vapours.
4th speed:
rapid disposal of odours and vapours.
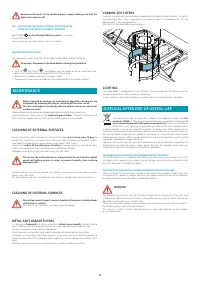
WHEN SHOULD THE FILTERS BE WASHED OR REPLACED?
The metal fi lters must be cleaned every 30 hours of operation.
The zeolite-carbon fi lters must be reactivated every 18 months and replaced every 3 years.
For further details see the
“MAINTENANCE”
chap.
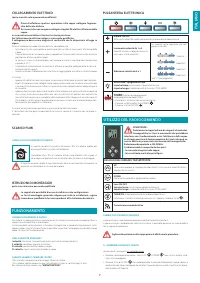
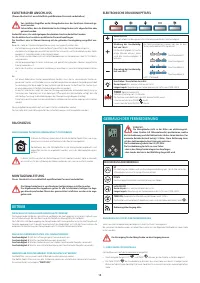
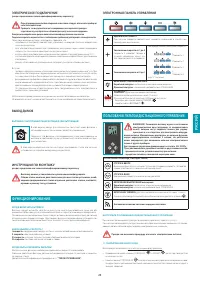
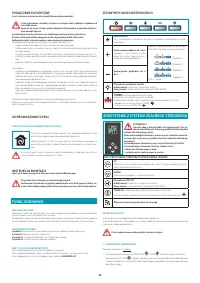
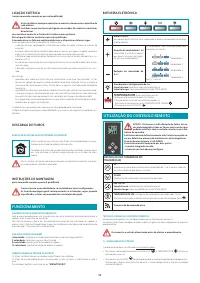
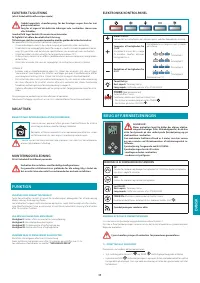
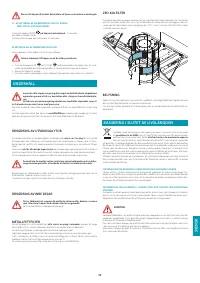
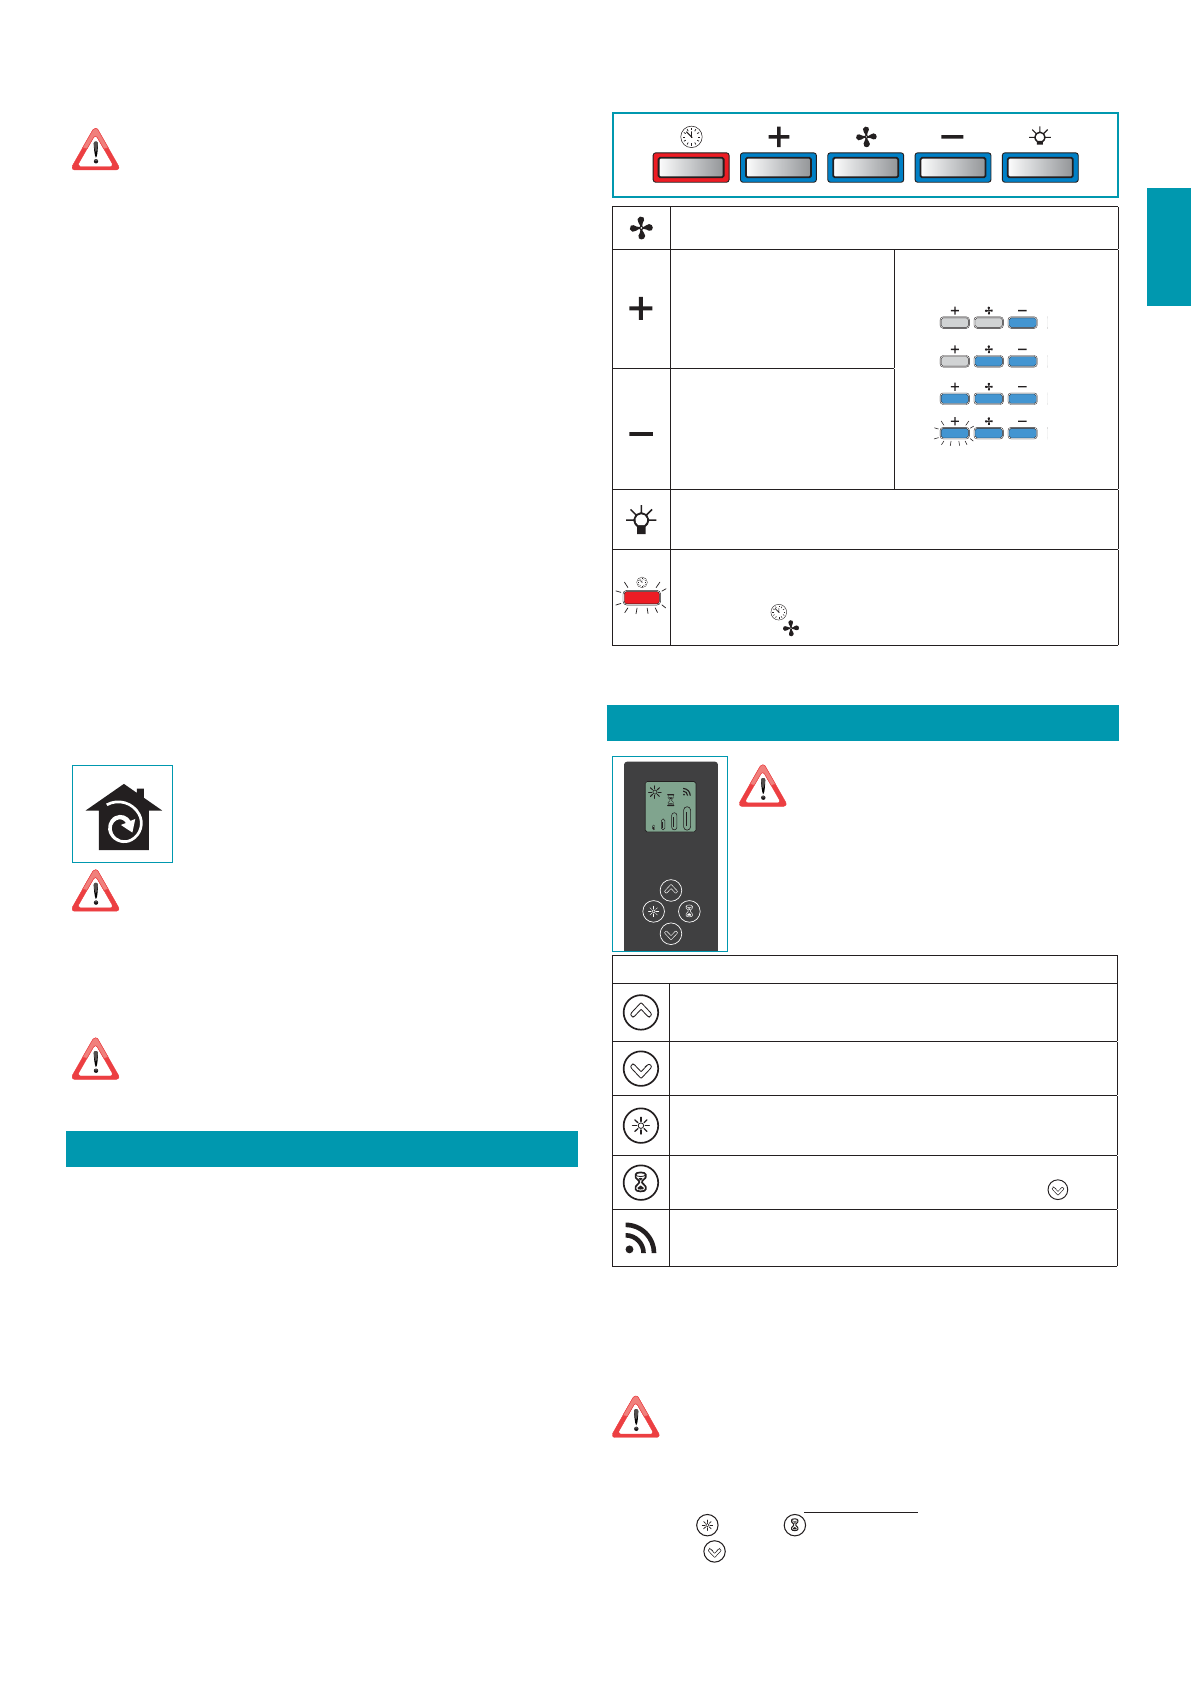
ELECTRONIC PUSHBUTTON PANEL
Motor ON/OFF
Upon start-up, the speed is that stored at the previous operation.
Increase speed from 1 to 4
Speed 4 is only active for a few min-
utes, then speed 3 activates.
The speeds are indicated by the LEDs
on the keys:
Speed 1
Speed 2
Speed 3
Speed 4
("+" LED fl ashing)
Reduce speed from 4 to 1
Light on/off
Short impulse:
turn light on and off
Long impulse:
change light tone from 2700K to 5600K
TIMER
(
red LED fl ashing)
Auto switch-off after 15 min.
The function deactivates (red LED off ) if:
- The TIMER key (
) is pressed again.
- The ON/OFF key (
) is pressed.
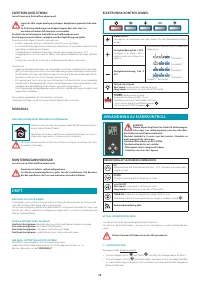
USING THE RADIO CONTROL
WARNINGS!:
Place the hood away from sources of electromagnetic
waves (e.g. microwave ovens), which could interfere
with the radio control and with the hood electronics. The maxi-
mum operating distance is 5 metres, that may vary according to
the presence of electromagnetic interferences.
Radio control operated at 433.92MHz.
The radio control consists of two parts:
- the receiver built into the hood;
- the transmitter shown here in the fi gure.
DESCRIPTION OF TRANSMITTING COMMANDS
UP
Motor switch-on and speed increase from 1 to 4. Speed 4 is only active for a
few minutes.
DOWN
Speed decrease and motor switch-off .
Light ON-OFF
Short impulse:
turn light on and off
Long impulse:
change light tone from 2700K to 5600K
TIMER ON:
The motor automatically switches off after 15 min.
The function is automatically disabled if the motor is switched off (
key)
Command transmission active
RADIO CONTROL CODE CHANGE
With only one radio control, go directly to point 2.
With several radio controls in the same room, a new code can be created by following the
procedure below.
Disconnect the power to the hood before starting the procedure.
1) - CREATE A NEW CODE
The procedure is to be carried out on the radio control.
•
Press LIGHT
and TIMER
simultaneously until the display starts fl ashing.
•
Press DOWN
on the radio control: saving is confi rmed by three brief fl ashes of the
display. The new code cancels and replaces the previous default code.
Характеристики

Остались вопросы?Не нашли свой ответ в руководстве или возникли другие проблемы? Задайте свой вопрос в форме ниже с подробным описанием вашей ситуации, чтобы другие люди и специалисты смогли дать на него ответ. Если вы знаете как решить проблему другого человека, пожалуйста, подскажите ему :)


