
Вытяжки Faber FABULA PLUS EVO+BK A60 - инструкция пользователя по применению, эксплуатации и установке на русском языке. Мы надеемся, она поможет вам решить возникшие у вас вопросы при эксплуатации техники.
Если остались вопросы, задайте их в комментариях после инструкции.
"Загружаем инструкцию", означает, что нужно подождать пока файл загрузится и можно будет его читать онлайн. Некоторые инструкции очень большие и время их появления зависит от вашей скорости интернета.
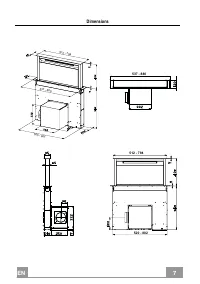


EN
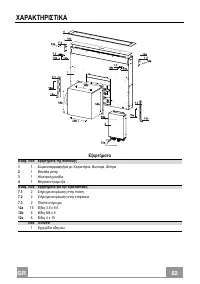
9
9
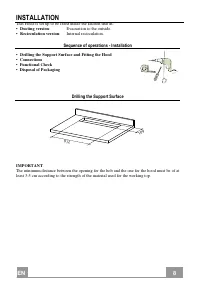
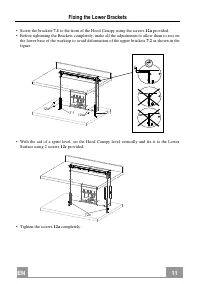
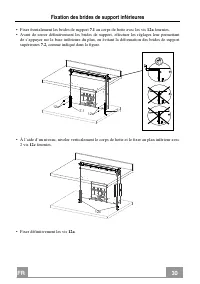
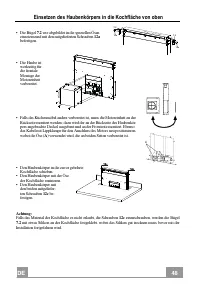
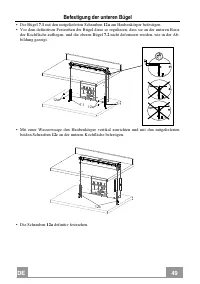
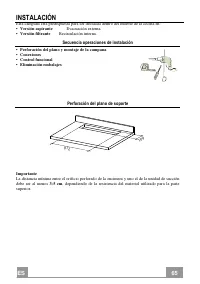
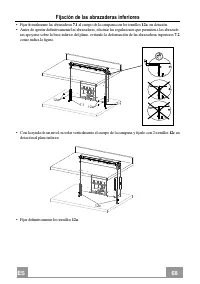
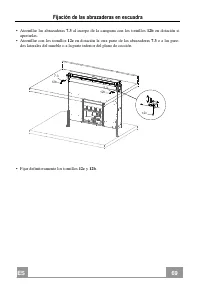
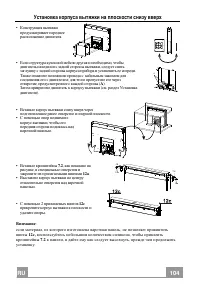
7.2
12a
7.2
12a
A
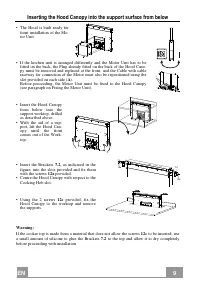
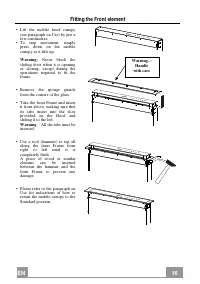
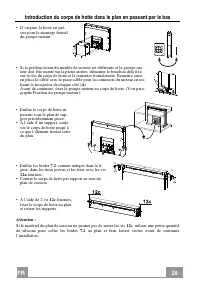
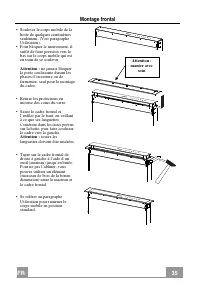
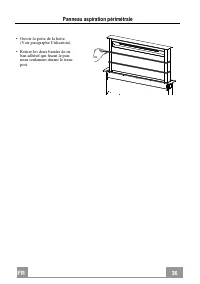
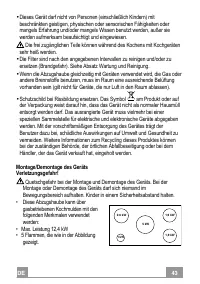
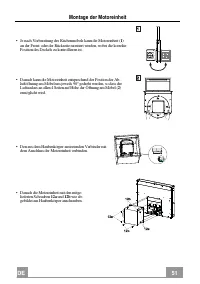
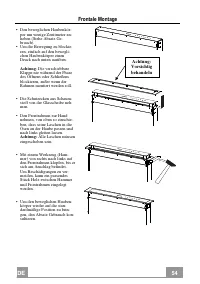
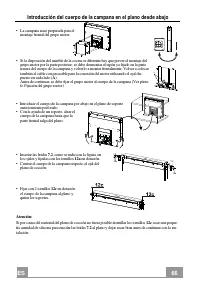
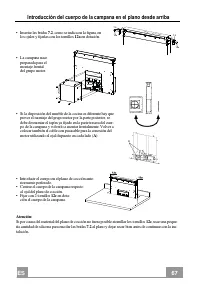
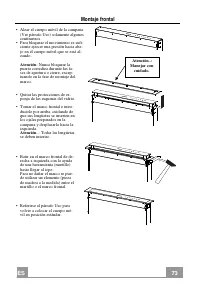
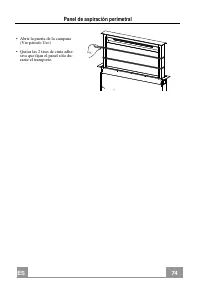
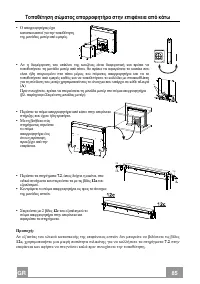
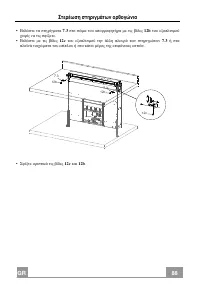
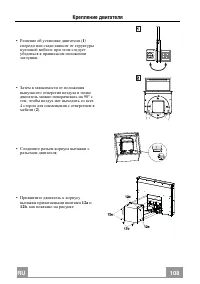
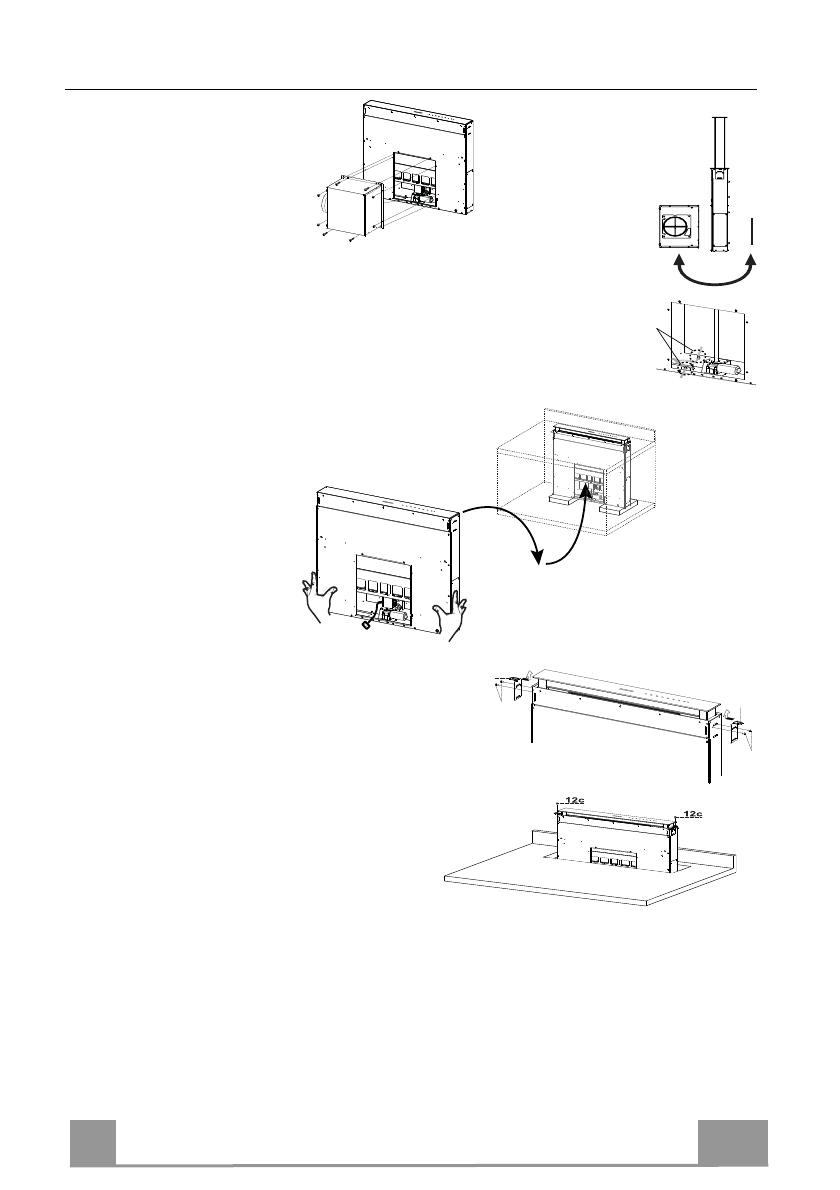
Inserting the Hood Canopy into the support surface from below
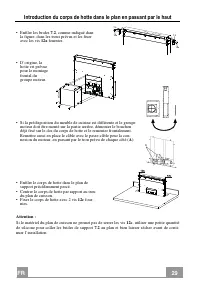
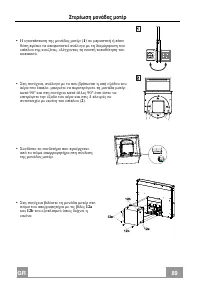
• The Hood is built ready for
front installation of the Mo-
tor Unit.
• If the kitchen unit is arranged differently and the Motor Unit has to be
fitted on the back, the Plug already fitted on the back of the Hood Cano-
py must be removed and replaced at the front, and the Cable with cable
raceway for connection of the Motor must also be repositioned using the
slot provided on each side (
A
).
Before proceeding, the Motor Unit must be fixed to the Hood Canopy
(see paragraph on Fixing the Motor Unit).
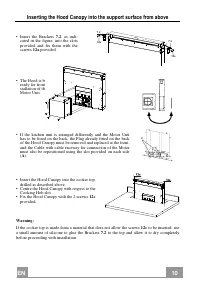
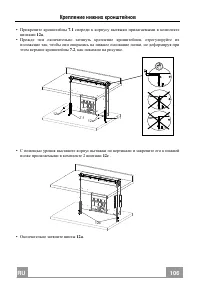
• Insert the Hood Canopy
from below into the
support worktop, drilled
as described above.
• With the aid of a sup-
port, lift the Hood Can-
opy until the front
comes out of the Work-
top.
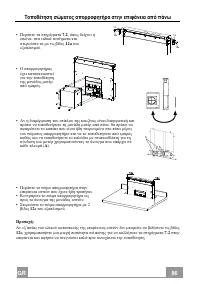
• Insert the Brackets
7.2
, as indicated in the
figure, into the slots provided and fix them
with the screws
12a
provided.
• Centre the Hood Canopy with respect to the
Cooking Hob slot.
• Using the 2 screws
12c
provided, fix the
Hood Canopy to the worktop and remove
the supports.
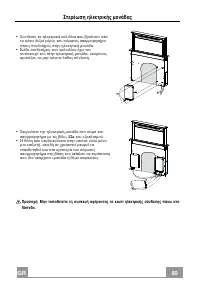
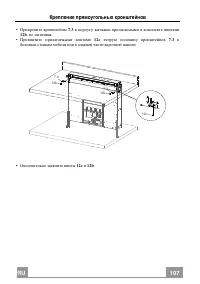
Warning:
If the cooker top is made from a material that does not allow the screws
12c
to be inserted, use
a small amount of silicone to glue the Brackets
7.2
to the top and allow it to dry completely
before proceeding with installation
Содержание
- 98 RU; ИНФОРМАЦИЯ ПО БЕЗОПАСНОСТИ; Подключение электрических проводов должно выполняться
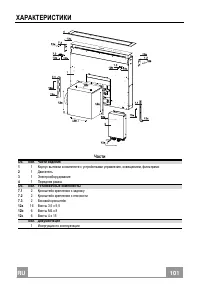
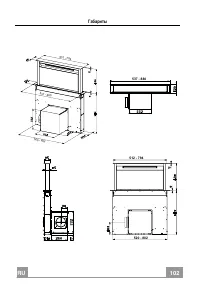
- 101 ХАРАКТЕРИСТИКИ; Части
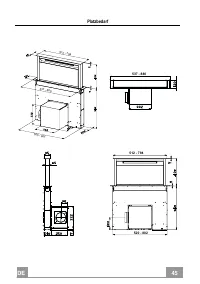
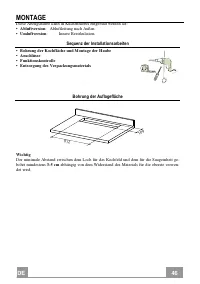
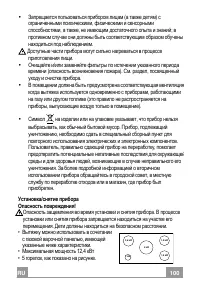
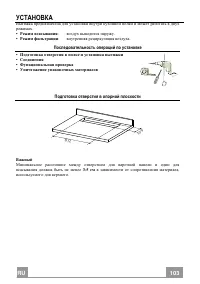
- 103 УСТАНОВКА; Последовательность операций по установке
- 104 Внимание
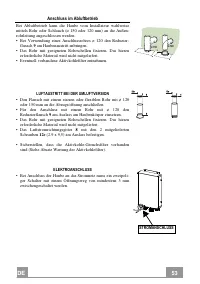
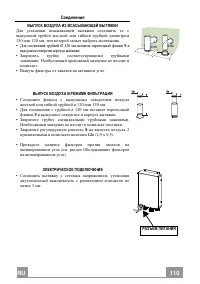
- 110 Соединения; ВЫПУСК ВОЗДУХА ИЗ ВСАСЫВАЮЩЕЙ ВЫТЯЖКИ
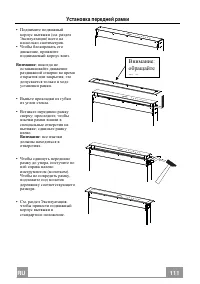
- 111 Установка передней рамки
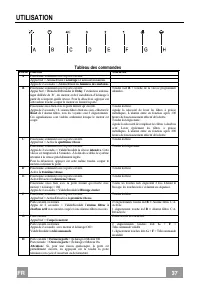
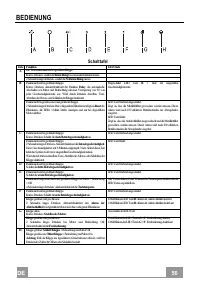
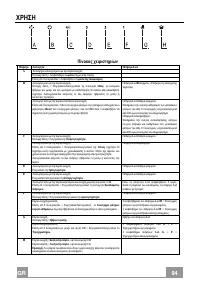
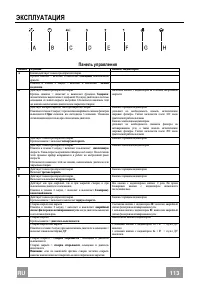
- 113 ЭКСПЛУАТАЦИЯ; Панель управления
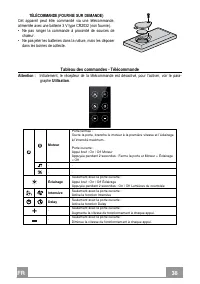
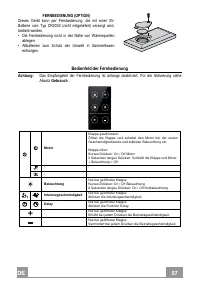
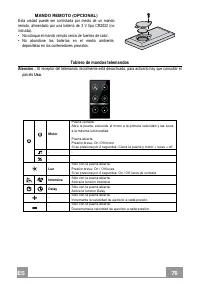
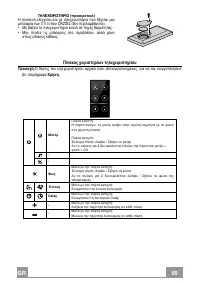
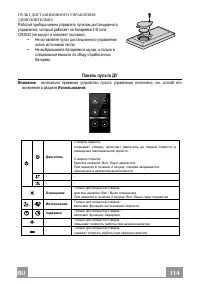
- 114 Панель пульта ДУ; Использование
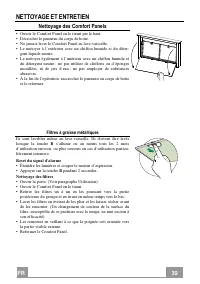
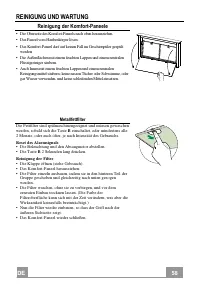
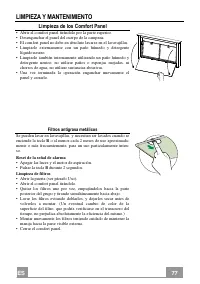
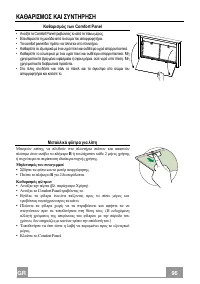
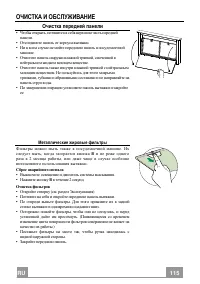
- 115 ОЧИСТКА И ОБСЛУЖИВАНИЕ; Очистка передней панели; Металлические жировые фильтры; Сброс
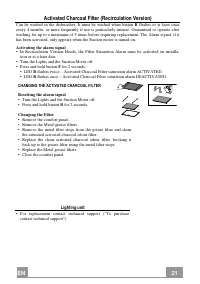
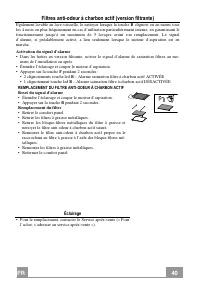
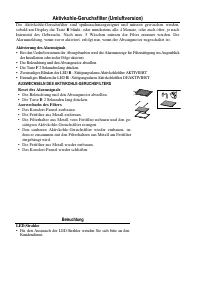
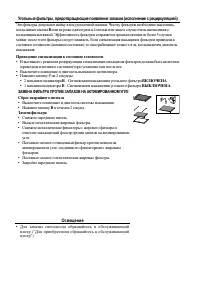
- 116 ЗАМЕНА ФИЛЬТРА ПРОТИВ ЗАПАХОВ НА АКТИВИРОВАННОМ УГЛЕ; Освещение
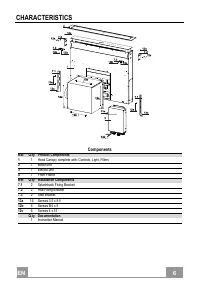
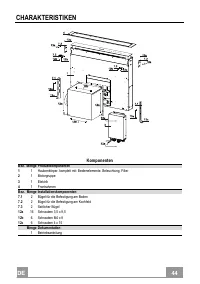
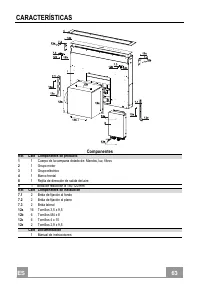
Характеристики

Остались вопросы?Не нашли свой ответ в руководстве или возникли другие проблемы? Задайте свой вопрос в форме ниже с подробным описанием вашей ситуации, чтобы другие люди и специалисты смогли дать на него ответ. Если вы знаете как решить проблему другого человека, пожалуйста, подскажите ему :)


