
Вытяжки Faber CYLINDRA ISOLA CONCRETE - инструкция пользователя по применению, эксплуатации и установке на русском языке. Мы надеемся, она поможет вам решить возникшие у вас вопросы при эксплуатации техники.
Если остались вопросы, задайте их в комментариях после инструкции.
"Загружаем инструкцию", означает, что нужно подождать пока файл загрузится и можно будет его читать онлайн. Некоторые инструкции очень большие и время их появления зависит от вашей скорости интернета.


EN
1
11
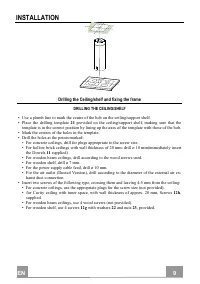
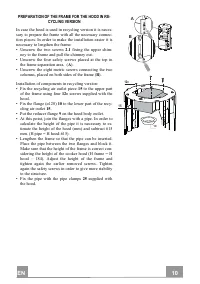
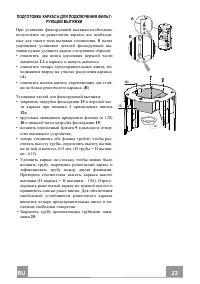
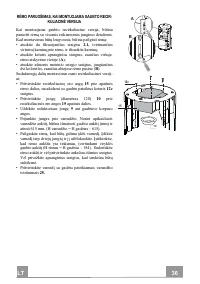
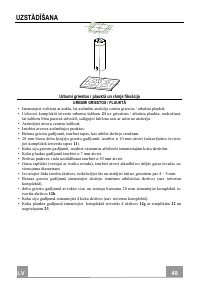
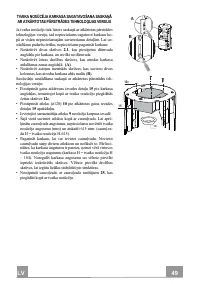
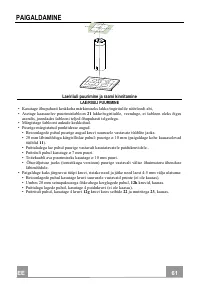
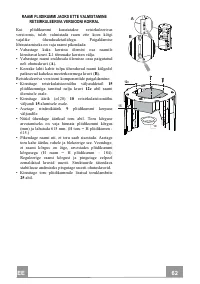
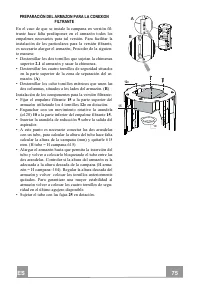
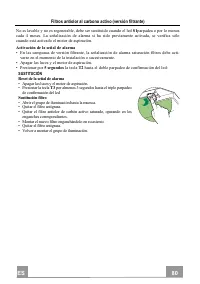
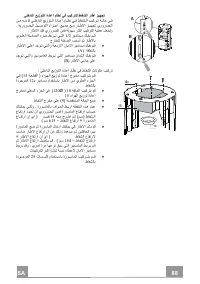
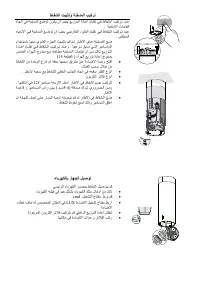
FIXING THE FRAME
• Lift the frame up, making sure that the index over the frame
plate is turned forwards.
• Fit the frame slots onto the two screws inserted in the ceiling as
above, and turn until reaching the centre of the adjustment slot.
• Tighten the two screws and fasten the other two screws pro-
vided; before locking the screws completely, it is possible to
adjust the frame by turning it, making sure that the screws do
not come out of their housing in the adjustment slot.
• The Frame must be securely fastened so as to support both the
weight of the Hood and the stress caused by occasional axial
pressure against the fitted Appliance. After fixing, make sure
that the base is stable even when the Frame is subjected to lat-
eral stress.
• If the Ceiling is not strong enough in the area where the hood
is to be fixed, the Installer must strengthen the area using suit-
able plates and counterplates anchored to resistant structures.
2
1
1
2
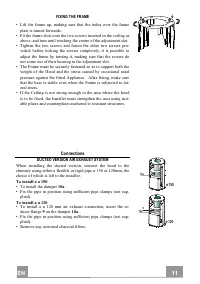
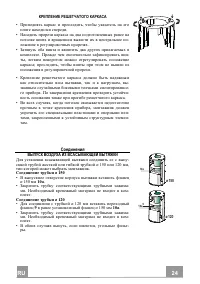
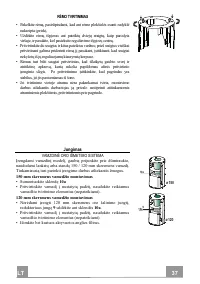
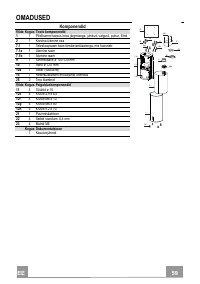
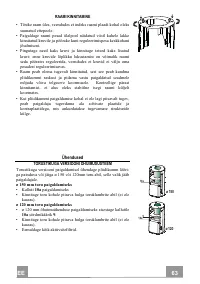
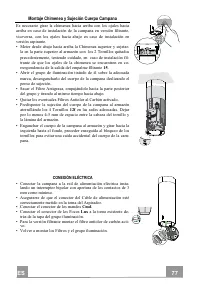
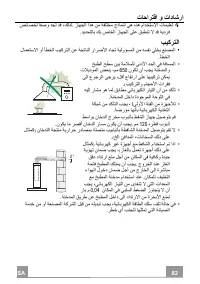
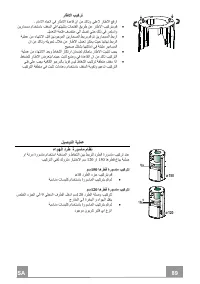
Connections
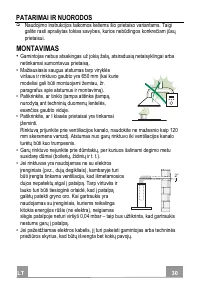
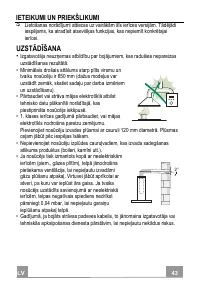
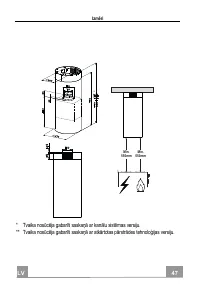
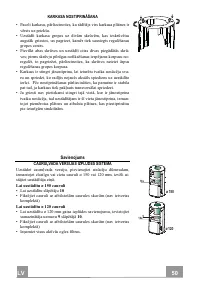
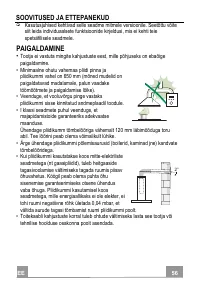
DUCTED VERSION AIR EXHAUST SYSTEM
When installing the ducted version, connect the hood to the
chimney using either a flexible or rigid pipe ø 150 or 120mm, the
choice of which is left to the installer.
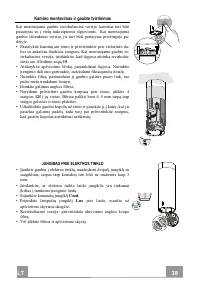
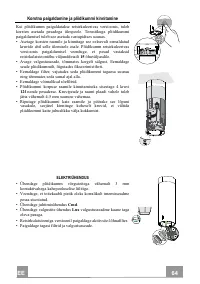
To install a ø 150
• To install the dumper
10a
.
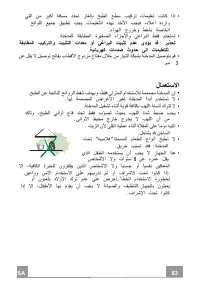
• Fix the pipe in position using sufficient pipe clamps (not sup-
plied).
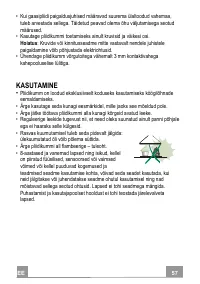
To install a ø 120
• To install a ø 120 mm air exhaust connection, insert the re-
ducer flange
9
on the dumper
10a
.
• Fix the pipe in position using sufficient pipe clamps (not sup-
plied).
• Remove any activated charcoal filters.
9
ø 120
ø 150
10a
10a
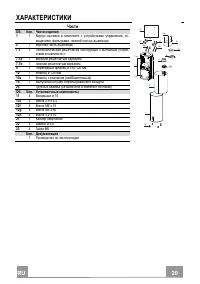
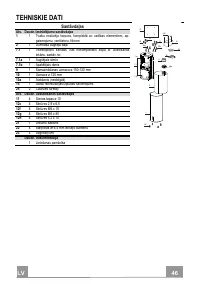
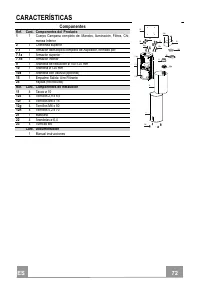
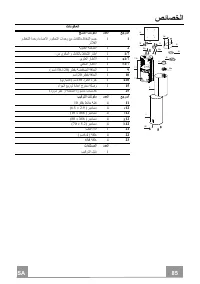
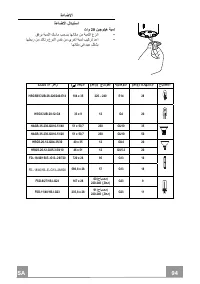
Характеристики

Остались вопросы?Не нашли свой ответ в руководстве или возникли другие проблемы? Задайте свой вопрос в форме ниже с подробным описанием вашей ситуации, чтобы другие люди и специалисты смогли дать на него ответ. Если вы знаете как решить проблему другого человека, пожалуйста, подскажите ему :)


