
Винные шкафы Dunavox DX-7.20BK/DP - инструкция пользователя по применению, эксплуатации и установке на русском языке. Мы надеемся, она поможет вам решить возникшие у вас вопросы при эксплуатации техники.
Если остались вопросы, задайте их в комментариях после инструкции.
"Загружаем инструкцию", означает, что нужно подождать пока файл загрузится и можно будет его читать онлайн. Некоторые инструкции очень большие и время их появления зависит от вашей скорости интернета.


Code Rev. D 20140818 (IEC)
10
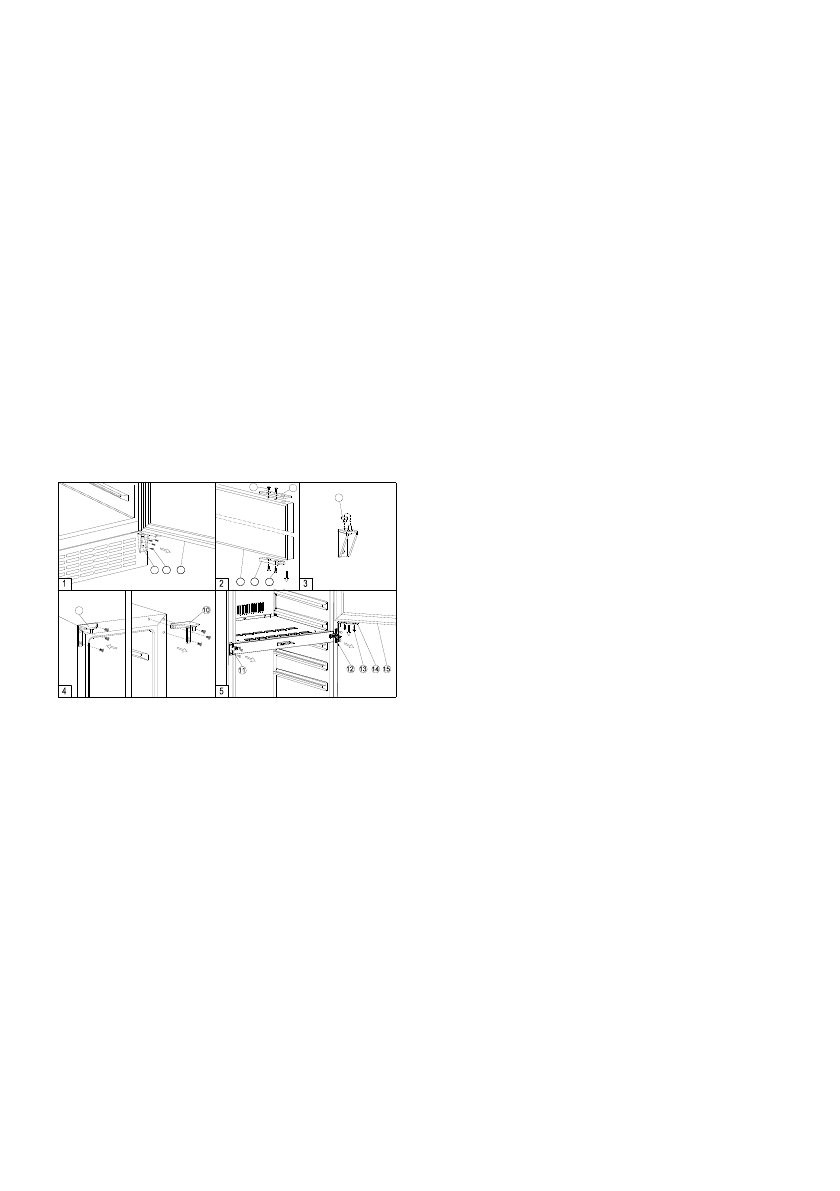
cabinet. (Fig. 4)
5. Unscrew and transfer door supporter
○
,10 to
the opposite side. At the same time remove the
stopper pin
○
,7 of bottom hinge to the opposite
designated position or unscrew and transfer the
hinge pin
○
,7a
of bottom hinge to the opposite
designated position.
(Fig. 5 & 3)
6. Unscrew and transfer the door adapter
○
,5
and lock catch
○
,4 to the top designated
position of glass door. (Fig. 2)
7.
Rotate the door 180° and relocate the glass door
to the designated position. Then screw the
bottom hinge on the left designated position and
tighten it. (Fig. 5)
8. Recheck and adjust the door alignment by
loosening the screws
○
,6and moving the door
adapter
○
,5. Tighten the screws
○
,6 after the
door is levelled. (Fig. 5)
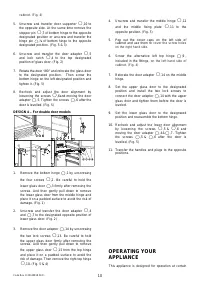
DESIGN 4
– For double door models
1
2
8
9
4
5
6
7
3
3
1. Remove the bottom hinge
○
,1 by unscrewing
the four screws
○
,2 . Be careful to hold the
lower glass door
○
,3 firmly after removing the
screws. And then gently pull down to remove
the lower glass door from the middle hinge and
place it on a padded surface to avoid the risk of
damage. (Fig. 1)
2. Unscrew and transfer the door adapter
○
,4
and
○
,7 to the designated opposite position of
lower glass door. (Fig. 2)
3. Remove the door adapter
○
,14 by unscrewing
the two lock screws
○
,13. Be careful to hold
the upper glass door firmly after removing the
screws. And then gently pull down to remove
the upper glass door
○
,15 from the top hinge
and place it on a padded surface to avoid the
risk of damage. Then remove the right top hinge
○
,10. (Fig. 5 & 4)
4. Unscrew and transfer the middle hinge
○
,12
and the middle fixing plate
○
,11 to the
opposite position. (Fig. 5)
5. Pop out the cover caps on the left side of
cabinet and use them to
cover the screw holes
on the right hand side.
6. Screw the alternative left top hinge
○
,9 ,
included in the fittings,
on the left hand side of
cabinet. (Fig. 4)
7. Relocate the door adapter
○
,14 on the middle
hinge.
8. Set the upper glass door to the designated
position and install the two lock screws to
connect the door adapter
○
,14 with the upper
glass door and tighten them before the door is
leveled.
9. Set the lower glass door to the designated
position and reassemble the bottom hinge.
10. Recheck and adjust the lower door alignment
by loosening the screws
○
,5 &
○
,6 and
moving the door adapter
○
,4&
○
,7 . Tighten
the screws
○
,5 &
○
,6 after the door is
levelled. (Fig. 5)
11. Transfer the handles and plugs to the opposite
positions.
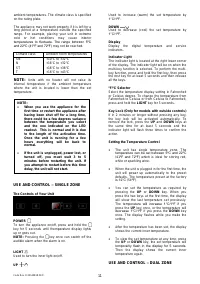
OPERATING YOUR
APPLIANCE
This appliance is designed for operation at certain
Характеристики

Остались вопросы?Не нашли свой ответ в руководстве или возникли другие проблемы? Задайте свой вопрос в форме ниже с подробным описанием вашей ситуации, чтобы другие люди и специалисты смогли дать на него ответ. Если вы знаете как решить проблему другого человека, пожалуйста, подскажите ему :)


