
Варочная панель Teka IZ 6420 LONDON BRICK - инструкция пользователя по применению, эксплуатации и установке на русском языке. Мы надеемся, она поможет вам решить возникшие у вас вопросы при эксплуатации техники.
Если остались вопросы, задайте их в комментариях после инструкции.
"Загружаем инструкцию", означает, что нужно подождать пока файл загрузится и можно будет его читать онлайн. Некоторые инструкции очень большие и время их появления зависит от вашей скорости интернета.


EN
27
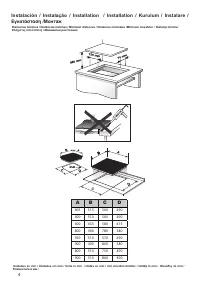
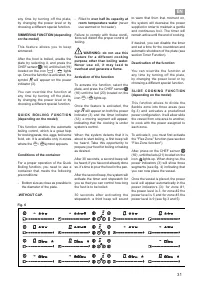
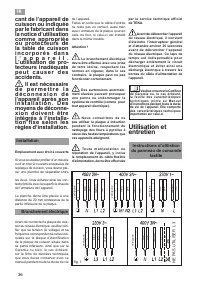
The board must be fitted 20 mm bene-
ath the under part of the stovetop.
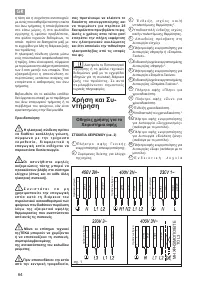
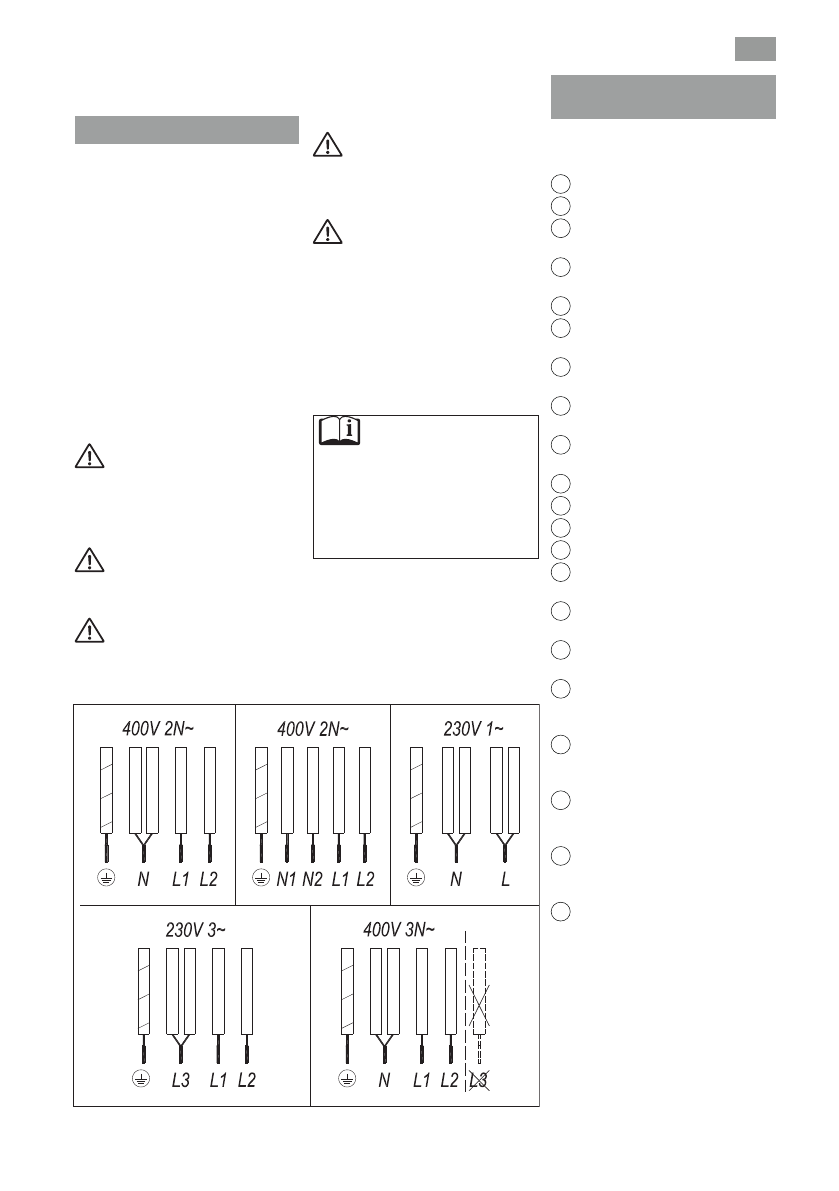
Electrical connection
Before you connect the stovetop to
the mains, check that the voltage
and frequency match those specified
on the stovetop nameplate, which is
underneath it, and on the Guarantee
Sheet, or if applicable on the technical
data sheet, which you must keep
together with this manual throughout
the product’s service life.
Ensure that the inlet cable does not
come into contact with the induction
top housing or the oven housing, if it
is installed in the same unit.
Warning:
The electrical connection
m u s t b e p r o p e r l y g r o u n d e d ,
f o l l o w i n g c u r r e n t l e g i s l a t i o n ,
otherwise the induction hob may
malfunction.
Unusually high power surges
can damage the control system (like
with any electrical appliance).
It is advised to refrain from
using the induction hob during the
pyrolytic cleaning function in the
case of pyrolytic ovens, due to the
high temperature that this type of
device attains.
Only the TEKA official techni-
cal service can handle or repair the
appliance, including replacement
of the power cable.
Before disconnecting the hob
form the mains, we recommend
switching off the cutoff switch and
w a i t i n g f o r a p p r o x i m a t e l y
2 5
seconds before disconnecting from
the mains. This time is required to
allow for the complete discharge of
the electronic circuitry and thus
preclude the possibility of electric
shock from the cable terminals.
K e e p t h e G u a r a n t e e
C e r t i f i c a t e o r t h e t e c h n i c a l
data sheet together with the
instructions manual throughout
the product’s service life. These
contain important technical
information.
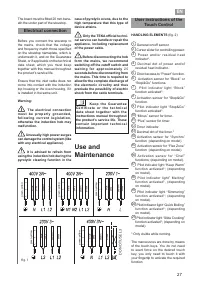
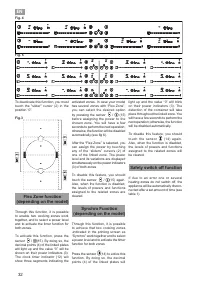
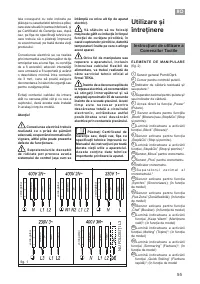
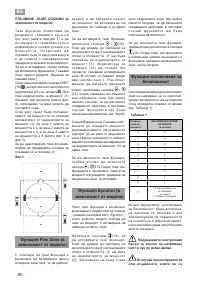
Use and
Maintenance
User instructions of the
Touch Control
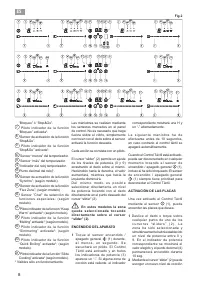
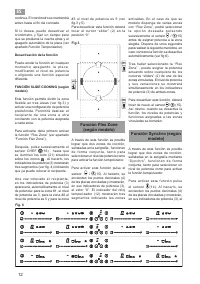
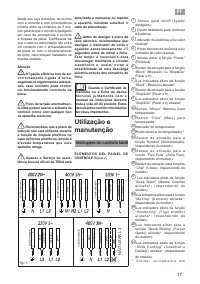
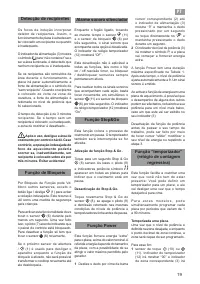
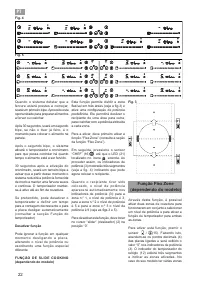
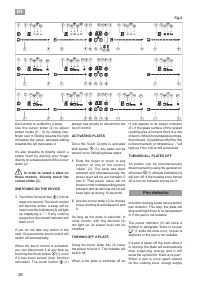
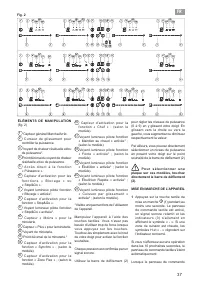
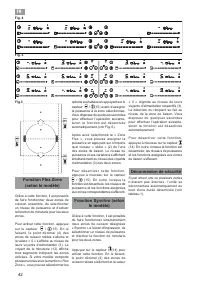
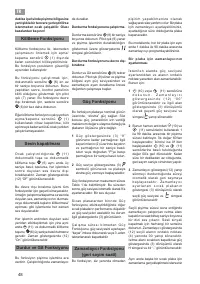
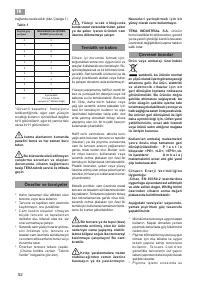
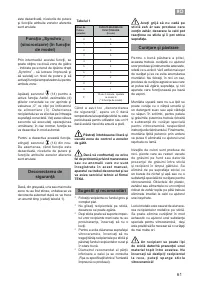
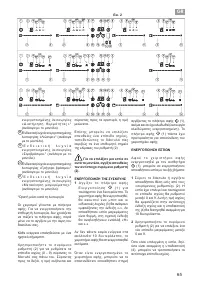
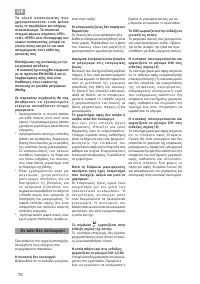
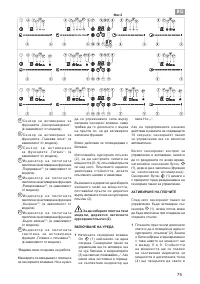
HANDLING ELEMENTS
(fig. 2)
1 General on/off sensor.
2
Cursor slider for controlling power.
3 Power and/or residual heat
indicator*.
4 Decimal dot of power and/of
residual heat indicator.
5 Direct access to “Power” function.
6 Activation sensor for “Block” or
“Stop&Go” functions.
7 Pilot indicator light “Block”
function activated*.
8 Activation sensor for “Stop&Go”
function.
9 Pilot indicator light “Stop&Go”
function activated*.
10 “Minus” sensor for timer.
11 “Plus” sensor for timer.
12
Timer indicator.
13 Decimal dot of the timer.*
14 Activation sensor for “Synchro”
function ;(depending on model).
15 Activation sensor for “Flex Zone”
function ;(depending on model).
16 Activation sensor for “Chef”
functions; (depending on model).
17 Pilot indicator light “Keep Warm”
function activated*; (depending
on model).
18 Pilot indicator light” Melting”
function activated*, (depending
on model).
19 Pilot indicator light “Simmering”
function activated*; (depending
on model).
20 Pilot indicator light “Quick Boiling”
function activated*; (depending
on model).
21 Pilot indicator light “Slide Cooking”
function activated*; (depending on
model).
* Only visible while running.
The manoeuvres are done by means
of the touch keys. You do not need
to exert force on the desired touch
key, you only need to touch it with
your fingertip to activate the required
function
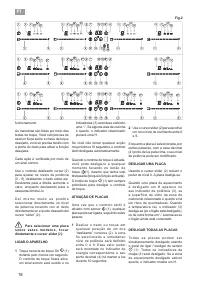
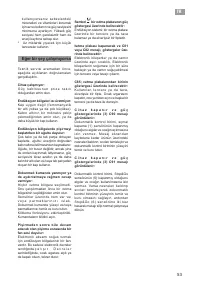
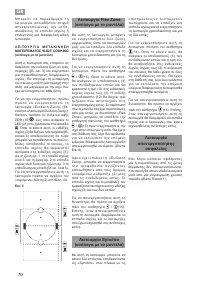
green-yellow
blue
brown
grey
black
green-yellow
blue
brown
grey
black
green-yellow
blue
brown
grey
black
green-yellow
blue
brown
grey
black
green-yellow
blue
brown
grey
black
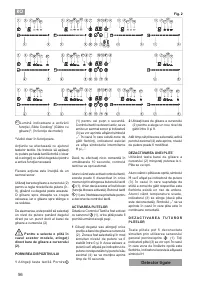
fig. 1
DO
NO
T
USE
L3
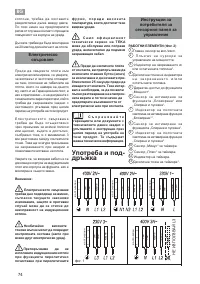
Характеристики

Остались вопросы?Не нашли свой ответ в руководстве или возникли другие проблемы? Задайте свой вопрос в форме ниже с подробным описанием вашей ситуации, чтобы другие люди и специалисты смогли дать на него ответ. Если вы знаете как решить проблему другого человека, пожалуйста, подскажите ему :)


