
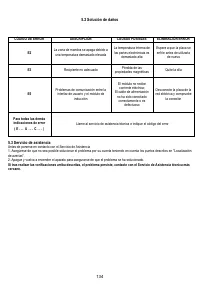
Варочная панель Elica NIKOLATESLA SWITCH BL/F/83 - инструкция пользователя по применению, эксплуатации и установке на русском языке. Мы надеемся, она поможет вам решить возникшие у вас вопросы при эксплуатации техники.
Если остались вопросы, задайте их в комментариях после инструкции.
"Загружаем инструкцию", означает, что нужно подождать пока файл загрузится и можно будет его читать онлайн. Некоторые инструкции очень большие и время их появления зависит от вашей скорости интернета.


60
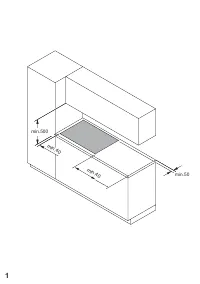
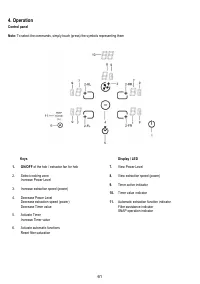
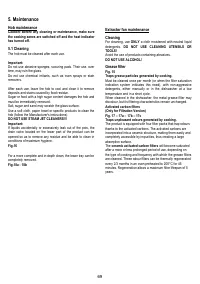
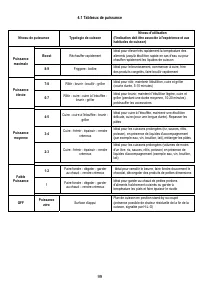
3. Installation
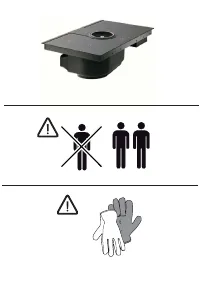
The electrical and mechanical installation must be
performed by qualified personnel.
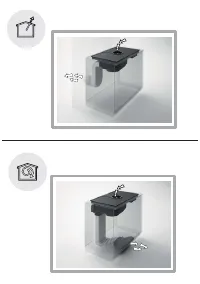
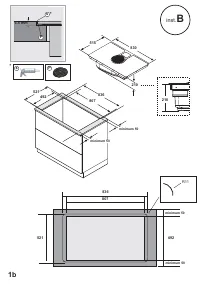
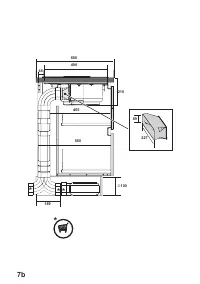
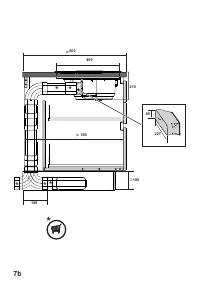
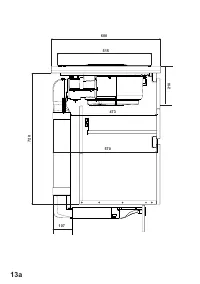
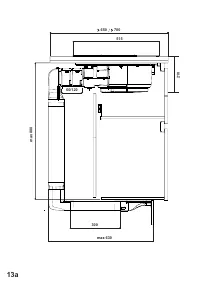
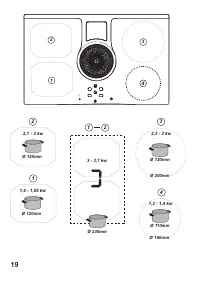
The electrical appliance is designed to be built-in to a 2-6 cm
thick worktop in the case of TOP installations; 2.5-6 cm in the
case of FLUSH installations.
The minimum clearance between the cooktop and wall must
be at least 5 cm at the front, at least 4 cm on the side and at
least 50 cm with respect to the wall units above.
NB = The suggested clearances are indicative: when
designing the spaces, follow the instructions of the
kitchen manufacturer.
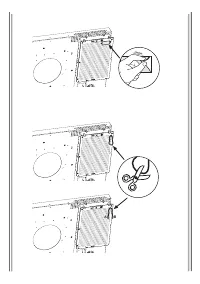
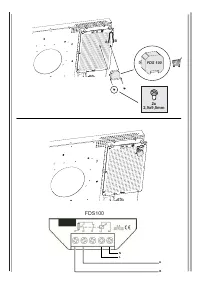
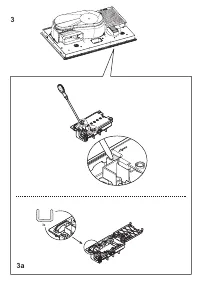
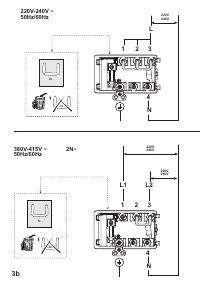
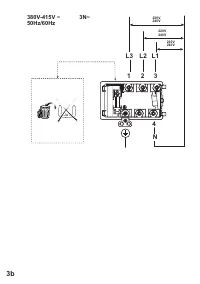
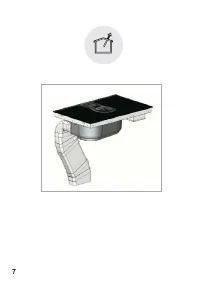
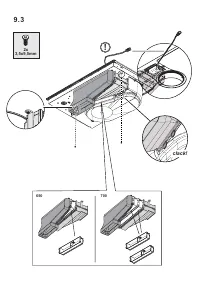
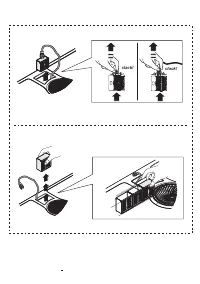
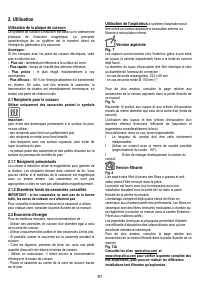
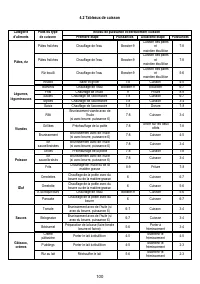
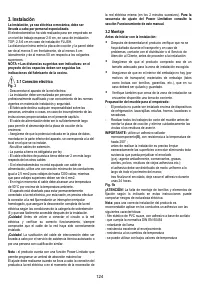
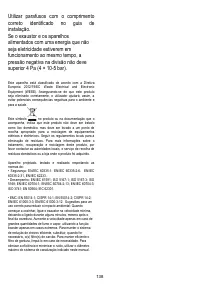
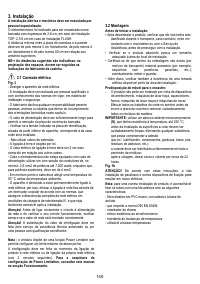
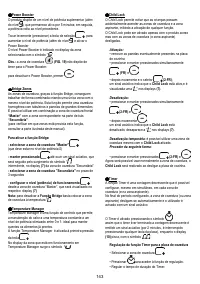
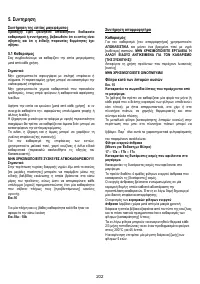
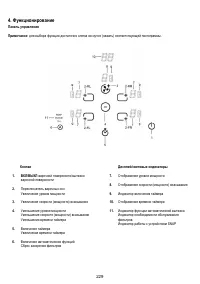
3.1 Electrical connection
Fig. 3
- Disconnect the device from the electrical network
-The installation must be performed by professionally qualified
personnel familiar with the applicable installation and safety
standards.
-The manufacturer declines any liability to people, animals or
things in the case of failure to follow the guidelines provided in
this chapter.
-The power cable must be long enough to allow removal of the
hob from the worktop
-Make sure that the voltage on the rating plate on the bottom
of the device corresponds to that of the house where it will be
installed.
-Do not use extension cords.
- Earthing is required by law
- The earth power cable must be 2cm longer than the other
cables
- If the household appliance is not equipped with a power
cable, use one with a minimum conductor diameter of 2.5
mm2 for power up to 7200 Watt; for higher power levels, the
diameter must be 4 mm2.
- At no point along the length of the cable must it reach a
temperature of 50° C above the room temperature.
- The device is intended to be permanently connected to the
electrical network, therefore, make the connection to the fixed
network via a standard omnipolar switch, which assures the
complete disconnection of the mains under category III over-
voltage conditions, and which is readily accessible after the
installation.
Caution!
Before reconnecting the circuit to the mains power
supply and checking its correct operation, always check that
the network cable has been correctly assembled.
Caution!
The interconnection cable must be replaced by
authorised customer service personnel or equally qualified
person.
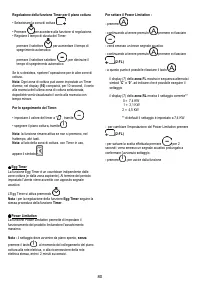
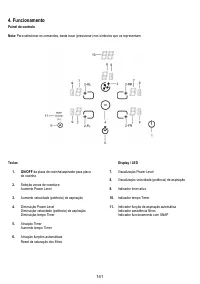
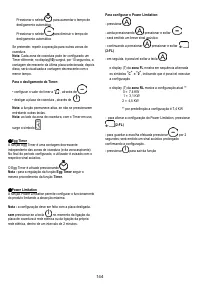
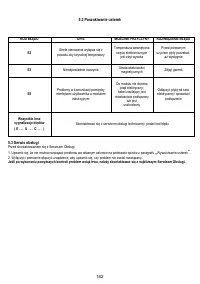
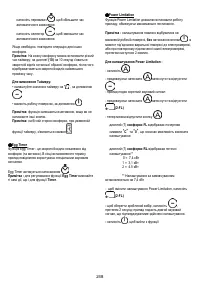
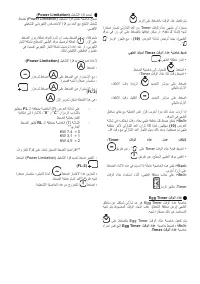
Note :
the product is equipped with a Power Limitator
function, which allows a maximum power limit to be set
The limit must be set at the time of the product's connection to
the electrical network or when the electrical network itself is
reconnected (within the following 2 minutes).
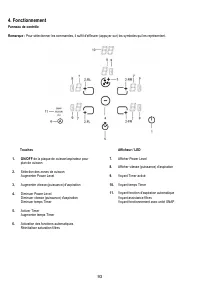
For the Power
Limitation setting sequence, see the Operation section of
this manual.
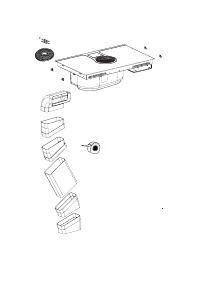
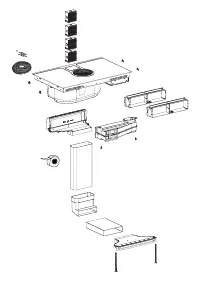
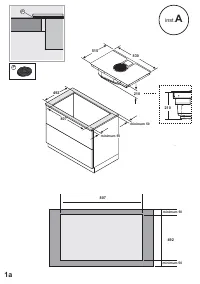
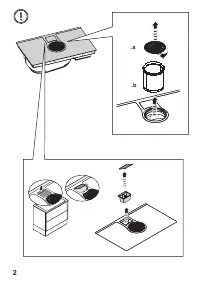
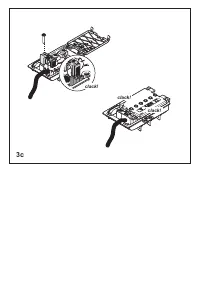
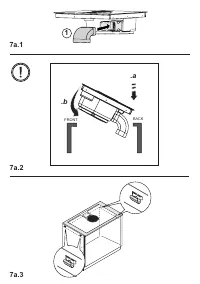
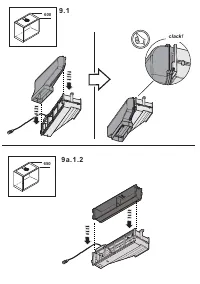
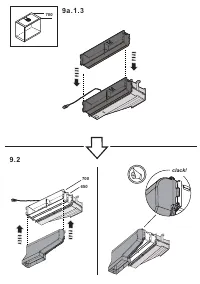
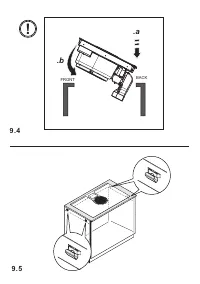
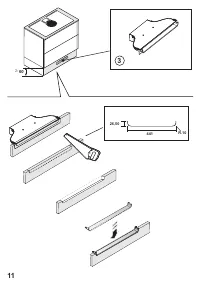
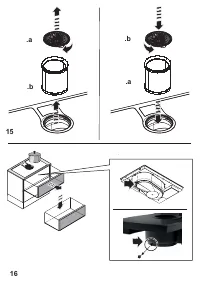
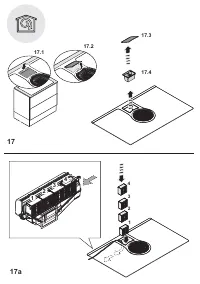
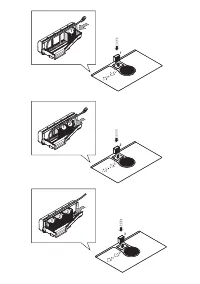
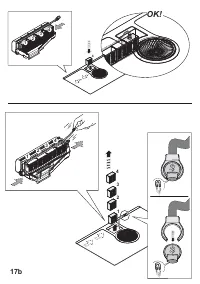
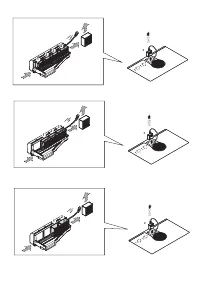
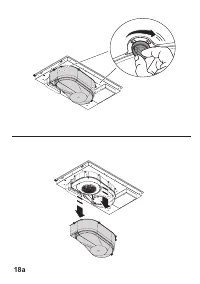
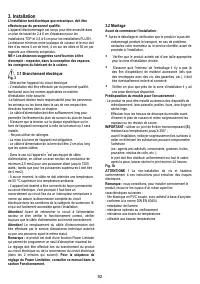
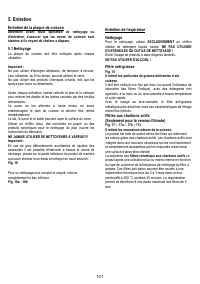
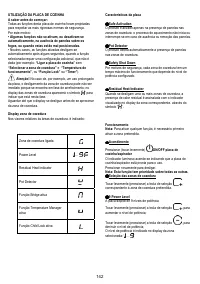
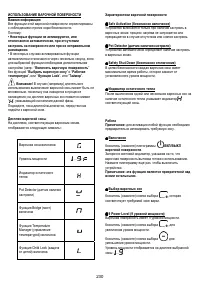
3.2 Mounting
Before starting the installation:
•
After unpacking the product, check that it has not been
damaged during transport and in the case of problems,
contact your dealer or Customer Service, before
proceeding with the installation.
•
Check that the product is the right size for the installation
location.
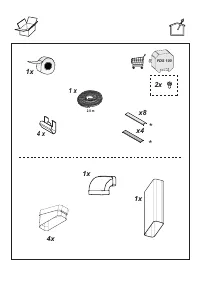
•
Check for accessories inside the packaging (placed there
for ease of transport) such as bags containing screws,
the warranty card, etc.. Remove them and keep them
safe.
•
Also check that there is a power socket near the
installation area
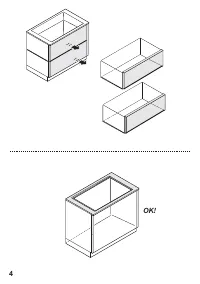
Preparing the cabinet for installation:
- The product cannot be installed above cooling appliances,
dishwashers, heaters, ovens, washing machines and
dryers.
- Cut the cabinet before inserting the hob and carefully
remove shavings or sawdust.
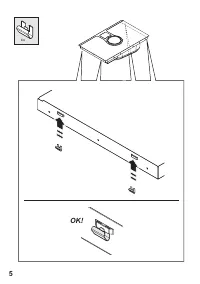
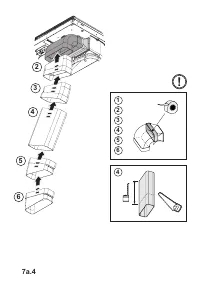
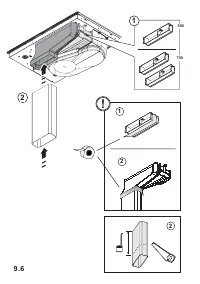
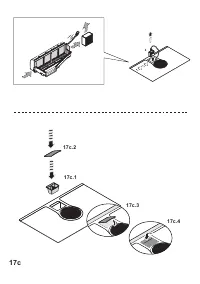
IMPORTANT:
use a single component adhesive sealant
(S)
, resistant against high temperatures up to 250°;
prior to installation, the surfaces that need to be glued
must be carefully cleaned, removing all substances that
may compromise adhesion
(e.g. release agents, preservatives, grease, oils, powders,
old adhesive residue, etc.);
the sealant must be evenly distributed along the entire
perimeter of the frame;
after gluing, leave to dry for approximately 24 hours.
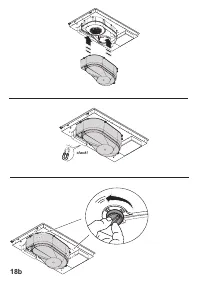
Fig. 1b
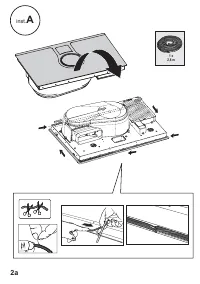
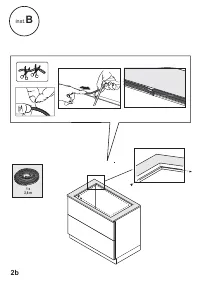
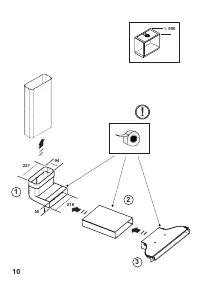
CAUTION!
Failure to install screws and fasteners in
accordance with these instructions may result in electrical
hazards.
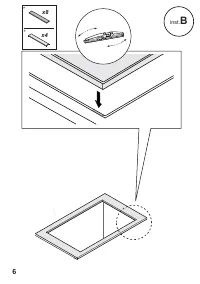
Note:
to ensure the correct installation of the product, it is
recommended to tape the pipes using an adhesive with the
following characteristics:
- soft elastic PVC film, with an acrylic-based adhesive
- which complies with DIN EN 60454 regulations
- flame retardant
- excellent resistance against wear
- resistant against temperature fluctuations
- can be used in low temperatures
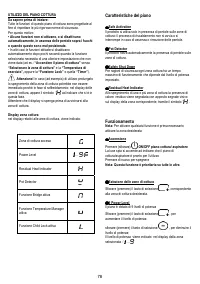
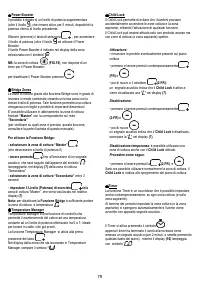
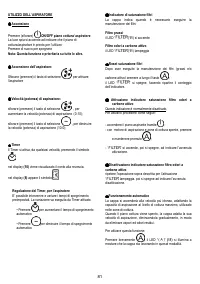
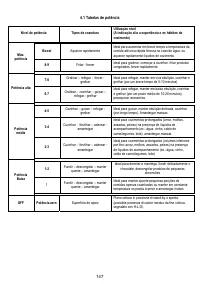
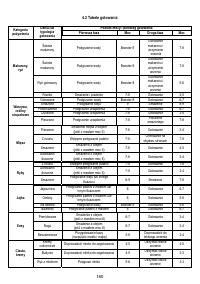
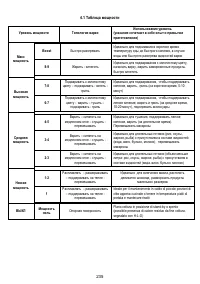
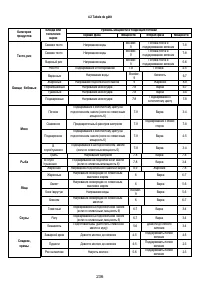
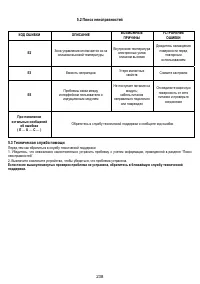
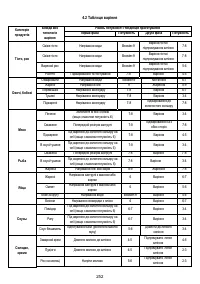
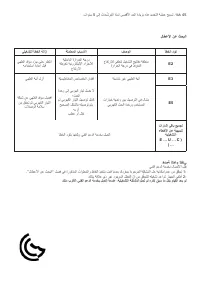
Характеристики

Остались вопросы?Не нашли свой ответ в руководстве или возникли другие проблемы? Задайте свой вопрос в форме ниже с подробным описанием вашей ситуации, чтобы другие люди и специалисты смогли дать на него ответ. Если вы знаете как решить проблему другого человека, пожалуйста, подскажите ему :)


