
Триммеры Makita DUR192LZ - инструкция пользователя по применению, эксплуатации и установке на русском языке. Мы надеемся, она поможет вам решить возникшие у вас вопросы при эксплуатации техники.
Если остались вопросы, задайте их в комментариях после инструкции.
"Загружаем инструкцию", означает, что нужно подождать пока файл загрузится и можно будет его читать онлайн. Некоторые инструкции очень большие и время их появления зависит от вашей скорости интернета.


17 ENGLISH
2.
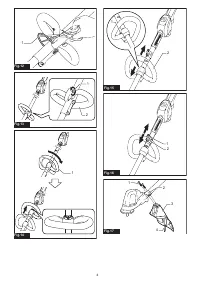
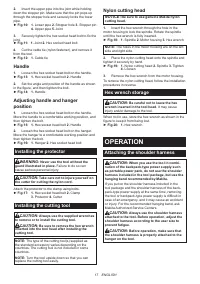
Insert the upper pipe into the joint while holding
down the stopper pin. Make sure that the pin pops up
through the stopper hole and securely locks the lower
pipe.
►
Fig.10:
1.
Lower pipe
2.
Stopper hole
3.
Stopper pin
4.
Upper pipe
5.
Joint
3.
Securely tighten the hex socket head bolt to fix the
joint.
►
Fig.11:
1.
Joint
2.
Hex socket head bolt
4.
Cut the cable tie (nylon fastener), and remove it
from the tool.
►
Fig.12:
1.
Cable tie
Handle
1.
Loosen the hex socket head bolt on the handle.
►
Fig.13:
1.
Hex socket head bolt
2.
Handle
2.
Set the angle and position of the handle as shown
in the figure, and then tighten the bolt.
►
Fig.14:
1.
Handle
Adjusting handle and hanger
position
1.
Loosen the hex socket head bolt on the handle.
Move the handle to a comfortable working position, and
then tighten the bolt.
►
Fig.15:
1.
Hex socket head bolt
2.
Handle
2.
Loosen the hex socket head bolt on the hanger.
Move the hanger to a comfortable working position and
then tighten the bolt.
►
Fig.16:
1.
Hanger
2.
Hex socket head bolt
Installing the protector
WARNING:
Never use the tool without the
guard illustrated in place.
Failure to do so can
cause serious personal injury.
CAUTION:
Take care not to injure yourself on
the cutter for cutting the nylon cord.
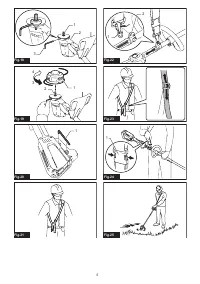
Attach the protector to the clamp using bolts.
►
Fig.17:
1.
Hex socket head bolt
2.
Clamp
3.
Protector
4.
Cutter
Installing the cutting tool
CAUTION:
Always use the supplied wrenches
to remove or to install the cutting tool.
CAUTION:
Be sure to remove the hex wrench
inserted into the tool head after installing the
cutting tool.
NOTE:
The type of the cutting tool(s) supplied as
the standard accessory varies depending on the
countries. The cutting tool is not included in some
countries.
NOTE:
Turn the tool upside down so that you can
replace the cutting tool easily.
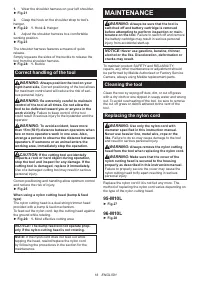
Nylon cutting head
NOTICE:
Be sure to use genuine Makita nylon
cutting head.
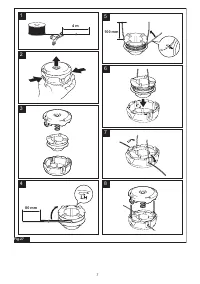
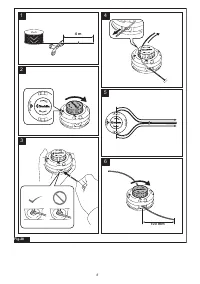
1.
Insert the hex wrench through the hole in the
motor housing to lock the spindle. Rotate the spindle
until the hex wrench is fully inserted.
►
Fig.18:
1.
Spindle
2.
Motor housing
3.
Hex wrench
NOTE:
The holes in the motor housing are on the left
side and right side.
2.
Place the nylon cutting head onto the spindle and
tighten it securely by hand.
►
Fig.19:
1.
Nylon cutting head
2.
Spindle
3.
Tighten
4.
Loosen
3.
Remove the hex wrench from the motor housing.
To remove the nylon cutting head, follow the installation
procedures in reverse.
Hex wrench storage
CAUTION:
Be careful not to leave the hex
wrench inserted in the tool head.
It may cause
injury and/or damage to the tool.
When not in use, store the hex wrench as shown in the
figure to keep it from being lost.
►
Fig.20:
1.
Hex wrench
OPERATION
Attaching the shoulder harness
CAUTION:
When you use the tool in combi-
nation of the backpack-type power supply such
as portable power pack, do not use the shoulder
harness included in the tool package, but use the
hanging band recommended by Makita.
If you put on the shoulder harness included in the
tool package and the shoulder harness of the back-
pack-type power supply at the same time, removing
the tool or backpack-type power supply is difficult in
case of an emergency, and it may cause an accident
or injury. For the recommended hanging band, ask
Makita Authorized Service Centers.
CAUTION:
Always use the shoulder harness
attached to the tool. Before operation, adjust the
shoulder harness according to the user size to
prevent fatigue.
CAUTION:
Before operation, make sure that
the shoulder harness is properly attached to the
hanger on the tool.
Содержание
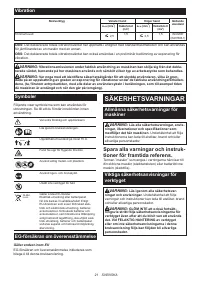
- 98 Вибрация; Декларация о соответствии ЕС; МЕРЫ БЕЗОПАСНОСТИ; Общие рекомендации по технике
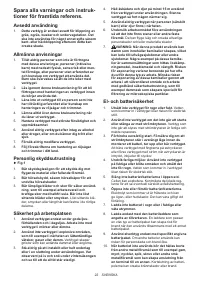
- 99 Важные правила техники
- 100 Электробезопасность
- 101 Режущие узлы
- 103 СОХРАНИТЕ ДАННЫЕ
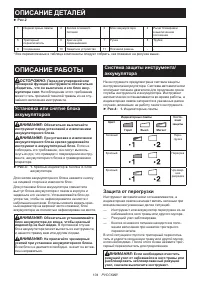
- 104 ОПИСАНИЕ ДЕТАЛЕЙ; Установка или снятие блока
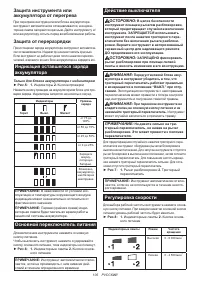
- 105 Защита инструмента или; Основной переключатель питания
- 106 Электрический тормоз; СБОРКА; Установка основных компонентов
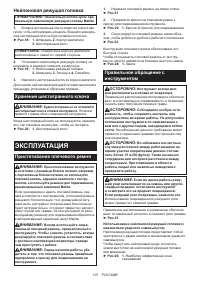
- 107 Нейлоновая режущая головка; ЭКСПЛУАТАЦИЯ; Пристегивание плечевого ремня
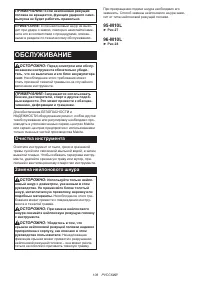
- 108 ОБСЛУЖИВАНИЕ; Очистка инструмента
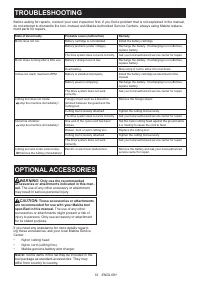
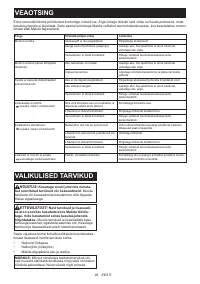
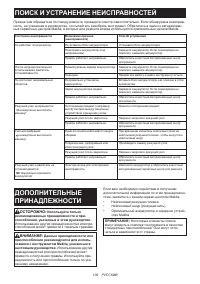
- 109 ПОИСК И УСТРАНЕНИЕ НЕИСПРАВНОСТЕЙ; ДОПОЛНИТЕЛЬНЫЕ
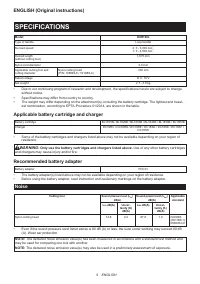
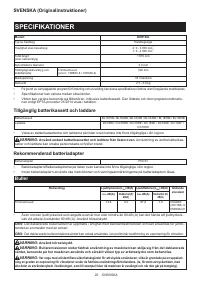
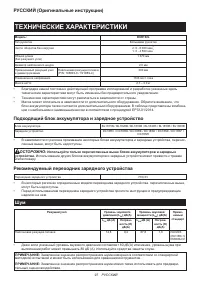
Характеристики

Остались вопросы?Не нашли свой ответ в руководстве или возникли другие проблемы? Задайте свой вопрос в форме ниже с подробным описанием вашей ситуации, чтобы другие люди и специалисты смогли дать на него ответ. Если вы знаете как решить проблему другого человека, пожалуйста, подскажите ему :)


Здравствуйте Подскажите пожалуйста, не включается, пищит, аккумулятор заряжен, не понимаю в чём причина??? Макита DUR 192L
Пиликает и всë.