
Триммеры Makita DUR192LZ - инструкция пользователя по применению, эксплуатации и установке на русском языке. Мы надеемся, она поможет вам решить возникшие у вас вопросы при эксплуатации техники.
Если остались вопросы, задайте их в комментариях после инструкции.
"Загружаем инструкцию", означает, что нужно подождать пока файл загрузится и можно будет его читать онлайн. Некоторые инструкции очень большие и время их появления зависит от вашей скорости интернета.


16 ENGLISH
NOTE:
Depending on the conditions of use and the
ambient temperature, the indication may differ slightly
from the actual capacity.
NOTE:
The first (far left) indicator lamp will brink
when the battery protection system works.
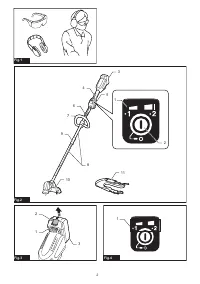
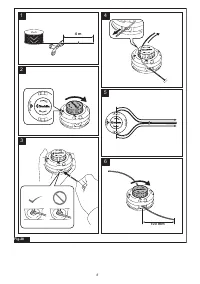
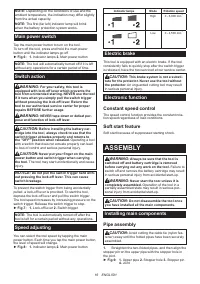
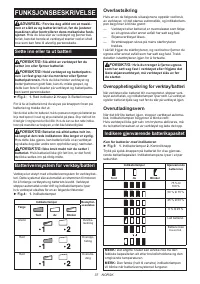
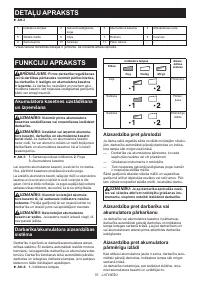
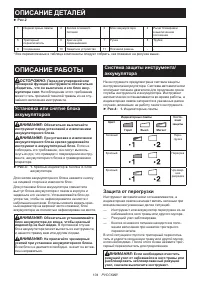
Main power switch
Tap the main power button to turn on the tool.
To turn off the tool, press and hold the main power
button until the indicator lamps go off.
►
Fig.6:
1.
Indicator lamps
2.
Main power button
NOTE:
The tool will automatically turned off if it is left
without any operations for a certain period of time.
Switch action
WARNING:
For your safety, this tool is
equipped with lock-off lever which prevents the
tool from unintended starting. NEVER use the tool
if it runs when you simply pull the switch trigger
without pressing the lock-off lever. Return the
tool to our authorized service center for proper
repairs BEFORE further usage.
WARNING:
NEVER tape down or defeat pur-
pose and function of lock-off lever.
CAUTION:
Before installing the battery car-
tridge into the tool, always check to see that the
switch trigger actuates properly and returns to
the "OFF" position when released.
Operating a tool
with a switch that does not actuate properly can lead
to loss of control and serious personal injury.
CAUTION:
Never put your finger on the main
power button and switch trigger when carrying
the tool.
The tool may start unintentionally and cause
injury.
NOTICE:
Do not pull the switch trigger hard with-
out pressing the lock-off lever. This can cause
switch breakage.
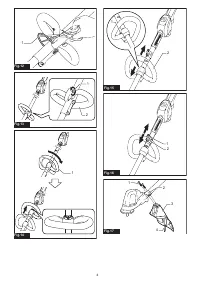
To prevent the switch trigger from being accidentally
pulled, a lock-off lever is provided. To start the tool,
depress the lock-off lever and pull the switch trigger.
The tool speed increases by increasing pressure on the
switch trigger. Release the switch trigger to stop.
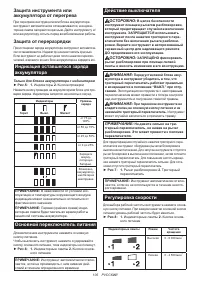
►
Fig.7:
1.
Lock-off lever
2.
Switch trigger
NOTE:
The tool is automatically turned off after the
tool is left for a certain period without any operations.
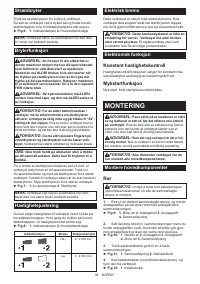
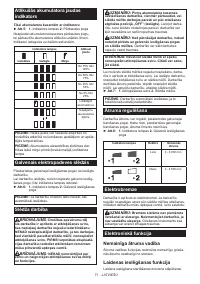
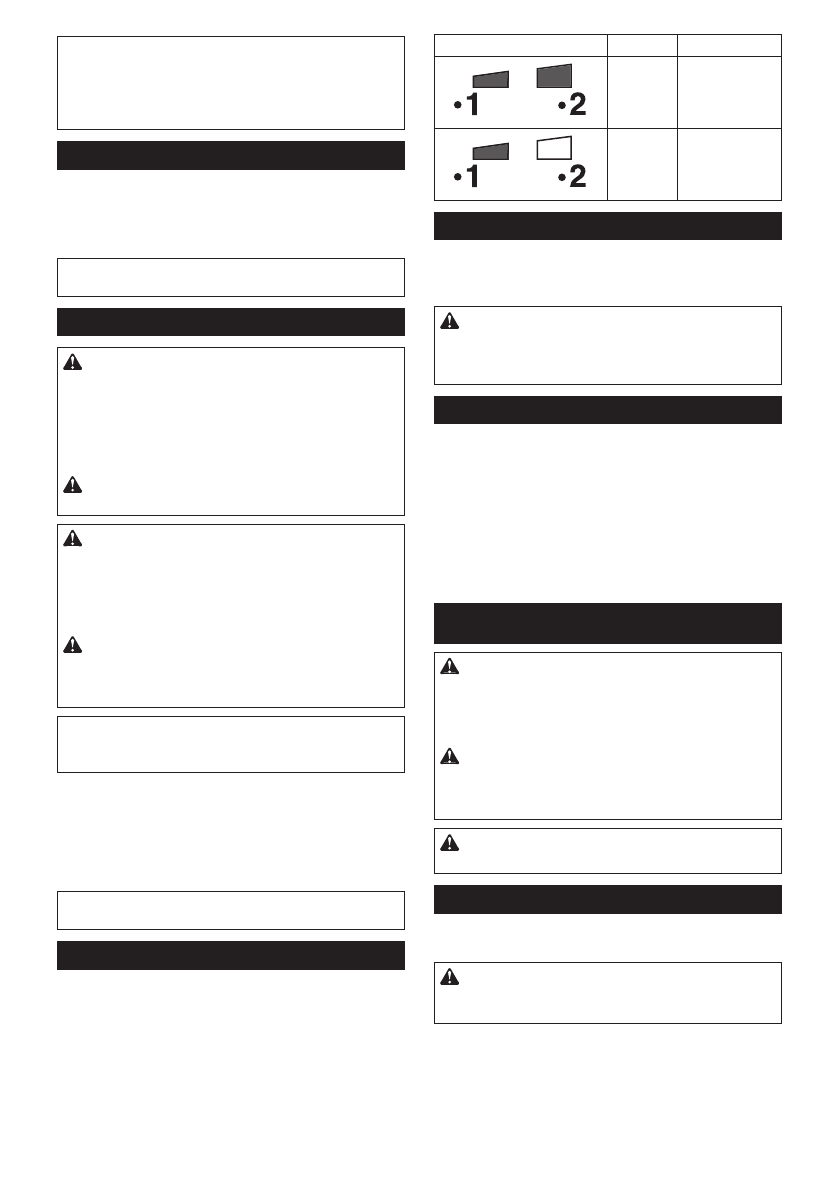
Speed adjusting
You can select the tool speed by tapping the main
power button. Each time you tap the main power button,
the level of speed will change.
►
Fig.8:
1.
Indicator lamps
2.
Main power button
Indicator lamps
Mode
Rotation speed
High
0 - 6,000 min
-1
Low
0 - 4,500 min
-1
Electric brake
This tool is equipped with an electric brake. If the tool
consistently fails to quickly stop after the switch trigger
is released, have the tool serviced at our service center.
CAUTION:
This brake system is not a substi-
tute for the protector. Never use the tool without
the protector.
An unguarded cutting tool may result
in serious personal injury.
Electronic function
Constant speed control
The speed control function provides the constant rota-
tion speed regardless of load conditions.
Soft start feature
Soft start because of suppressed starting shock.
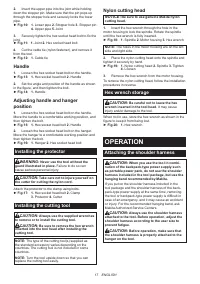
ASSEMBLY
WARNING:
Always be sure that the tool is
switched off and battery cartridge is removed
before carrying out any work on the tool.
Failure to
switch off and remove the battery cartridge may result
in serious personal injury from accidental start-up.
WARNING:
Never start the tool unless it is
completely assembled.
Operation of the tool in a
partially assembled state may result in serious per-
sonal injury from accidental start-up.
CAUTION:
Do not disassemble the tool once
you have installed all the main components.
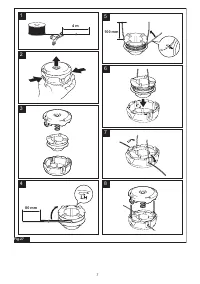
Installing main components
Pipe assembly
CAUTION:
Avoid cutting the cable tie (nylon fas-
tener) away until the folded pipes have been securely
assembled.
1.
Straighten the two-folded pipes, and then align the
stopper pin on the upper pipe with the stopper hole in
the joint.
►
Fig.9:
1.
Upper pipe
2.
Stopper hole
3.
Stopper pin
4.
Joint
Содержание
- 98 Вибрация; Декларация о соответствии ЕС; МЕРЫ БЕЗОПАСНОСТИ; Общие рекомендации по технике
- 99 Важные правила техники
- 100 Электробезопасность
- 101 Режущие узлы
- 103 СОХРАНИТЕ ДАННЫЕ
- 104 ОПИСАНИЕ ДЕТАЛЕЙ; Установка или снятие блока
- 105 Защита инструмента или; Основной переключатель питания
- 106 Электрический тормоз; СБОРКА; Установка основных компонентов
- 107 Нейлоновая режущая головка; ЭКСПЛУАТАЦИЯ; Пристегивание плечевого ремня
- 108 ОБСЛУЖИВАНИЕ; Очистка инструмента
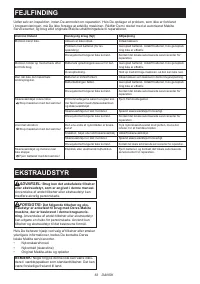
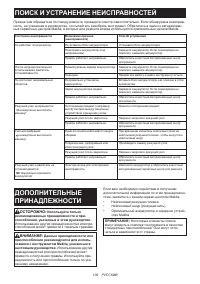
- 109 ПОИСК И УСТРАНЕНИЕ НЕИСПРАВНОСТЕЙ; ДОПОЛНИТЕЛЬНЫЕ
Характеристики

Остались вопросы?Не нашли свой ответ в руководстве или возникли другие проблемы? Задайте свой вопрос в форме ниже с подробным описанием вашей ситуации, чтобы другие люди и специалисты смогли дать на него ответ. Если вы знаете как решить проблему другого человека, пожалуйста, подскажите ему :)


Здравствуйте Подскажите пожалуйста, не включается, пищит, аккумулятор заряжен, не понимаю в чём причина??? Макита DUR 192L
Пиликает и всë.