Тонометры Microlife BP 3BTO-AP - инструкция пользователя по применению, эксплуатации и установке на русском языке. Мы надеемся, она поможет вам решить возникшие у вас вопросы при эксплуатации техники.
Если остались вопросы, задайте их в комментариях после инструкции.
"Загружаем инструкцию", означает, что нужно подождать пока файл загрузится и можно будет его читать онлайн. Некоторые инструкции очень большие и время их появления зависит от вашей скорости интернета.


7
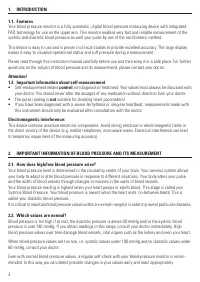
measurement. Use a cushion for support if necessary.
• If the arm artery lies considerably lower or higher than the heart, an false reading will be obtained.
Each 15 cm difference in height results in a measurement error of 10 mmHg!
• Cuffs that are too narrow or too short result in false measurement values. Selecting the correct cuff is
of extraordinary importance. The cuff size is dependent upon the circumference of the arm (measured in
the centre). The permissible range is printed on the cuff. If this is not suitable for your use, please
contact your dealer.
Note: Only use clinically approved Microlife Cuffs!
• A loose cuff or a sideways protruding air pocket causes false measurement values.
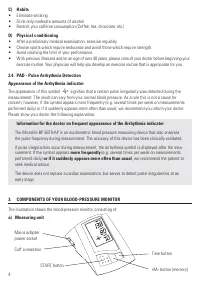
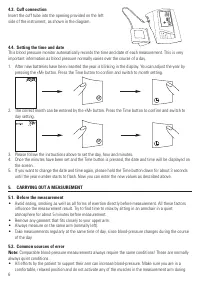
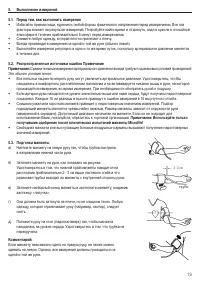
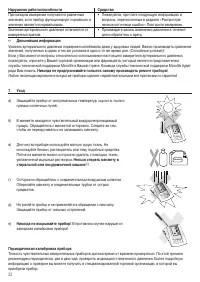
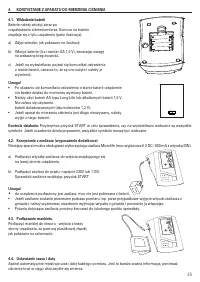
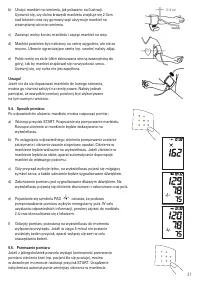
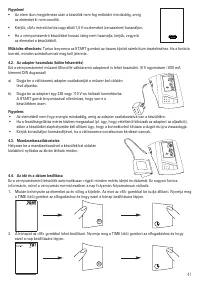
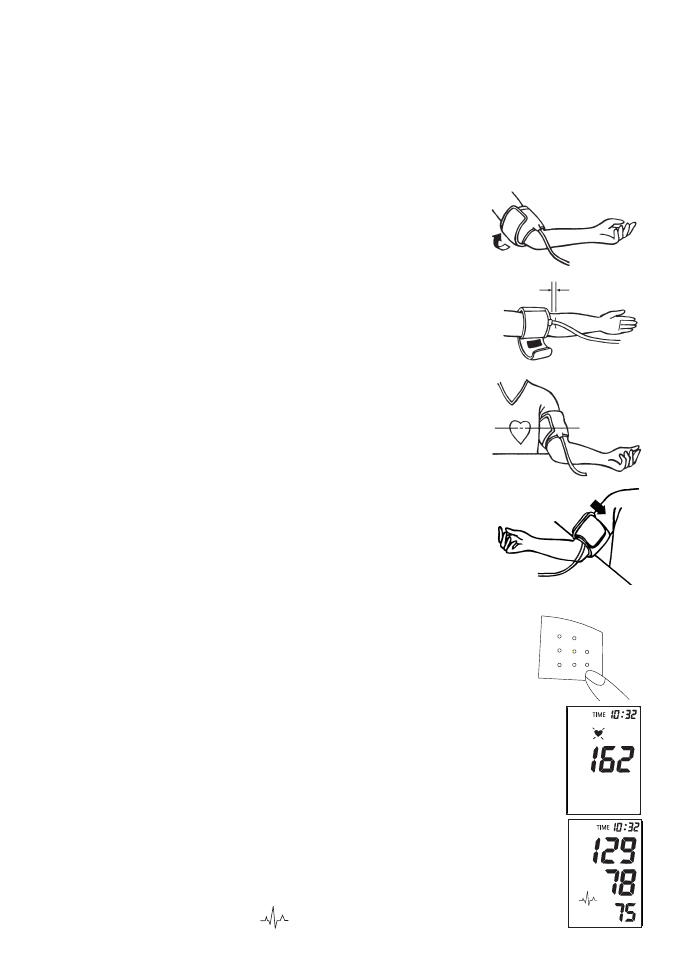
5.3. Fitting the cuff
a) Push the cuff over the left upper arm so that the tube points in
the direction of the lower arm.
b) Lay the cuff on the arm as illustrated. Make certain that the
lower edge of the cuff lies approximately 2 to 3 cm above the
elbow and that the rubber tube leaves the cuff on the inner side
of the arm.
c) Tighten the free end of the cuff and close the cuff with the
closer.
d) The cuff should be snug on your upper arm, but not too tight.
Any piece of clothing which restricts the arm (e.g. a pullover)
must be taken off.
e) Lay your arm on a table (palm upwards) so that the cuff is at the
same height as the heart. Do not bend the tube!
Comment
:
If it is not possible to fit the cuff to your left arm, it can also be
placed on the right. However, all measurements should be made
using the same arm
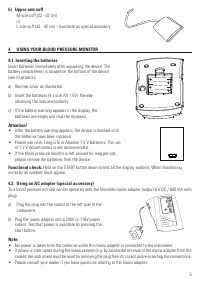
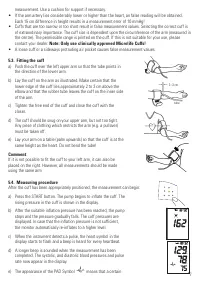
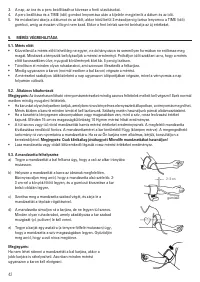
5.4. Measuring procedure
After the cuff has been appropriately positioned, the measurement can begin:
a) Press the START button. The pump begins to inflate the cuff. The
rising pressure in the cuff is shown in the display.
b) After the suitable inflation pressure has been reached, the pump
stops and the pressure gradually falls. The cuff pressures are
displayed. In case that the inflation pressure is not sufficient,
the monitor automatically re-inflates to a higher level.
c) When the instrument detects a pulse, the heart symbol in the
display starts to flash and a beep is heard for every heartbeat.
d) A longer beep is sounded when the measurement has been
completed. The systolic, and diastolic blood pressures and pulse
rate now appear in the display.
e) The appearance of the PAD Symbol
means that a certain
2–3 cm
tube
mmHg
mmHg
Содержание
- 2 Automatic Blood Pressure Monitor; Руководство по пользованию; Automatyczny ciśnieniomierz krwi; Instrukcja używania; Automata vérnyomásmérő; Használati útmutató
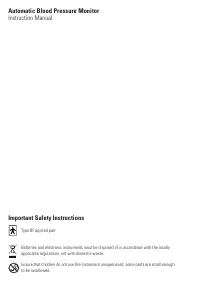
- 15 Важные указания по безопасности; Класс защиты BF
- 17 Введение; Помните о следующем: самостоятельные измерения выполняются для; контроля; , а не для постановки; не; предназначен для контроля частоты сердечного ритма!; Электромагнитные помехи.
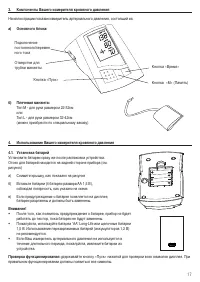
- 20 Снимите крышку, как показано на рисунке; Проверка функционирования:; правильном функционировании должны появиться все символы.
- 21 подтверждения и перехода к установке числа.
- 22 Выполнение измерений; Снимите любую одежду, которая плотно прилегает к плечу.; Примечание: Используйте только
- 24 показания, удалите батареи и установите новые

