
Телевизоры Sharp 2T-C42BD1X - инструкция пользователя по применению, эксплуатации и установке на русском языке. Мы надеемся, она поможет вам решить возникшие у вас вопросы при эксплуатации техники.
Если остались вопросы, задайте их в комментариях после инструкции.
"Загружаем инструкцию", означает, что нужно подождать пока файл загрузится и можно будет его читать онлайн. Некоторые инструкции очень большие и время их появления зависит от вашей скорости интернета.

7
8
Initial setup (Continued)
Regarding the headphone jack
• Use headphones with a stereo mini plug (
3.5 mm).
• Be sure to unplug headphones from the jack when they
are not in use.
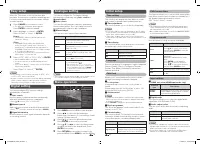
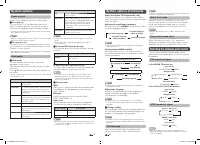
Volume display when headphones are plugged in
30
CAUTION
• AUDIO output terminal is also used for headphones.
Reduce the volume before using headphones.
Overwhelming sound may damage your hearing.
H
Colour system
You can change the colour system to one that is
compatible with the image on the screen. (Auto,
PAL, SECAM, NTSC 3.58, NTSC 4.43, PAL-60)
NOTE
• If “Auto” is selected, colour system for each channel is
automatically set. If an image does not display clearly,
select another colour system (e.g. PAL, NTSC 4.43).
• “Colour system” is selectable only when inputting a
composite signal.
H
Link setup
Link operation
Using the HDMI CEC (Consumer Electronics Control)
protocol, with Link operation you can interactively
operate compatible system equipment (e.g. DVD),
by connecting the link operation-compatible devices
with HDMI-certifi ed cables to the TV.
Link operation allows you to operate the HDMI-
connected equipment and the TV by using a single
remote control unit. (Off, On)
Auto power on
If this is activated, the one touch play function
is enabled. While the TV is in standby mode, it
automatically turns on and plays back the image
from the HDMI source. (Off, On)
Speaker select
You can select to listen to the TV sound only from
the LINK-compatible audio system.
(Internal speakers, External device)
Audio return channel
If this function is set to “Auto”, the TV can send
audio data for video content shown on the TV
to a connected audio device with just one ARC-
compatible cable. Using this function eliminates the
need to use a separate digital or analogue audio
cable. (Off, Auto)
Connection for using “Audio return channel”
You need to use ARC-compatible cables/devices
and connect to the INPUT 1 terminal to activate this
function.
NOTE
• The ARC (Audio return channel) function works only when
using the INPUT 1 terminal.
• When you use an audio system compatible with the ARC
function of the TV, you do not need to connect an optical
audio cable to the TV.
H
Reset
If complex adjustments are made and the settings
cannot be restored to normal, you can reset the
settings to the factory preset values.
NOTE
• If you execute “Reset”, all the settings such as “Picture
settings”, “Audio settings” and “Initial setup” will be reset
to the factory preset values.
Information
Identifi cation
You can check the current version of the software on
the screen.
Software update
This is used to upgrade the system software to
enhance the TV functions.
H
Manual update
Updates the software using a USB memory device
containing the update fi le.
H
Auto update setting
OAD update
• This function is for automatically download the
data for the version update software over digital
broadcasts when the “OAD update” is set to “On”.
• To download, follow the instructions when the
download message appears during a digital
broadcast.
• Once the software upgrade is done, the TV will
automatically go to standby state with Red LED.
OAD scan
• This function is for manually download the data for
the version update software over digital broadcasts.
CAUTION
• Do not disconnect the AC cord when the software
upgrade is in progress, as this may cause the
upgrade to fail. If problem arises ask a qualifi ed
service personnel before the software upgrade
period expires.
Software license
You can read the software license on the screen.
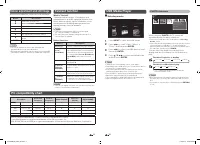
Picture settings
Selecting a preset AV mode
“AV mode” gives you several viewing options to
choose from to best match the system environment,
which can vary due to factors like room-brightness,
type of programme watched or the type of image
input from external equipment.
Selected item
Description
STANDARD
For a highly defi ned image in a normally
bright room.
MOVIE
For a movie.
PC
For PC (Available only when inputting an
HDMI or PC signal).
USER
Allows you to customise settings as
desired. You can set the mode for each
input source.
DYNAMIC
For a clear-cut image emphasising high
contrast for sports viewing.
DYNAMIC
(Fixed)
Changes the image and sound settings
to the factory preset values. No
adjustments are allowed.
COMFORT
MODE
Reduce the blue light of the TV.
SUPER ECO
Reduce the backlight brightness.
NOTE
• You can select a different AV mode item for each input
mode. (For example, select STANDARD for TV input and
DYNAMIC for VIDEO input.)
Adjustment items
Selected item
c
button
d
button
Backlight
The screen dims
The screen
brightens
Contrast
For less contrast
For more contrast
Brightness
For less brightness For more brightness
Colour
For less colour
intensity
For more colour
intensity
Tint
Skin tones become
reddish
Skin tones become
greenish
Sharpness
For less sharpness
For more sharpness
Advanced
This TV provides various advanced functions for
optimising the picture quality.
H
Digital noise reduction
Reduces noise on screen and produces a clearer
video image. (Off, Low, Medium, High, Auto)
H
Eagle View*
“Eagle View” technology produces a sharp picture
from the original moving picture. (Off, On)
H
AquoMotion Lite*
“AquoMotion Lite” technology provides superior
solutions for display picture quality removing motion
blur. (Off, High, Advance)
NOTE
*
This effect is greater on fast moving images.
*
This function will have no effect in the following cases.
1) The type of signal received is a PC signal.
2) An OSD is being displayed.
3) Teletext is activated.
*
If images appear blurred or fl ickering, set to “Off”.
• “Picture settings” cannot be changed during
“DYNAMIC (Fixed)” mode.
• For resetting all “Picture settings” items to factory preset
values, press
a
/
b
to select “Reset”, press
ENTER
, press
a
/
b
to select “Yes”, and then press
ENTER
.
Audio settings
You can adjust the sound quality to your preference
with the following settings.
Selected item
c
button
d
button
Treble
For weaker treble
For stronger treble
Bass
For weaker bass
For stronger bass
Balance
Decrease audio
from the right
speaker
Decrease audio
from the left
speaker
H
Surround
The surround function produces surround effect from
the speakers. (Off, On)
H
Bass enhancer
This function allows you to enjoy bass-enhanced
sound.
Selected item
Description
On
Bass enhancer function is on.
Off
Outputs the normal sound.
H
Auto volume
Different sound sources, fairly often do not have the
same volume level, for example the changing from
movie to the advertisements. Auto volume solves this
problem and equalises the volume levels. (Off, On)
NOTE
• For resetting all “Audio setting” items to factory preset
values, press
a
/
b
to select “Reset”, press
ENTER
, press
a
/
b
to select “Yes”, and then press
ENTER
.
2T-C42BD1X_H264_EN.indd 4
2T-C42BD1X_H264_EN.indd 4
7/12/2019 10:35:25 AM
7/12/2019 10:35:25 AM
Характеристики

Остались вопросы?Не нашли свой ответ в руководстве или возникли другие проблемы? Задайте свой вопрос в форме ниже с подробным описанием вашей ситуации, чтобы другие люди и специалисты смогли дать на него ответ. Если вы знаете как решить проблему другого человека, пожалуйста, подскажите ему :)


