Телевизоры кинескопные Sony KV-29FQ85K - инструкция пользователя по применению, эксплуатации и установке на русском языке. Мы надеемся, она поможет вам решить возникшие у вас вопросы при эксплуатации техники.
Если остались вопросы, задайте их в комментариях после инструкции.
"Загружаем инструкцию", означает, что нужно подождать пока файл загрузится и можно будет его читать онлайн. Некоторые инструкции очень большие и время их появления зависит от вашей скорости интернета.


17
GB
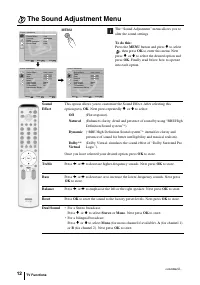
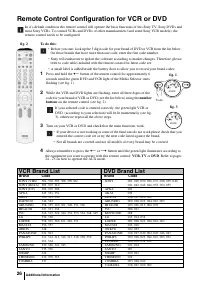
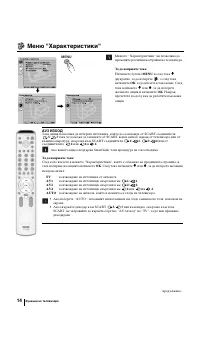
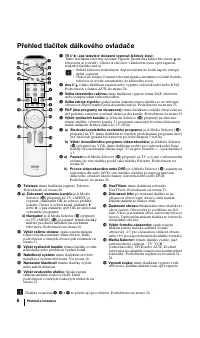
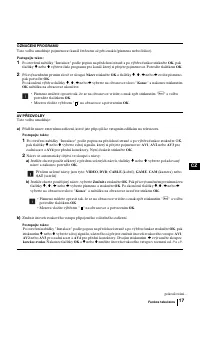
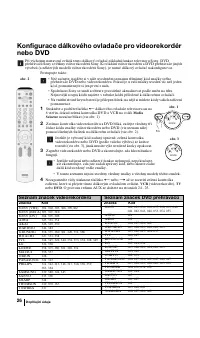
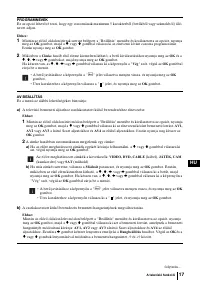
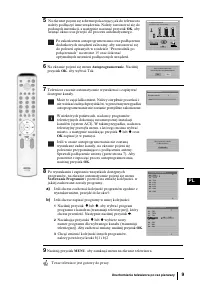
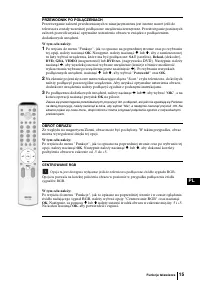
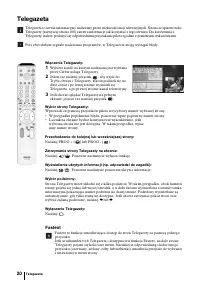
PROGRAMME LABELS
This option allows you to name a channel using up to five characters (letters or numbers).
To do this:
1
Once you have entered the "Set Up" menu as it is explained in the previous page and after selecting the option,
press
OK
, then press
v
or
V
to select the programme number with the channel you wish to name. Next press
OK
.
2
With the first element of the
Label
column highlighted, press
OK
and
v
,
V
,
B
or
b
to select the letter, next
press
OK
.
When you have finished, press
v
,
V
,
B
or
b
to select the word “
End
” on the screen and finally press
OK
to
turn off the menu from the screen.
• To correct the letter, select "
%
" on the screen to go back and press
OK
.
• For a blank, select " " on the screen and press
OK
.
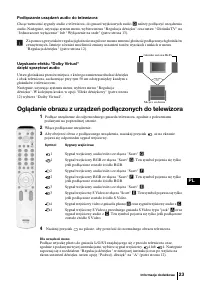
AV PRESET
This option allows you to:
a)
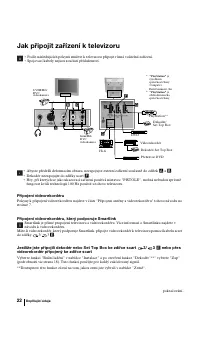
Designate a name to the external equipment you have connected to the input sockets of the TV set.
To do this:
1
Once you have entered the "Set Up" menu as it is explained in the previous page and after selecting the option,
press
OK
, then press
v
or
V
to select the input source you wish to name:
AV1, AV2
or
AV3
for the rear Scarts
and
AV4
for front connectors. Next press
OK
twice.
2
A label automatically appears in the label column:
a)
If you want to use one of the predefined labels, press
v
or
V
to select the desired label and finally press
OK
.
The total predefined labels are:
VIDEO, DVD, CABLE, GAME
,
CAM
(camcorder) or
SAT
(satellite).
b)
If you want to set a different label, select
Edit
and press
OK
. Then, with the first element highlighted, press
v
,
V
,
B
or
b
to select the letter, next press
OK
. When you have finished, press
v
,
V
,
B
or
b
to select
the word “
End
” on the screen and finally press
OK
to turn off the menu from the screen.
• To correct the letter, select "
%
" on the screen to go back and press
OK
.
• For a blank, select " " on the screen and press
OK
.
b)
Change the input sound level of the optional equipment connected.
To do this:
Once you have entered the "Set Up" menu as it is explained in the previous page and after selecting the option
press
OK
, then press
v
or
V
to select the input source you want to alter the input sound level:
AV1, AV2
or
AV3
for the rear Scarts and
AV4
for front connectors. Next press twice
b
to highlight the
Sound Offset
column.
Finally press
OK
and
v
or
V
to alter the input sound level between -9 and +9.
TV Functions
continued...
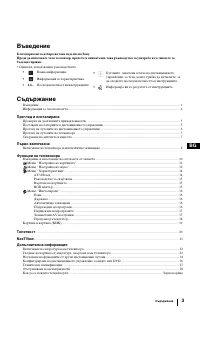
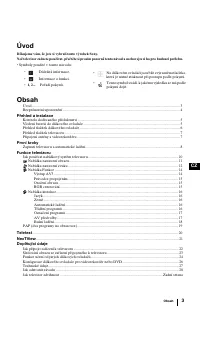
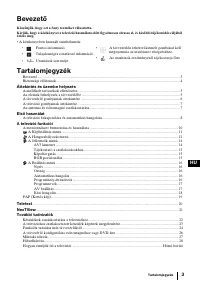
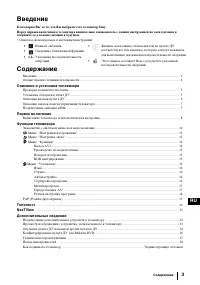
Содержание
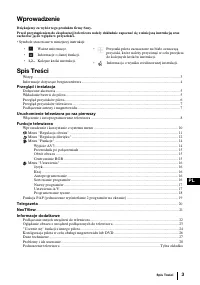
- 137 Введение
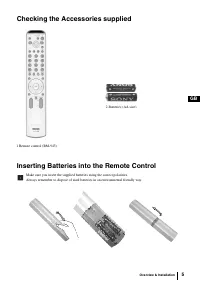
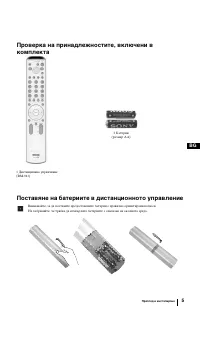
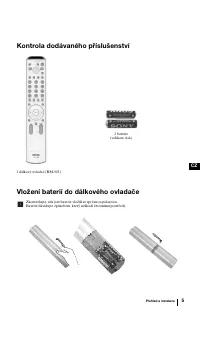
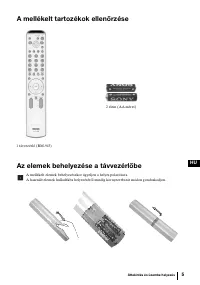
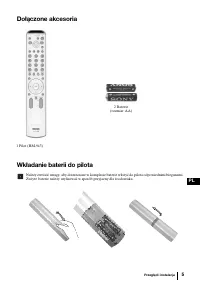
- 139 Проверка комплекта поставки
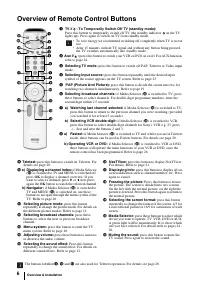
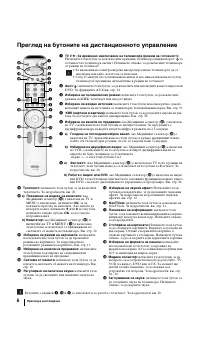
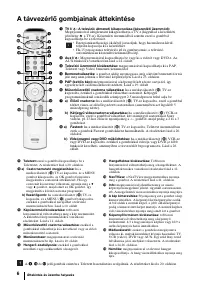
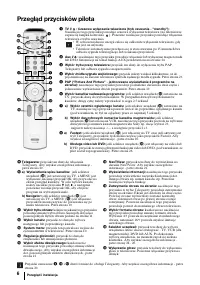
- 140 Описание кнопок пульта ДУ
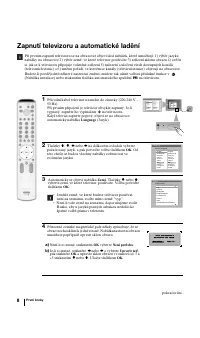
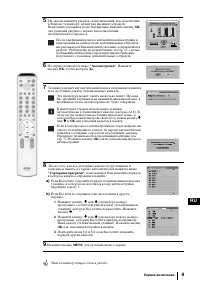
- 142 Включение телевизора и автоматическая настройка
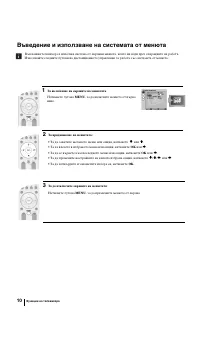
- 144 Знакомство с системой меню и ее использование
- 148 ВЫХОД AV3
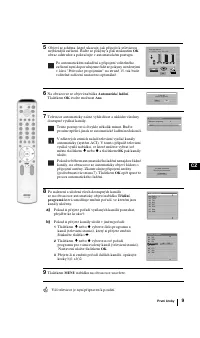
- 152 РУЧНАЯ НАСТРОЙКА ПРОГРАММ
- 153 Смена активного экрана
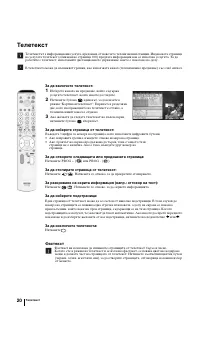
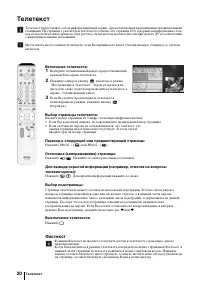
- 154 Включение телетекста:
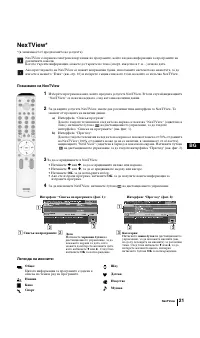
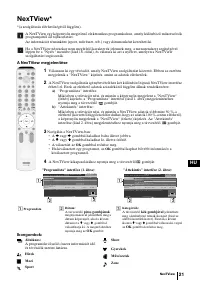
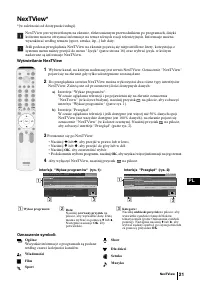
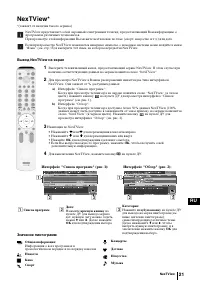
- 155 Вывод NexTView на экран
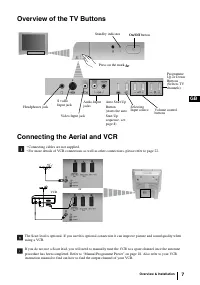
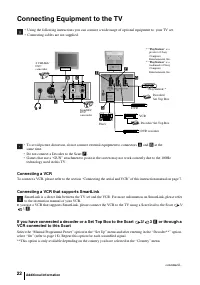
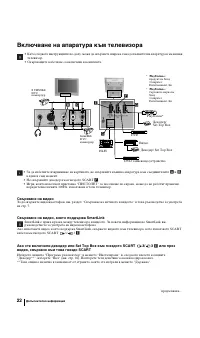
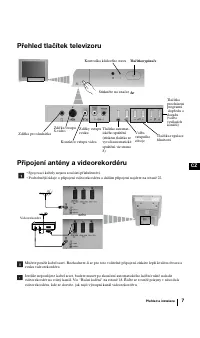
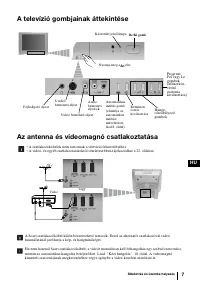
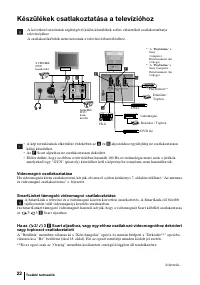
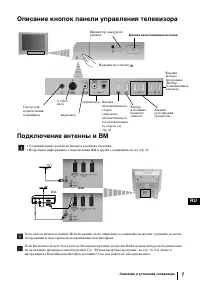
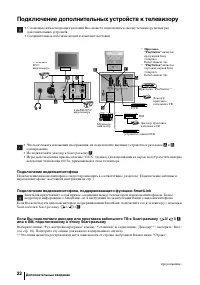
- 156 Подключение дополнительных устройств к телевизору; Подключение видеомагнитофона
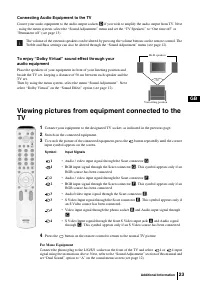
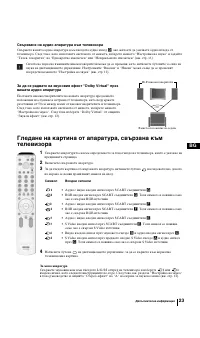
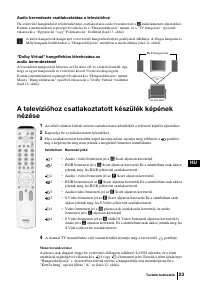
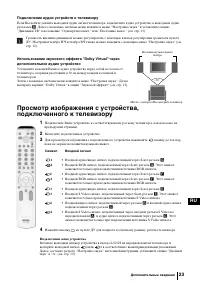
- 157 Подключение аудио устройств к телевизору; Просмотр изображения с устройства,
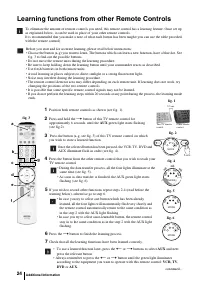
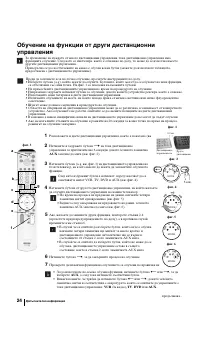
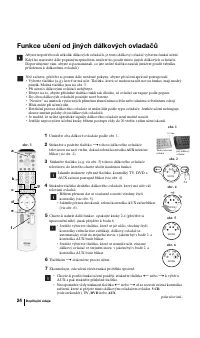
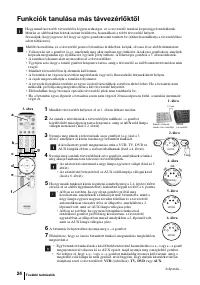
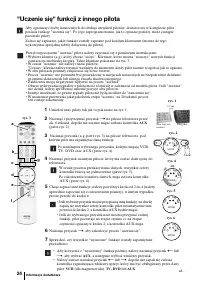
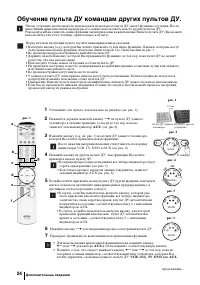
- 158 Обучение пульта ДУ командам других пультов ДУ.
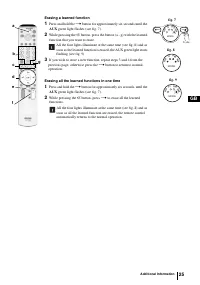
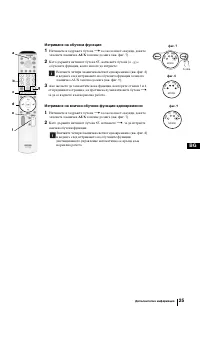
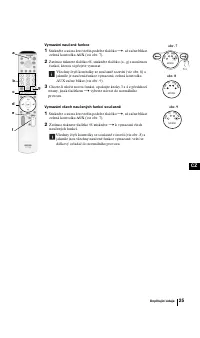
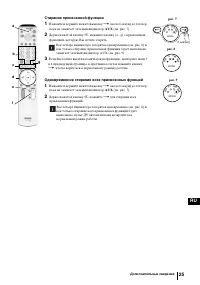
- 159 Cтирание присвоенной функции; Одновременное стирание всех присвоенных функций
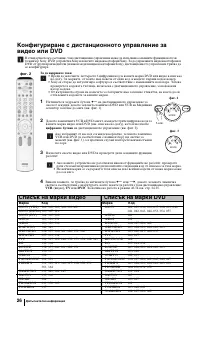
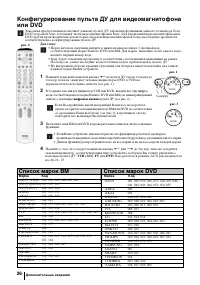
- 160 Список марок ВМ
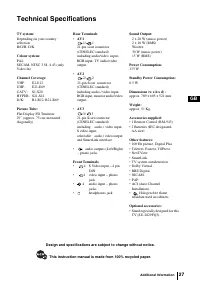
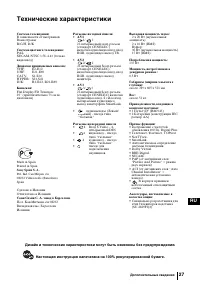
- 161 Технические характеристики
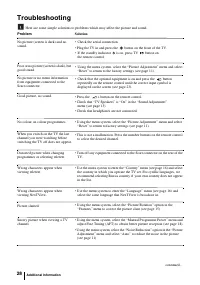
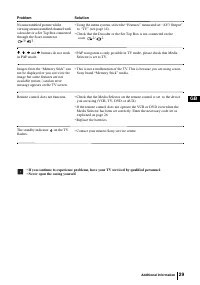
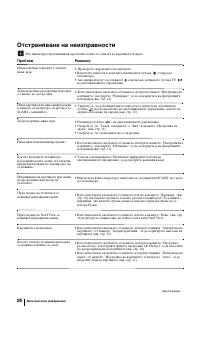
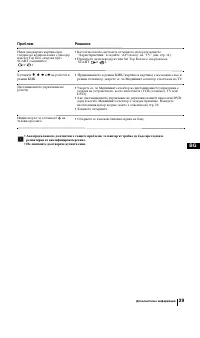
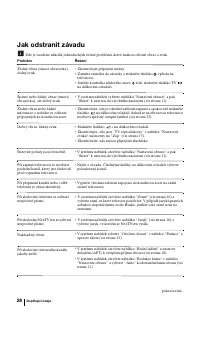
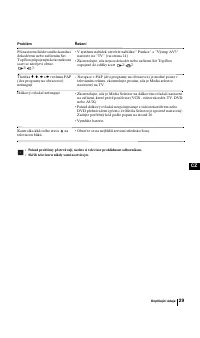
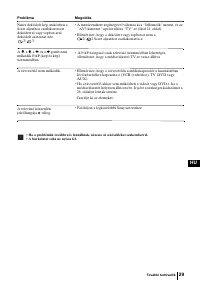
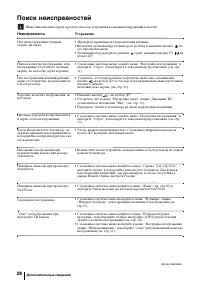
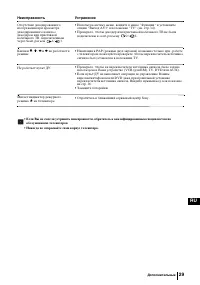
- 162 Поиск неисправностей; Неисправность


