
Соковыжималки Oursson JM6001/GA - инструкция пользователя по применению, эксплуатации и установке на русском языке. Мы надеемся, она поможет вам решить возникшие у вас вопросы при эксплуатации техники.
Если остались вопросы, задайте их в комментариях после инструкции.
"Загружаем инструкцию", означает, что нужно подождать пока файл загрузится и можно будет его читать онлайн. Некоторые инструкции очень большие и время их появления зависит от вашей скорости интернета.


16
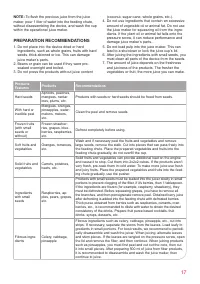
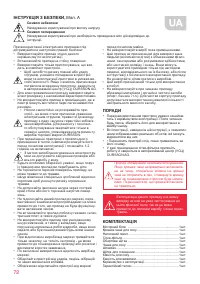
To avoid overheating of the motor, do not use
this device for more than 30 minutes without
a pause. Every 30 minutes make a 5-minute
break and let the device cool down.
Do not use a spoon or other foreign objects
in order to remove the pulp from the pulp
spout as it may damage the device.
To push the ingredients into the feeding chu
-
te, use only the pusher, which is included
with the device. It is strictly forbidden to push
ingredients with hands, as this could cause
injury.
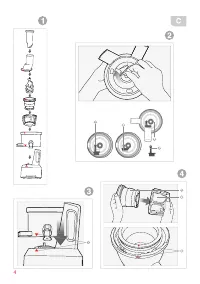
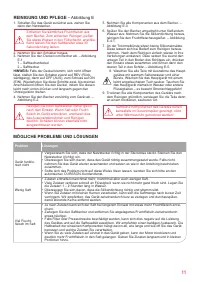
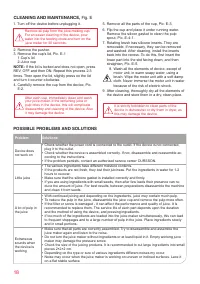
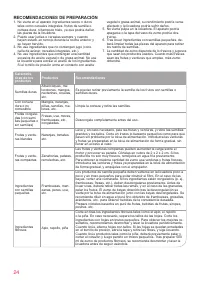
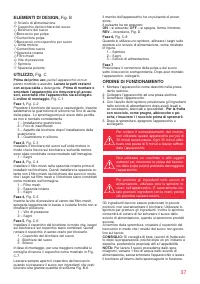
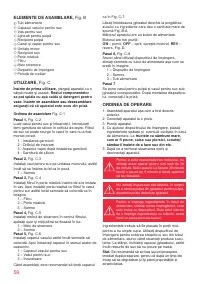
UTILIZATION,
Fig. C
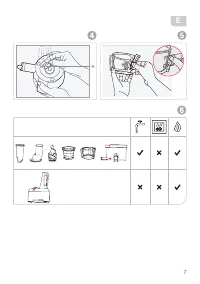
Before first use,
wipe the device with a soft, dry
cloth.
The rest of the parts wash with warm water
and detergent.
Before assembling or disassem-
bling the device and / or removing attachments,
make sure that the device is unplugged. The
order of assembly,
Pic. C-1.
Step 1,
Pic. C-2
Take juice cup and flip it. Firmly insert the silicone
gasket into the pulp exit hole. Juice maker can leak
if it hasn’t been assembled properly.
1
–
Installing gasket
2
–
Insert Hole
3 – Cup’s appearance after installing the gasket
4
–
Silicon gasket
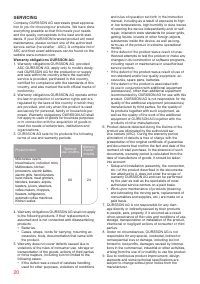
Step 2,
Pic. C-3
Install the juice cup onto the motor unit so that the
arrows on the cup and on the motor unit were com-
bined as shown in the picture.
1
–
Marks
Step 3,
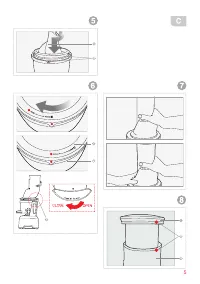
Pic. C-4
Install the mesh filter into the rotating brush, before
installing them into the cup. Then install the rotating
brush with the mesh filter into the juice cup so that
the marks on the mesh filter and cup were com
-
bined as shown in the picture.
1
–
Mesh filter
2
–
Rotating brush
3
–
Marks
Step 4,
Pic. C-5
Insert the pressure screw into the center of the
mesh filter, lightly pushing it down and turning until it
snaps into place.
1 – Pressure screw
2 – Marks
Step 5,
Pic. C-6
Install the cup’s lid so that the marks on the lid
and on the cup were combined. Than turn the lid
clockwise to lock it.
1 – Juice cup’s lid
2 – Juice cup
3 – Latch
ORDER OF OPERATION
1.
Assemble the device as described in the previous
section.
2. Plug the device into an electrical outlet.
3.
Turn on the device.
4.
With the help of the pusher place beforehand
washed and, if necessary, peeled and chopped
ingredients into the feeding chute.
Fruit with a
large seed, such as plum, apricot or peach,
remove the seeds before making juice from
them.
5. After finishing juicing switch it off and unplug it.
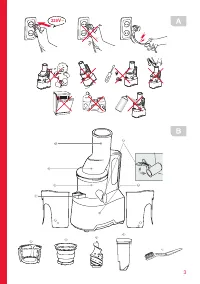
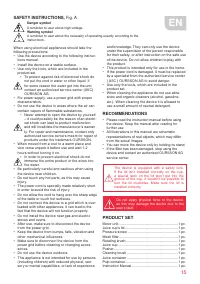
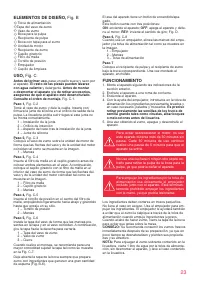
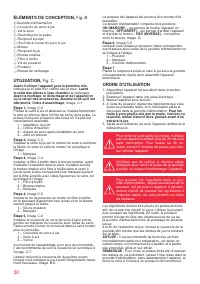
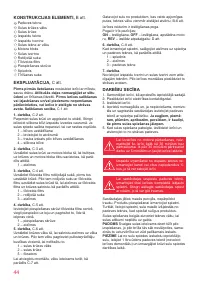
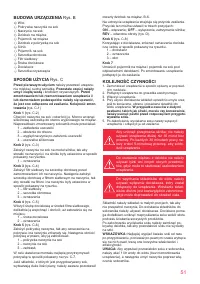
ELEMENTS OF DESIGN,
Fig. B
Feeding chute
Juice cup’s lid
Juice cup
Spout for pulp
Pulp container
Spout with lid for juice
Motor unit
Juice container
Rotating brush
Mesh filter
Pressure screw
Pusher
Cleaning brush
When the assembling, for greater convenience it is
recommended to hold the lid as shown in Pic. C-7.
Always leave the spout’s lid open when preparing
juice from the ingredients that give a large amount
of foam Pic. B-6.
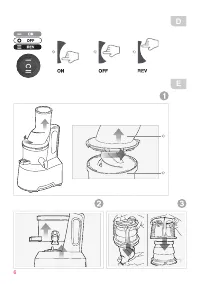
The device’s handle has a power button.
The button has three positions:
ON
– turns on;
OFF
– turns off, stops the motor;
REV
– revers, Pic. D.
Step 6,
Pic. C-8
When using a pusher align marks on the pusher
and the feeding chute as shown in the picture.
1 – Pusher
2 – Marks
3 – Feeding chute
Step 7
Place the pulp container and juice container under
the corresponding spout. After assembling the
device, plug it in.
The ingredients must be placed in small portions,
to not overfill the cup. Use the pusher to push
ingredients. In addition, the pusher will help avoid
splashing the juice from the feeding chute, when
squeezing juicy products.
At the end of juicing, close the lid of the spout so
that the remnants of juice do not drip on the table.
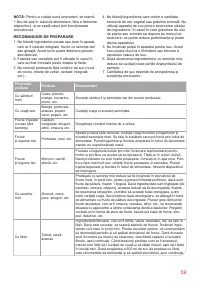
TIP:
It is recommended to drink fresh juices immedi-
ately after preparation, because after a while they be
-
gin to flake, lose useful properties and attractiveness.


