Снегоуборщики AL-KO SNOWLINE 760TE - инструкция пользователя по применению, эксплуатации и установке на русском языке. Мы надеемся, она поможет вам решить возникшие у вас вопросы при эксплуатации техники.
Если остались вопросы, задайте их в комментариях после инструкции.
"Загружаем инструкцию", означает, что нужно подождать пока файл загрузится и можно будет его читать онлайн. Некоторые инструкции очень большие и время их появления зависит от вашей скорости интернета.


GB
Original operating instructions
28
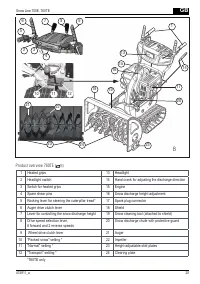
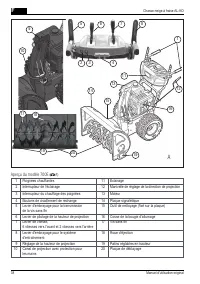
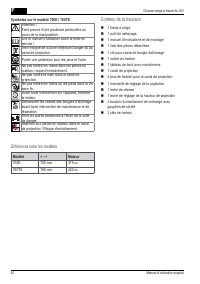
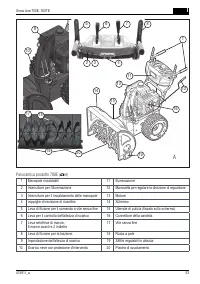
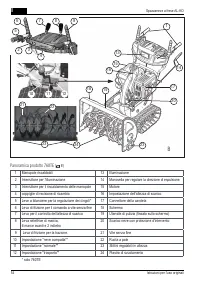
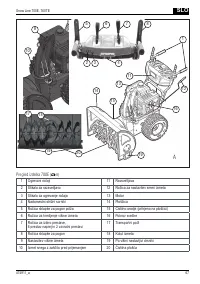
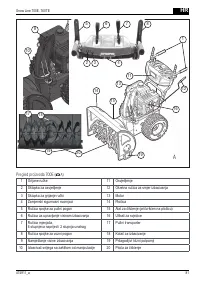
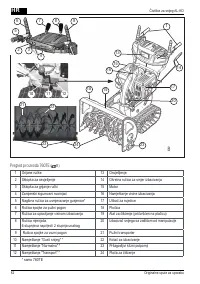
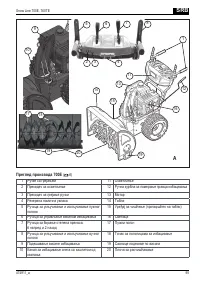
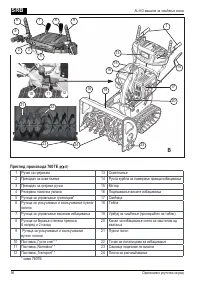
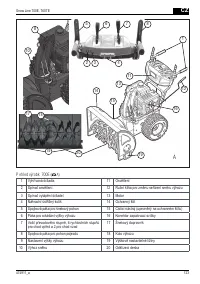
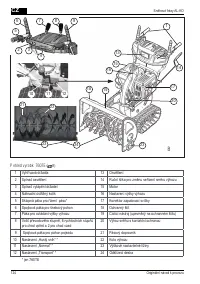
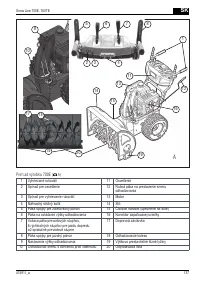
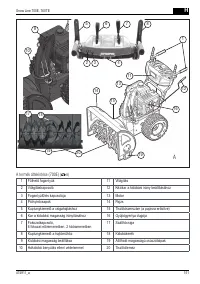
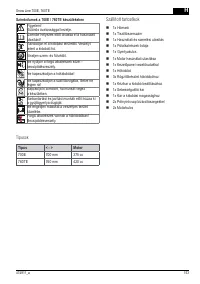
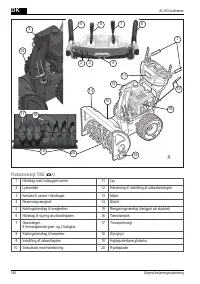
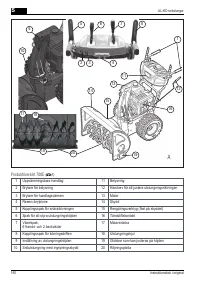
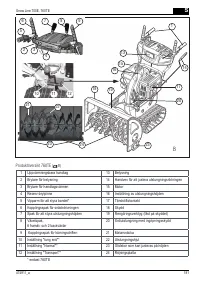
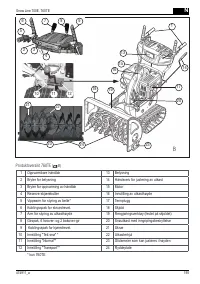
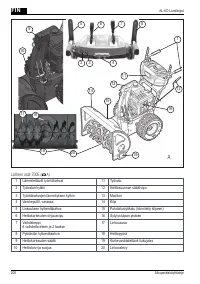
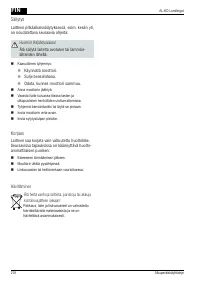
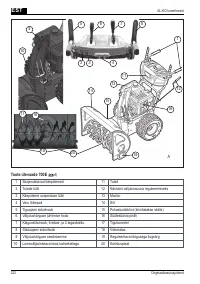
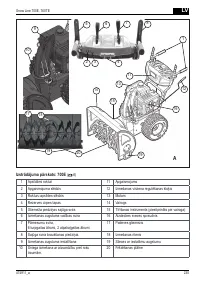
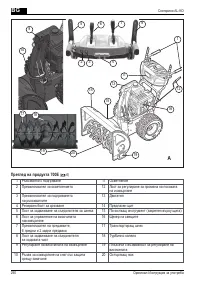
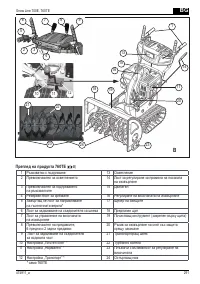
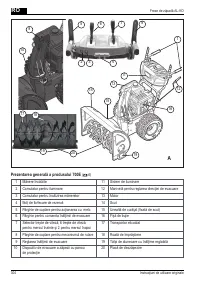
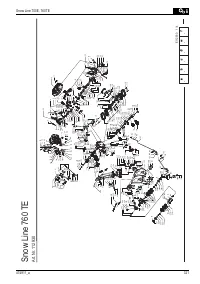
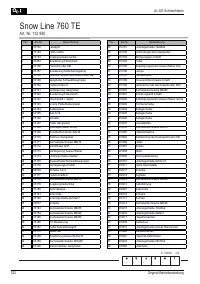
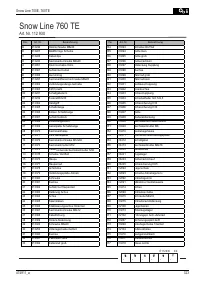
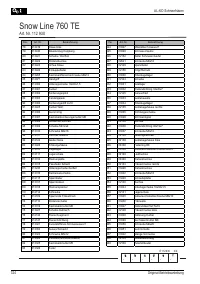
AL-KO snow blowers
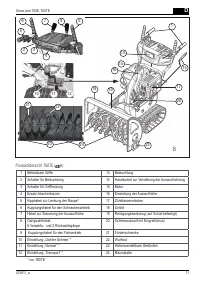
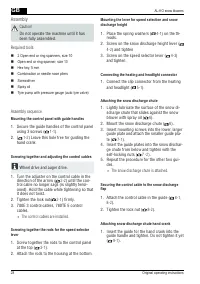
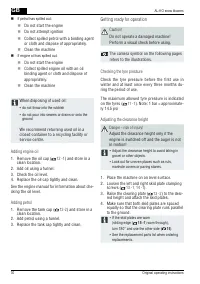
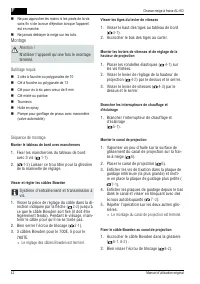
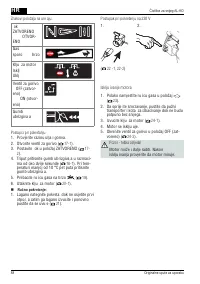
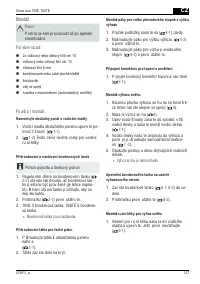
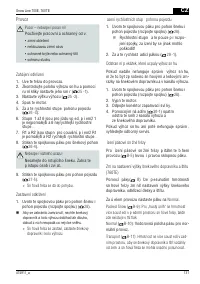
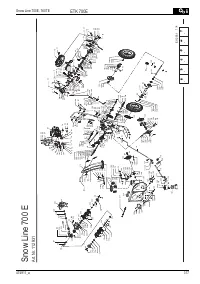
Assembly
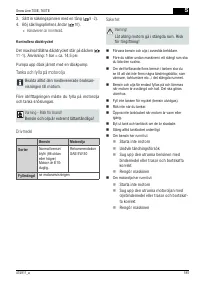
Caution!
Do not operate the machine until it has
been fully assembled.
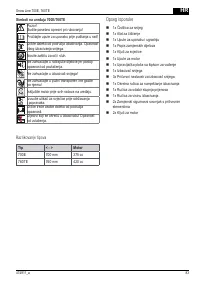
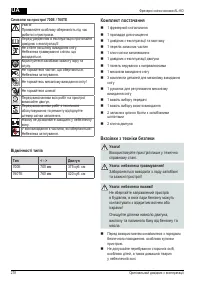
Required tools
2 Open-end or ring spanners, size 10
Open-end or ring spanner, size 13
Hex key, 5 mm
Combination or needle nose pliers
Screwdriver
Spray oil
Tyre pump with pressure gauge (auto tyre valve)
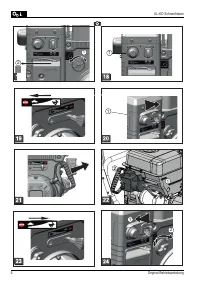
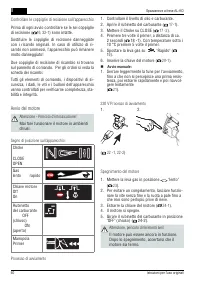
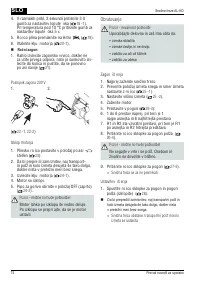
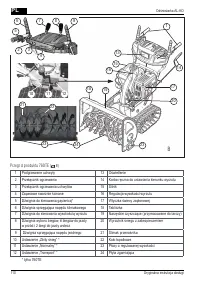
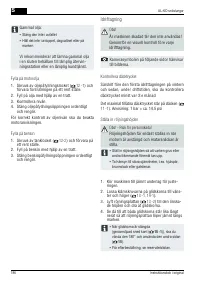
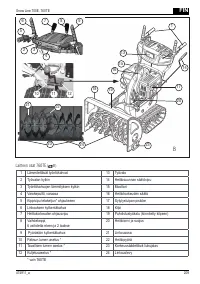
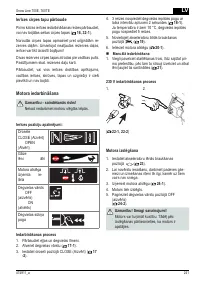
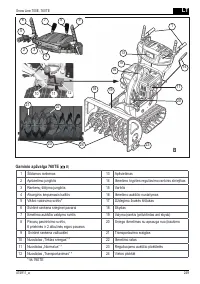
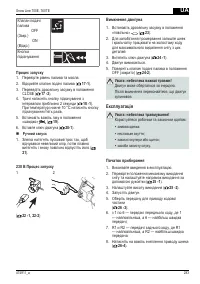
Assembly sequence
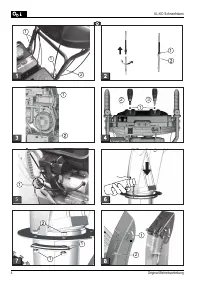
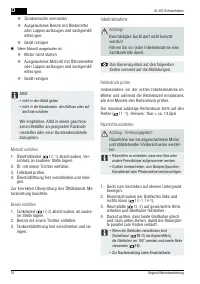
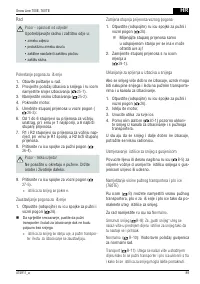
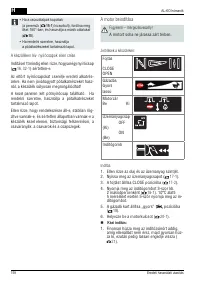
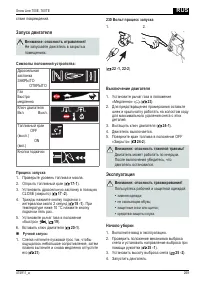
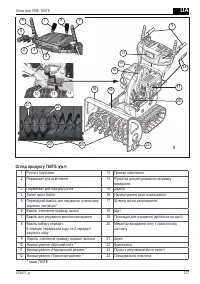
Mounting the control panel with guide handles
1. Secure the guide handles of the control panel
using 3 screws (
1-1
)
.
2. (
1-2
)
Leave this hole free for guiding the
hand crank.
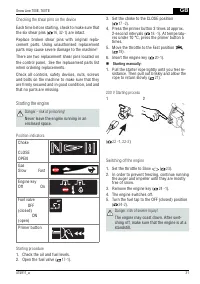
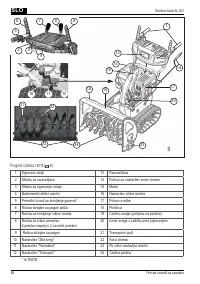
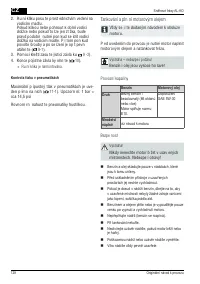
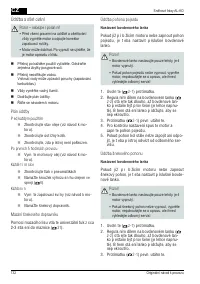
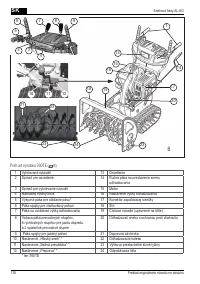
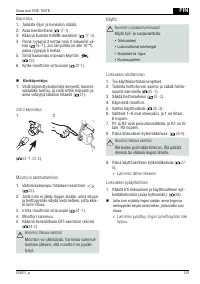
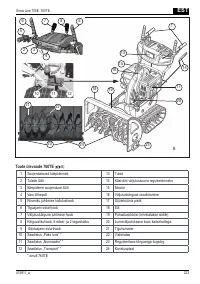
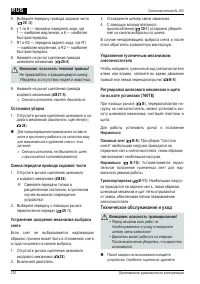
Screwing together and adjusting the control cables
Wheel drive and auger drive.
1. Turn the adjuster on the control cable in the
direction of the arrow (
2-2
)
until the con-
trol cable no longer sags (is slightly tensi-
oned). Hold the cable while tightening so that
it does not twist.
2. Tighten the lock nut(
2-1
) firmly.
3. 700E 3 control cables, 760TE 5 control
cables.
x
The control cables are installed.
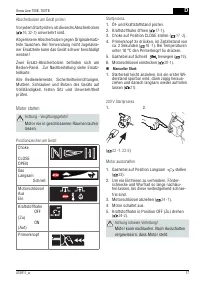
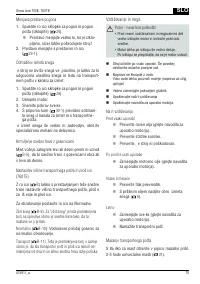
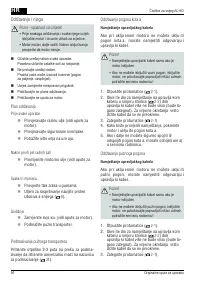
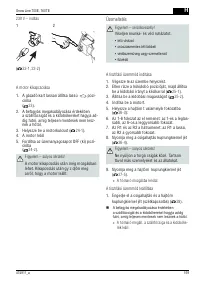
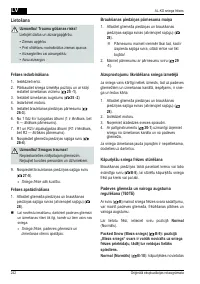
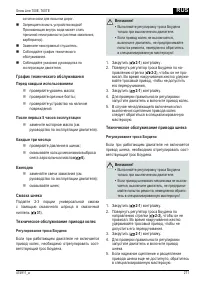
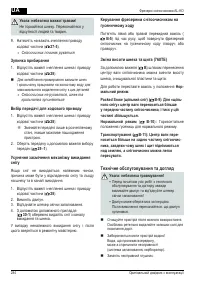
Screwing together the rods for the speed selector
lever
1. Screw together the rods to the control panel
at the top (
3-1
)
.
2. Attach the rods to the housing at the bottom.
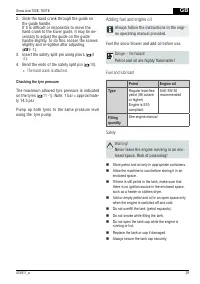
Mounting the lever for speed selection and snow
discharge height
1. Place the spring washers (
4-1
) on the th-
reads.
2. Screw on the snow discharge height lever (
4-2
)
and tighten
3. Screw on the speed selector lever (
4-3
)
and tighten.
Connecting the heating and headlight connector
1. Connect the clip connector from the heating
and headlight (
5-1
).
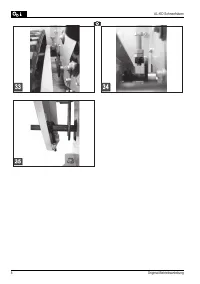
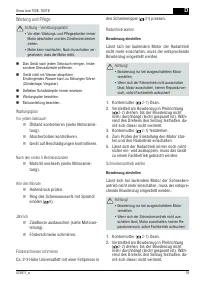
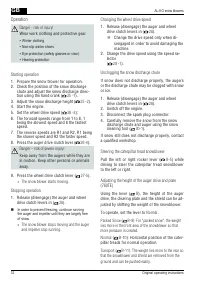
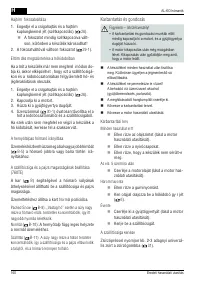
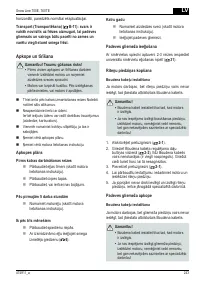
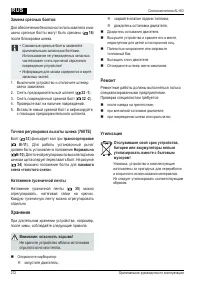
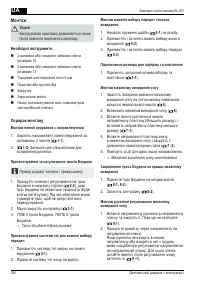
Attaching the snow discharge chute
1. Lightly lubricate the surface of the snow di-
scharge chute that slides against the snow
blower with spray oil (
6
).
2. Mount the snow discharge chute (
6
).
3. Insert mounting screws into the lower, larger
guide plate and attach the smaller guide pla-
te (
7-1
).
4. Insert the guide plates into the snow dischar-
ge chute from below and tighten with the
self-locking nuts (
7 -2
).
5. Repeat the procedure for the other two gui-
des.
x
The snow discharge chute is attached.
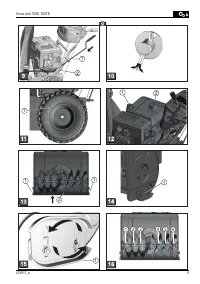
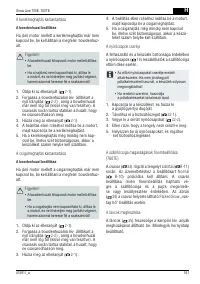
Securing the control cable to the snow discharge
flap
1. Attach the control cable in the guide (
8-1,
8-2
).
2. Tighten the lock nut (
8-2
).
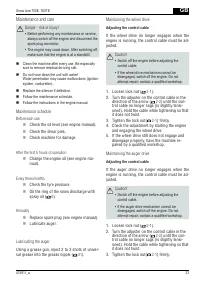
Attaching snow discharge chute hand crank
1. Insert the guide for the hand crank into the
guide handle and tighten. Do not tighten it yet
(
9-1
).


