
Шуруповерты DWT BM-1050 M 5.1.6 - инструкция пользователя по применению, эксплуатации и установке на русском языке. Мы надеемся, она поможет вам решить возникшие у вас вопросы при эксплуатации техники.
Если остались вопросы, задайте их в комментариях после инструкции.
"Загружаем инструкцию", означает, что нужно подождать пока файл загрузится и можно будет его читать онлайн. Некоторые инструкции очень большие и время их появления зависит от вашей скорости интернета.


18
English
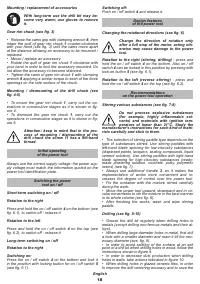
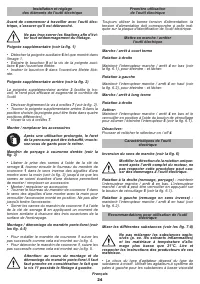
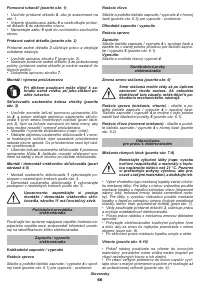
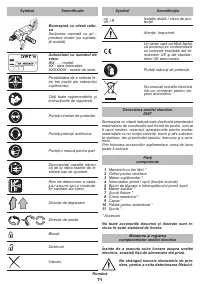
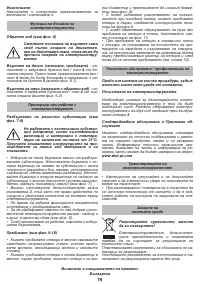
Mounting / replacement of accessories
With long-term use the drill bit may be-
come very warm; use gloves to remove
it.
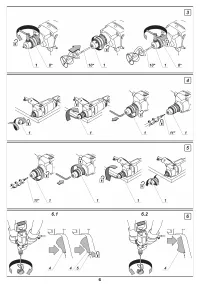
Gear rim chuck (see fig. 3)
•
Release the cams grip with clamping wrench
8
, then
rotate the quill of gear rim chuck
1
counter-clockwise
with your hand (see fig. 3) until the cams move apart
at the distance allowing an accessory to be mounted /
replaced�
•
Mount / replace an accessory�
•
Rotate the quill of gear rim chuck
1
clockwise with
your hand in order to lock the accessory mounted� Do
not allow the accessory to become distorted�
•
Tighten the cams of gear rim chuck
1
with clamping
wrench
8
applying a similar torque to each of the three
openings on the side surface of the chuck�
Mounting / dismounting of the drill chuck (see
fig. 4-5)
•
To mount the gear rim chuck
1
, carry out the op-
erations in consecutive stages as it is shown in fig
-
ure 4�
•
To dismount the gear rim chuck
1
, carry out the
operations in consecutive stages as it is shown in fig
-
ure 5�
Attention: keep in mind that in the pro-
cess of mounting / dismounting of the
drill chuck the screw 11 has a left-hand
thread.
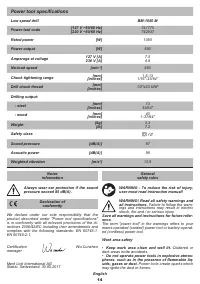
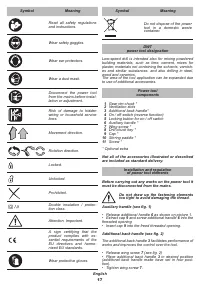
Initial operating
of the power tool
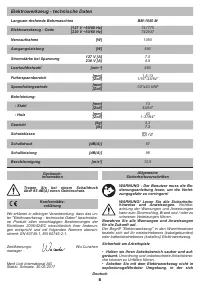
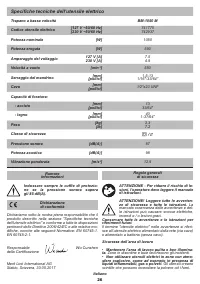
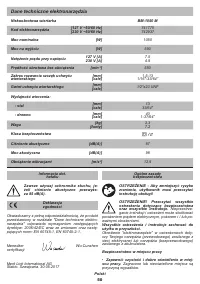
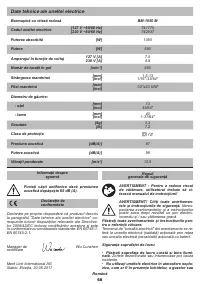
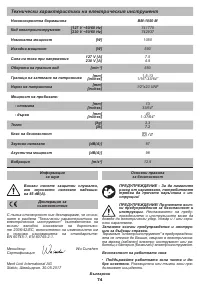
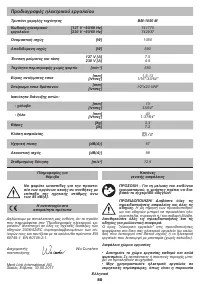
Always use the correct supply voltage: the power sup-
ply voltage must match the information quoted on the
power tool identification plate.
Switching the power
tool on / off
Short-term switching on / off
Rotation to the right
Press and hold the on / off switch
4
on the bottom (see
fig. 6.1), to switch off - release it.
Rotation to the left
Press and hold the on / off switch
4
on the top (see
fig. 6.2), to switch off - release it.
Long-term switching on / off
Rotation to the right
Switching on:
Press the on / off switch
4
on the bottom and lock it
in the position with locking button for on / off switch
5
(see fig. 6.1).
Switching off:
Push on / off switch
4
and release it�
Design features
of the power tool
Changing the rotational directions (see fig. 6)
Change the direction of rotation only
after a full stop of the motor, acting oth-
erwise may cause damage to the power
tool.
Rotation to the right (stirring, drilling)
- press and
hold the on / off switch
4
on the bottom� Also on / off
switch
4
can be locked in this position by pressing with
lock-on button
5
(see fig. 6.1).
Rotation to the left (reverse stirring)
- press and
hold the on / off switch
4
on the top (see fig. 6.2).
Recommendations
on the power tool operation
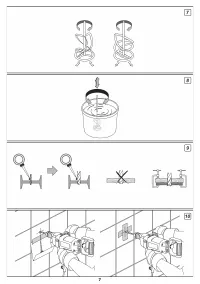
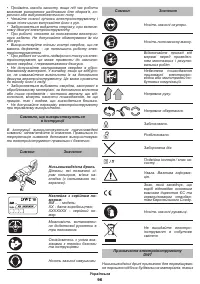
Stirring various substances (see fig. 7-8)
Do not process explosive substances
(for example, highly inflammable sol-
vents) and materials with ignition tem-
perature of lower than 21°С. Study the
manufacturer's instructions for such kind of mate-
rials carefully and stick to them.
•
The selection of stirring paddle type depends on the
type of substances stirred� Use stirring paddles with
left-hand blade spinning for low-viscosity substances
(dispersed paints, lacquers, sealing compounds, liquid
cement solution)� Use stirring paddles with right-hand
blade spinning for high-viscosity substances (ready-
made plastering solution, concrete, putty, polymeric
resins) (see fig. 7).
•
Always use additional handle
3
, as it makes the
implementation of works more convenient and in-
creases the degree of control over the power tool�
•
Fix the container with the mixture stirred carefully
during the work�
•
Move the power tool upward, downward and in cir-
cular movements to stir the mixture in the best manner
in its whole volume (see fig. 8).
• After finishing the works, wash and wipe stirring
paddle�
Drilling (see fig. 9-10)
•
Grease the drill bit regularly when drilling holes in
metals (except drilling non-ferrous metals and their al-
loys)�
• When drilling large diameter holes in metal, first drill
a hole with a smaller diameter and ream it till the nec-
essary diameter (see. fig. 9).
•
In order to avoid splitting of the surface at an exit
point of a drill bit when drilling holes in wood, follow the
instructions shown in figure 9.
•
In order to decrease dust production when drilling
holes in walls, take actions indicated in figure 10.
•
When drilling holes in glazed ceramic tiles, in order
to improve the drill centering accuracy and to save the


