
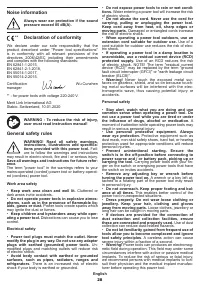
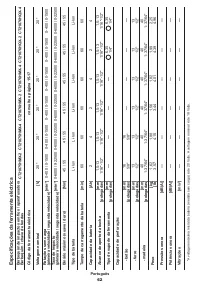
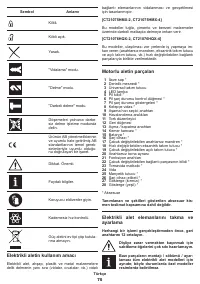
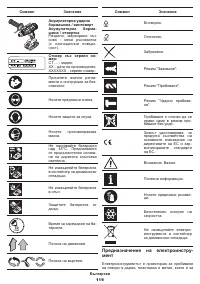
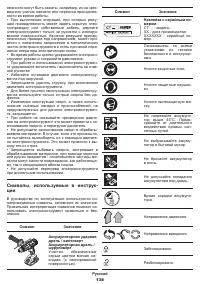
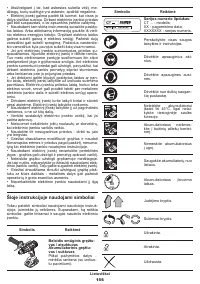
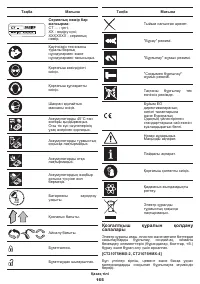
Шуруповерты CROWN CT21076HMX - инструкция пользователя по применению, эксплуатации и установке на русском языке. Мы надеемся, она поможет вам решить возникшие у вас вопросы при эксплуатации техники.
Если остались вопросы, задайте их в комментариях после инструкции.
"Загружаем инструкцию", означает, что нужно подождать пока файл загрузится и можно будет его читать онлайн. Некоторые инструкции очень большие и время их появления зависит от вашей скорости интернета.


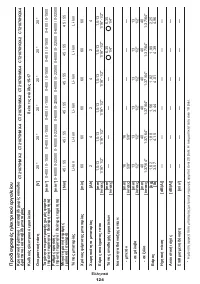


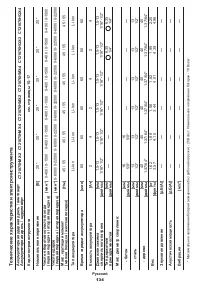


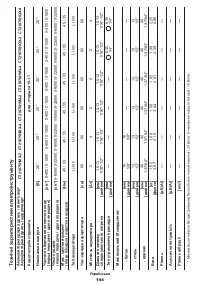

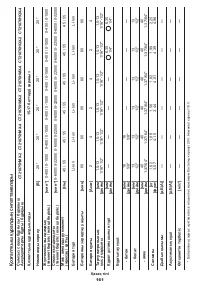


33
English
•
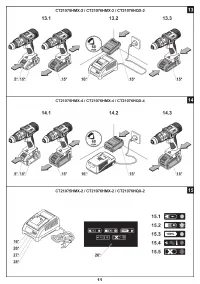
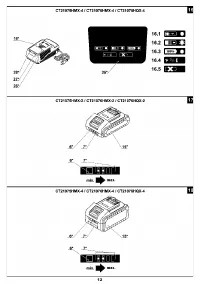
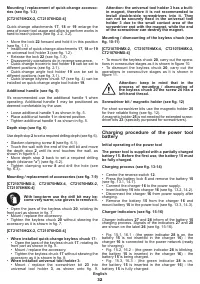
Fig� 15�4, 16�4 - (the red indicator
27
is on, the bat-
tery
15
is inserted in the charger
16
) - the charging
process of the battery
15
is terminated due to inappro-
priate temperature� When the temperature conditions
are normal, the process of charging will resume�
•
Fig� 15�5, 16�5 - (the red indicator
27
is blinking, the
battery
15
is inserted in the charger
16
) - the charging
process of the battery
15
is terminated because of its
failure� Replace the faulty battery
15
, its further use is
prohibited�
In the process of charging the battery 15
and the charger 16 become hot, it is a
normal process.
Switching the power tool on / off
Make sure that the reverse switch 12 is not centred,
this blocks on / off switch 13.
Switching on:
Press on / off switch
13.
Switching off:
Release the on / off switch
13
�
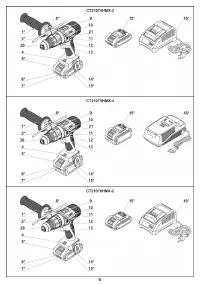
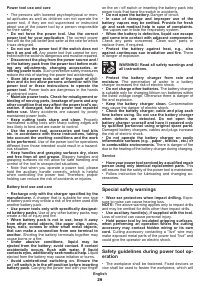
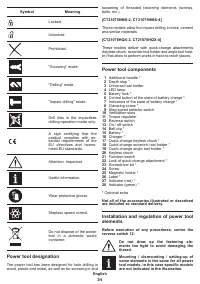
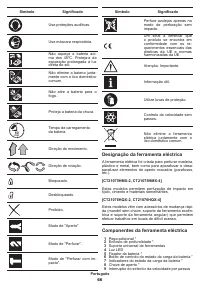
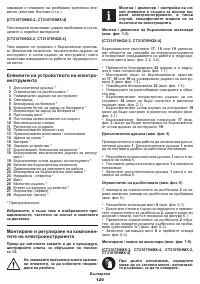
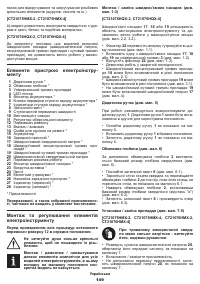
Design features of the power tool
Battery
The battery
15
is protected by the safety system
against deep discharge� In case of complete discharge,
the power tool is automatically switched off�
Attention:
do not try to switch on the power tool when the
protection system is activated the battery 15 can
be damaged.
Temperature protection
The temperature protection system enables to auto-
matically deactivate the power tool in case of excess
load or when the temperature of the battery
15
is ex-
ceeding 70°C� The system guarantees protection of
the power tool from damage in case of noncompliance
with the operation conditions�
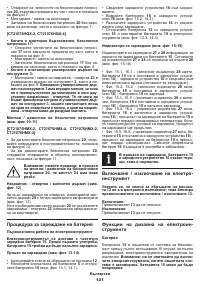
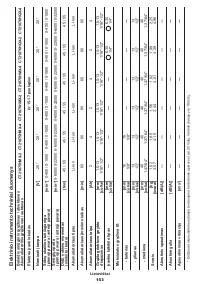
Indicators of the state of battery charge (see
fig. 17-18)
With the push of the button
6
the indicators
7
show the
state of charge of the battery
15
(see fig. 17-18).
LED lamp
When the on / off switch
13
is pushed, the LED lamp
4
is automatically switched on that allows to carry out
works in low light conditions�
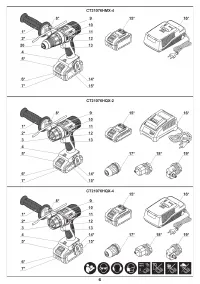
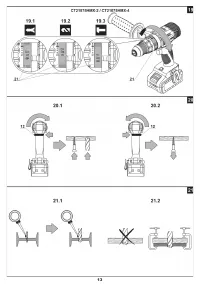
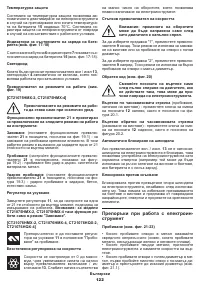
Function switch (see fig. 19)
[CT21075HMX-2, CT21075HMX-4]
Switching the operation modes shall be
carried out only in the off mode of the
tool's motor.
Function switch 21 is designed for the switching
the following operation modes of the tool:
Screwing
(set the function switch
21
in the position
indicated in figure 19.1) -
for screwing in of threaded
fastening elements� In this operation mode, it's
possible to set one of the 21 torque values�
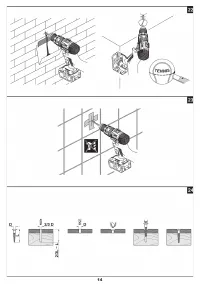
Drilling
(set the function switch
21
in the position
indicated in figure 19.2) - non-impact drilling in wood,
synthetics, metal�
Impact
drilling
(set the function switch
21
in the
position indicated in figure 19.3) - impact drilling in
masonry, concrete, natural stone�
Torque regulator
Rotate the regulator
11
in order to set one of
the 21 torque values most suitable for the work
performed�
Attention: for models CT21075HMX-2,
CT21075HMX-4 this function works in "Screwing"
mode only.
[CT21076HMX-2, CT21076HMX-4, CT21076HQX-2,
CT21076HQX-4]
It is recommended to set the torque
regulator
11
into the position "Drill" to
perform drilling�
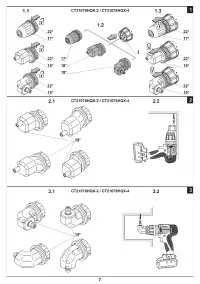
Stepless speed adjustment
Speed is controlled from 0 to maximum by
pressing force of on / off switch
13
� Weak
pressing results in low revolutions, which
enable a smooth power tool switch-on�
Step speed selector switch
Attention: one can only change the revo
-
lutions per minute range after the engine
fully stops.
In order to put in the "1" gear, move the switch
9
back�
This mode is used for the fastening of screws or for
large diameter hole drilling�
In order to choose the "2" gear, move the switch
9
forward� This mode is used for speed drilling of small
diameter holes�
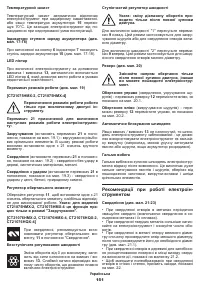
Changing the rotational directions (see fig. 20)
Change the direction of rotation only
after a full stop of the motor, acting oth
-
erwise may cause damage to the power
tool.
Clockwise rotation
(drilling, fastening of screws) -
move the reverse switch
12
to the left as it is shown
in fig. 20.1.
Counter clockwise rotation
(unscrewing the
screws) - move the reverse switch
12
to the right as it
is shown in fig. 20.2.
Spindle automatic locking
If the on / off switch
13
is not pressed, the spindle of the
power tool is locked this enables to use the power tool
as an ordinary screwdriver (for example it can be used
to tighten manually screws or bolts, if the battery is low)�


