
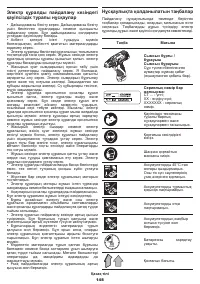
Шуруповерты CROWN CT21072HX-2 BMC - инструкция пользователя по применению, эксплуатации и установке на русском языке. Мы надеемся, она поможет вам решить возникшие у вас вопросы при эксплуатации техники.
Если остались вопросы, задайте их в комментариях после инструкции.
"Загружаем инструкцию", означает, что нужно подождать пока файл загрузится и можно будет его читать онлайн. Некоторые инструкции очень большие и время их появления зависит от вашей скорости интернета.


25
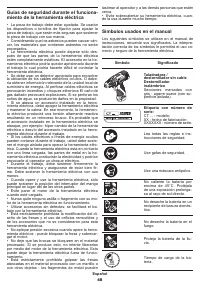
English
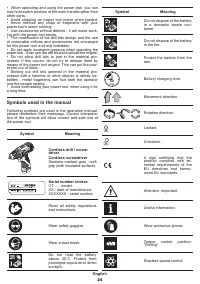
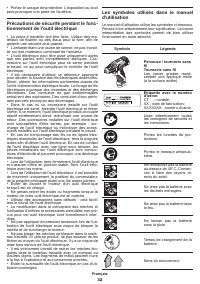
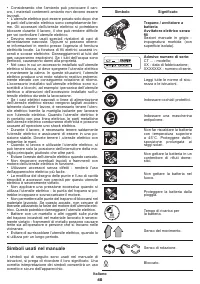
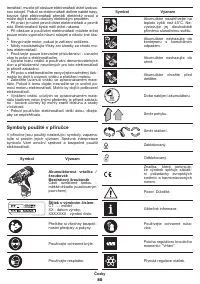
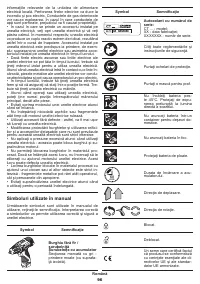
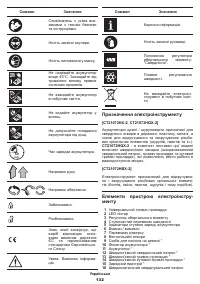
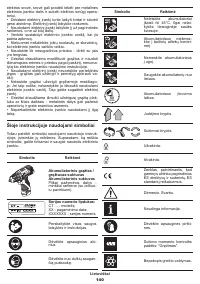
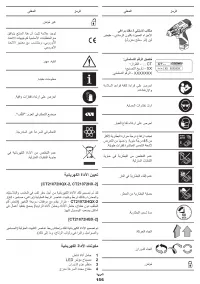
Symbol
Meaning
Do not dispose of the power
tool in a domestic waste
container�
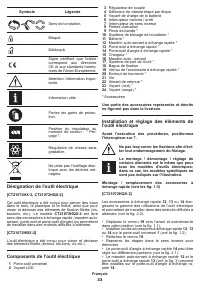
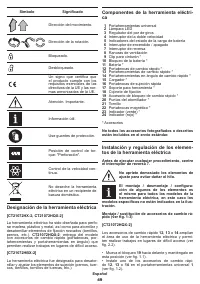
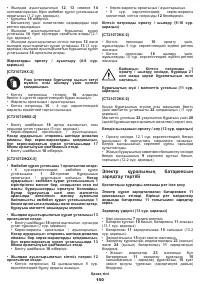
Power tool designation
[CT21072HX-2, CT21072HQX-2]
The power tool has been designed for hole drilling in
wood, plastic and metal, as well as for screwing in and
loosening of threaded fastening elements (screws,
bolts, etc�)�
CT21072HQX-2 -
model deliver with quick-
change attachments (keyless chuck, tool holder and
angle tool holder) that allow to perform works in hard-
to-reach places�
[CT21072HBX-2]
The power tool has been designed to unscrew and
to tighten threaded fastening elements (bolts, nuts,
screws, bolt screws, etc�)�
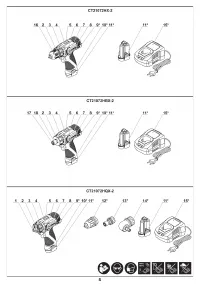
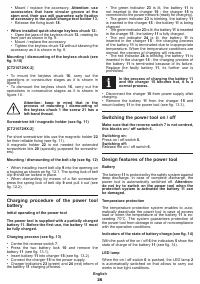
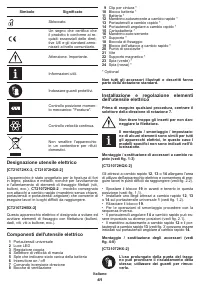
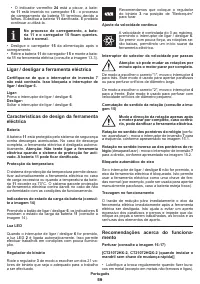
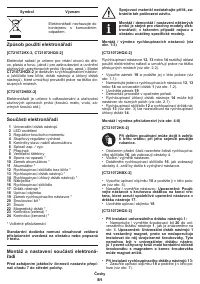
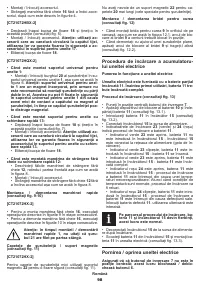
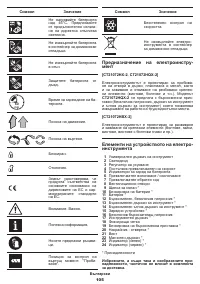
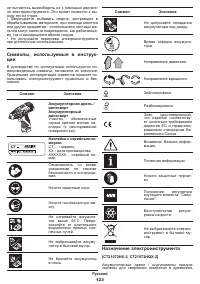
Power tool components
1
Universal tool holder
2
LED lamp
3
Torque regulator
4
Step speed selector switch
5
Indicators of the state of battery charge
6
On / off switch
7
Reverse switch
8
Ventilation slots
9
Belt clip *
10
Battery lock *
11
Battery *
12
Quick-change keyless chuck *
13
Quick-change tool holder *
14
Quick-change angle tool holder *
15
Charger *
16
Keyless chuck
17
Tool holder *
18
Fixing bush
19
Lock of quick-change attachment *
20
Screwdriver bit *
21
Screw
22
Magnetic holder *
23
Indicator (green) *
24
Indicator (red) *
* Optional extra
Not all of the accessories illustrated or described
are included as standard delivery.
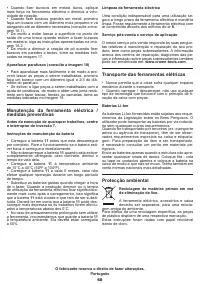
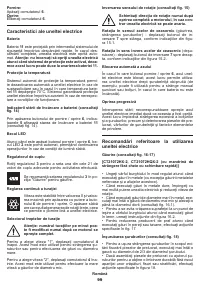
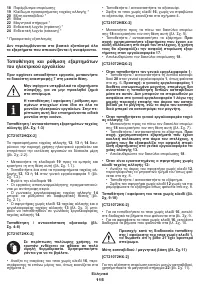
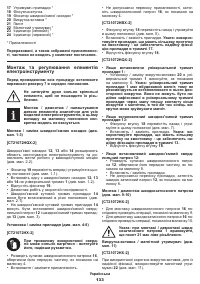
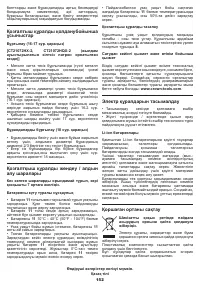
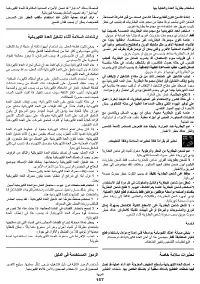
Installation and regulation of power tool
elements
Before execution of any procedures, centre the
reverse switch 7.
Do not draw up the fastening elements
too tight to avoid damaging the thread.
Mounting / dismounting / setting-up of
some elements is the same for all power
tool models, in this case specific models
are not indicated in the illustration.
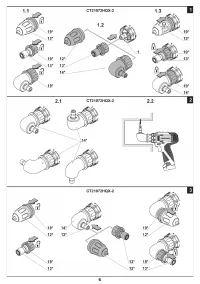
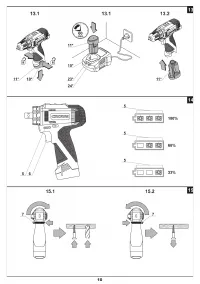
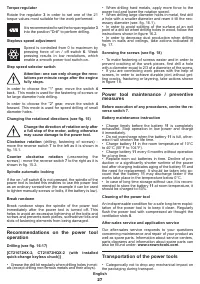
Mounting / replacement of quick-change accesso
-
ries (see fig. 1-3)
[CT21072HQX-2]
Quick-change attachments
12
,
13
or
14
enlarge the
area of power tool usage and allow to perform works in
hard-to-reach places (see fig. 2.2).
•
Move the lock
19
forward and hold it in this position
(see fig. 1.1).
•
Install one of quick-change attachments
12
,
13
or
14
on universal tool holder
1
(see fig. 1.2).
•
Release the lock
19
�
•
Disassembly operations do in reverse sequence�
•
Quick-change angle tool holder
14
can be set to
different positions (see fig. 2.1).
•
Quick-change keyless chuck
12
and quick-change
tool holder
13
(see fig. 3) can be installed on quick-
change angle tool holder
14
�
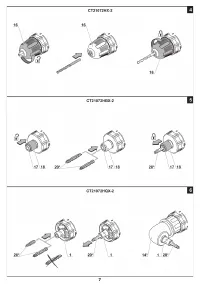
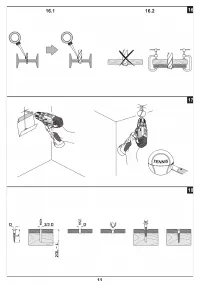
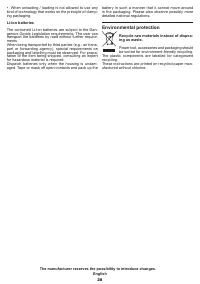
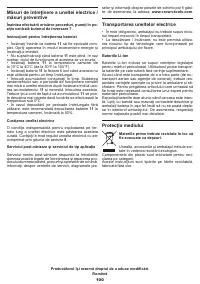
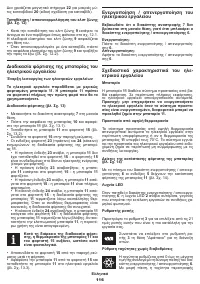
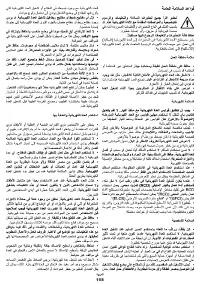
Mounting / replacement of accessories (see fig. 4-8)
[CT21072HX-2]
With long-term use the drill bit may be
-
come very warm; use gloves to remove it.
•
Open the jaws of the keyless chuck
16
, rotating its
front part as shown in fig. 4.
•
Mount / replace the accessory�
•
Tighten the keyless chuck
16
without skewing the
accessory as it is shown in fig. 4.
[CT21072HBX-2]
•
Move backward the fixing bush
18
and hold it in this
position (see fig. 5).
•
Mount / replace the accessory�
Attention: use
accessories that have circular groove at the
stem end, their use will guarantee safe fixation of
accessory in the tool holder 17.
•
Release the fixing bush
18
�
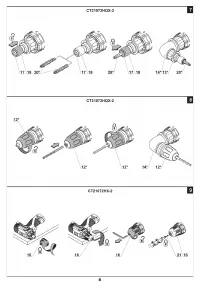
[CT21072HQX-2]
•
When installed universal tool holder 1:
•
Mount / replace the screwdriver bit
20
into
universal tool holder
1
, as shown onto fig. 6.
Attention: the universal tool holder 1 has a built-
in magnet, therefore it is not recommended to
install double-side screwdrivers into it. They
can not be securely fixed in the universal tool
holder 1 due to the small contact area of the
screwdriver end with the magnet, while the end
of the screwdriver can destroy the magnet.
•
When installed quick-change tool holder 13:
•
Move backward the fixing bush
18
and hold it in
this position (see fig. 7).


