Сетевые хранилища QNAP (2.5GbE)(TS-855EU-8G) - инструкция пользователя по применению, эксплуатации и установке на русском языке. Мы надеемся, она поможет вам решить возникшие у вас вопросы при эксплуатации техники.
Если остались вопросы, задайте их в комментариях после инструкции.
"Загружаем инструкцию", означает, что нужно подождать пока файл загрузится и можно будет его читать онлайн. Некоторые инструкции очень большие и время их появления зависит от вашей скорости интернета.


• Username: Specify an administrator username that contains 1 to 32 characters. The name can
contain letters (A to Z, a to z), numbers (0 to 9), and hyphens (-), multi-byte Chinese, Japanese,
Korean, and Russian characters.
The username cannot contain the following special characters: grave accent (`), asterisk (*), equal
sign (=), plus sign (+), square brackets ([ ]), curly brackets ({}), slash (\), vertical bar (|), semicolon
(;), colon (:), apostrophe ('), quotation mark ("), comma (,), less than sign (< ), greater than sign (>),
backslash (/), question mark (?), percent sign (%), dollar sign ($), and the space character.
Important
To protect your NAS from brute force attacks, create a new system administrator account
during QTS installation to disable the default "admin" account.
• Password: Specify an administrator password with 1 to 64 characters. The password can contain
any ASCII characters.
• Confirm Password: Enter the new administrator password again.
15. Click Next.
The Set the date and time screen appears.
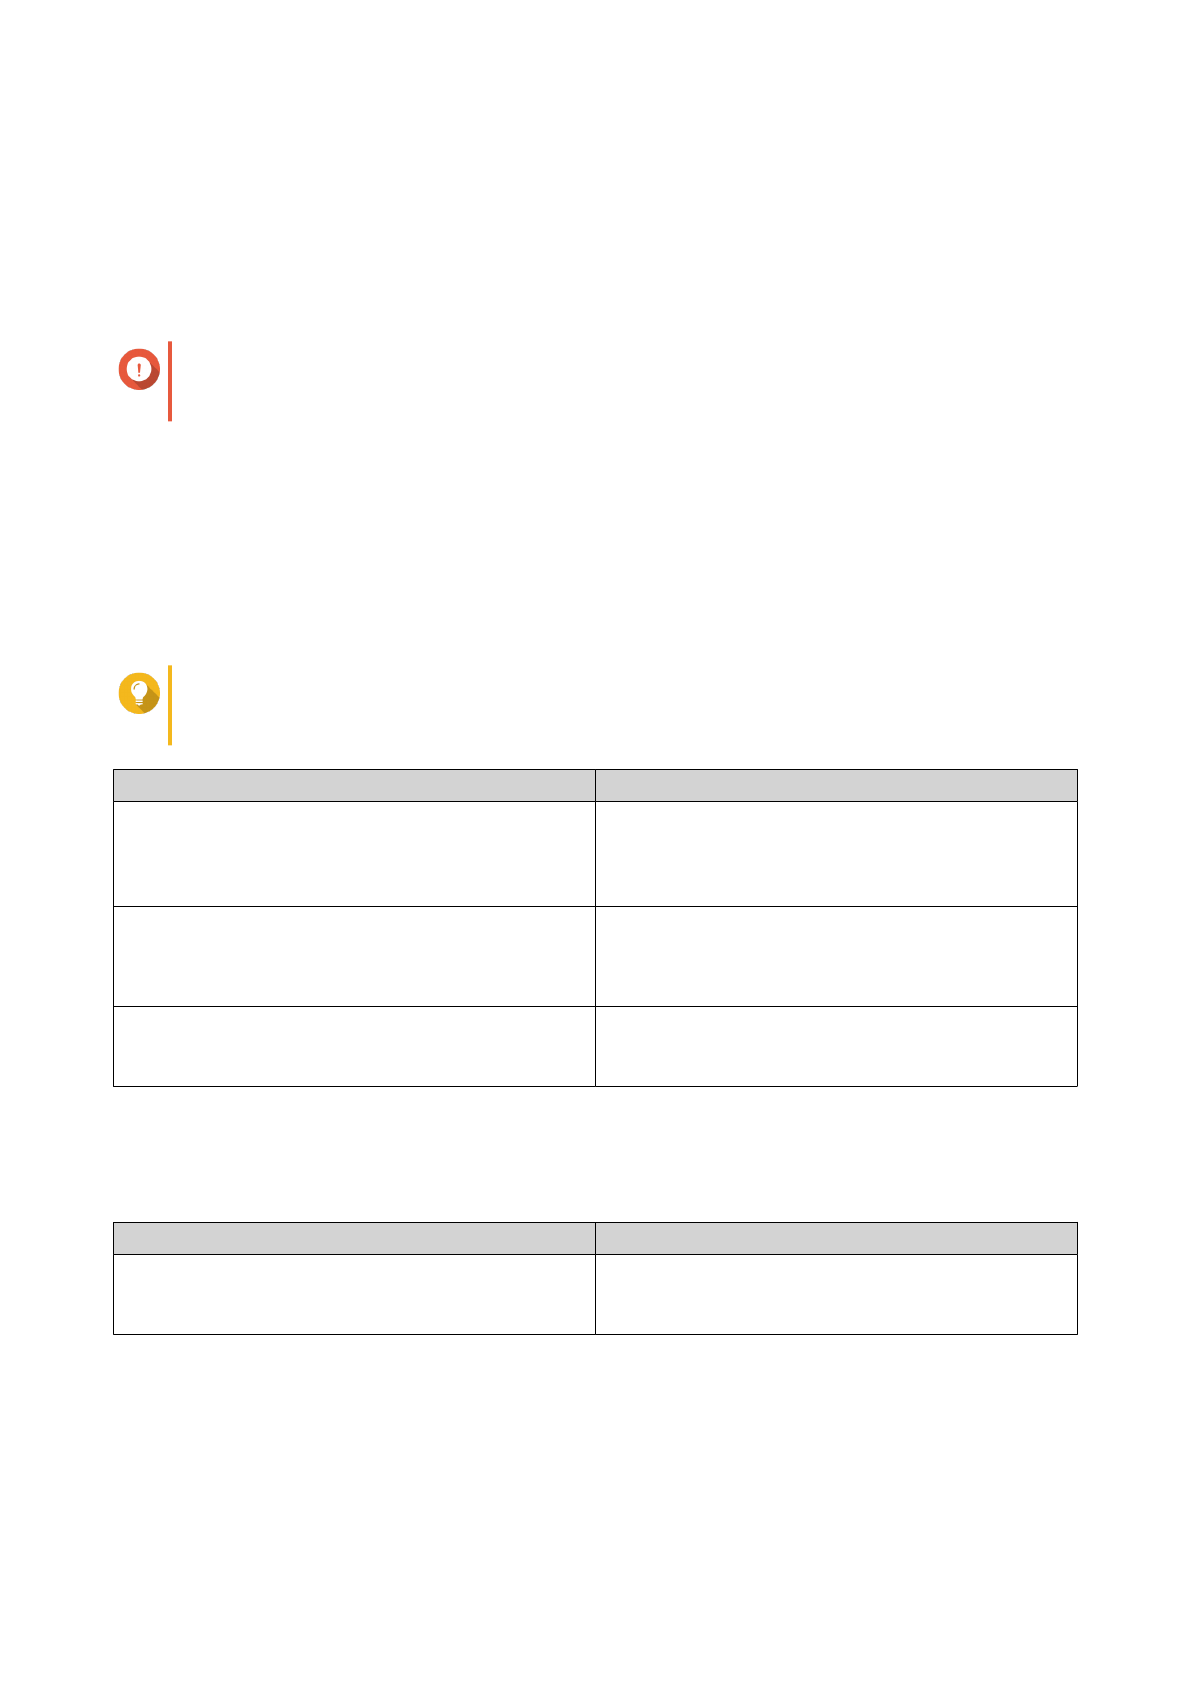
16. Specify the time zone, date, and time using any of the following methods:
Tip
QNAP recommends connecting to an NTP server to ensure that the NAS follows the
Coordinated Universal Time (UTC) standard.
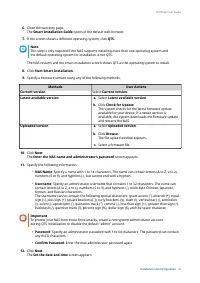
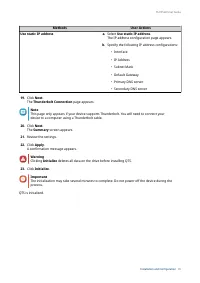
Methods
User Actions
Synchronize with computer or mobile device time
Select Same as the computer/device time
The NAS synchronizes with the date and time of the
computer or mobile device used to complete the
initialization.
Enter manually
a. Select Input Manually.
b. Specify the date and time.
The NAS uses the specified date and time.
Synchronize with a time server automatically
Click Synchronize with an Internet time server
automatically.
The NAS synchronizes with the NTP server.
17. Click Next.
The Configure the network settings screen appears.
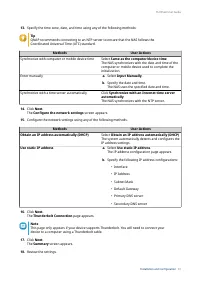
18. Configure the network settings using any of the following methods.
Methods
User Actions
Obtain an IP address automatically (DHCP)
Select Obtain an IP address automatically (DHCP)
The system automatically detects and configures the
IP address settings.
TS-855eU User Guide
Installation and Configuration
44
Характеристики

Остались вопросы?Не нашли свой ответ в руководстве или возникли другие проблемы? Задайте свой вопрос в форме ниже с подробным описанием вашей ситуации, чтобы другие люди и специалисты смогли дать на него ответ. Если вы знаете как решить проблему другого человека, пожалуйста, подскажите ему :)
