Роутеры TP-Link ARCHER AX11000 - инструкция пользователя по применению, эксплуатации и установке на русском языке. Мы надеемся, она поможет вам решить возникшие у вас вопросы при эксплуатации техники.
Если остались вопросы, задайте их в комментариях после инструкции.
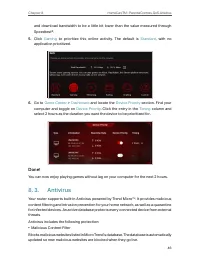
"Загружаем инструкцию", означает, что нужно подождать пока файл загрузится и можно будет его читать онлайн. Некоторые инструкции очень большие и время их появления зависит от вашей скорости интернета.


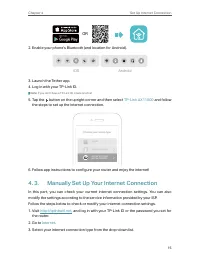


76
Chapter 12
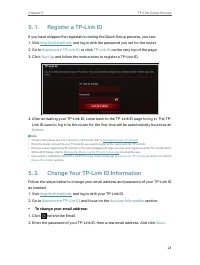
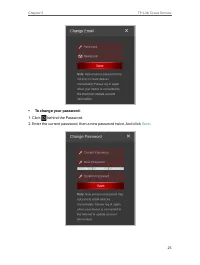
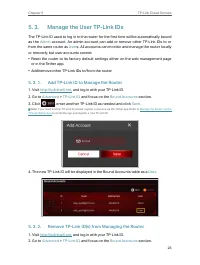
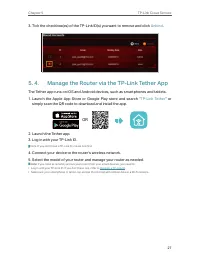
Customize Your Network Settings
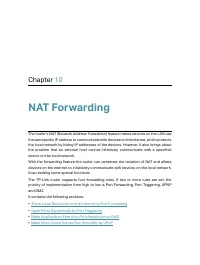
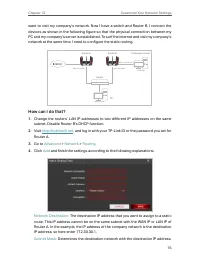
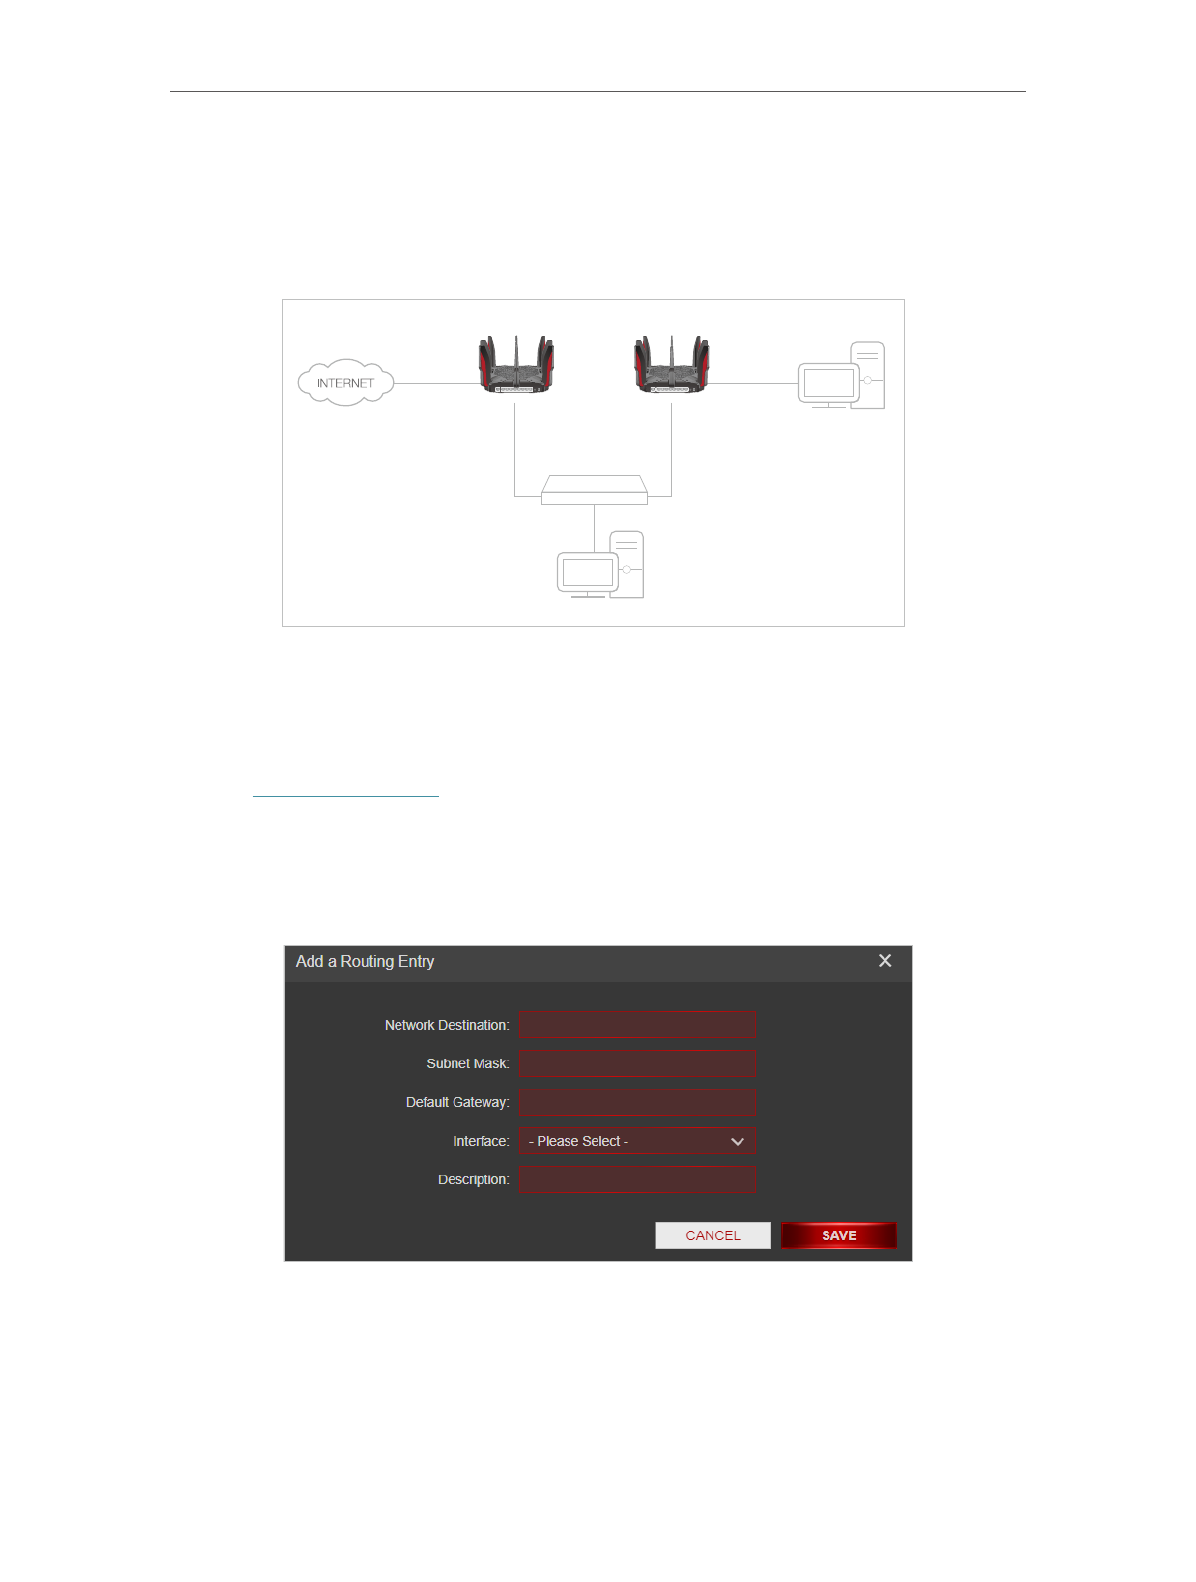
want to visit my company’s network. Now I have a switch and Router B. I connect the
devices as shown in the following figure so that the physical connection between my
PC and my company’s server is established. To surf the internet and visit my company’s
network at the same time, I need to configure the static routing.
Company’s server
PC
Router B
Router A
Switch
LAN: 192.168.0.1
192.168.0.100
LAN: 192.168.0.2
WAN: 172.30.30.100
172.30.30.1
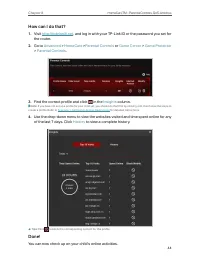
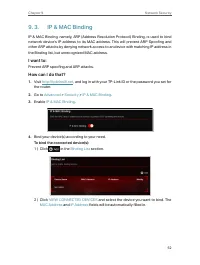
How can I do that?
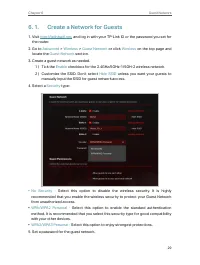
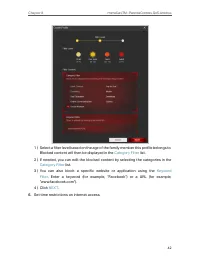
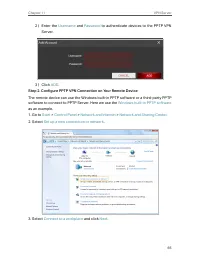
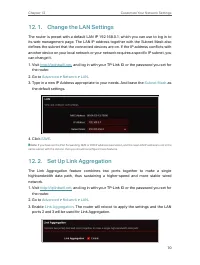
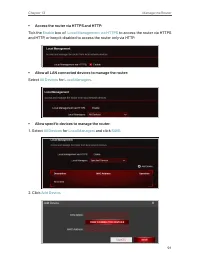
1.
Change the routers’ LAN IP addresses to two different IP addresses on the same
subnet. Disable Router B’s DHCP function.
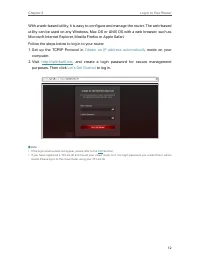
2.
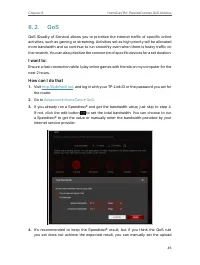
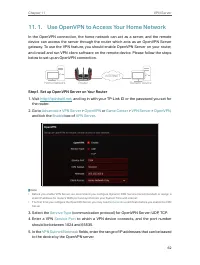
Visit
http://tplinkwifi.net
, and log in with your TP-Link ID or the password you set for
Router A.
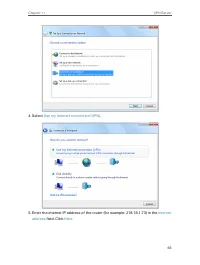
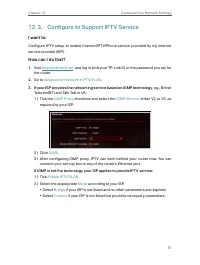
3.
Go to
Advanced
>
Network
>
Routing
.
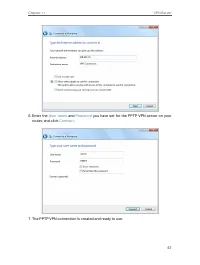
4.
Click
Add
and finish the settings according to the following explanations:
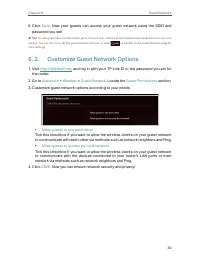
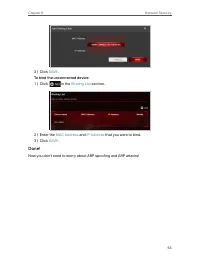
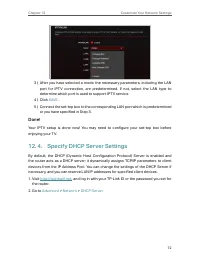
Network Destination:
The destination IP address that you want to assign to a static
route. This IP address cannot be on the same subnet with the WAN IP or LAN IP of
Router A. In the example, the IP address of the company network is the destination
IP address, so here enter 172.30.30.1.
Subnet Mask:
Determines the destination network with the destination IP address.
Характеристики

Остались вопросы?Не нашли свой ответ в руководстве или возникли другие проблемы? Задайте свой вопрос в форме ниже с подробным описанием вашей ситуации, чтобы другие люди и специалисты смогли дать на него ответ. Если вы знаете как решить проблему другого человека, пожалуйста, подскажите ему :)

