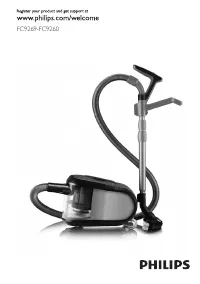
Пылесос Philips FC9264_01_02 - инструкция пользователя по применению, эксплуатации и установке на русском языке. Мы надеемся, она поможет вам решить возникшие у вас вопросы при эксплуатации техники.
Если остались вопросы, задайте их в комментариях после инструкции.
"Загружаем инструкцию", означает, что нужно подождать пока файл загрузится и можно будет его читать онлайн. Некоторые инструкции очень большие и время их появления зависит от вашей скорости интернета.


8
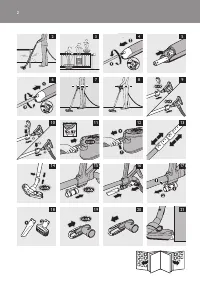
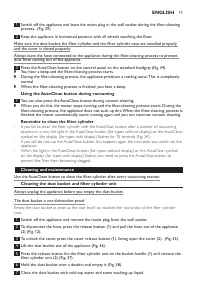
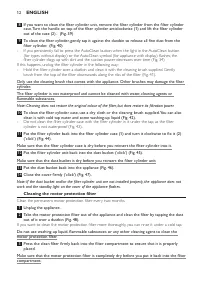
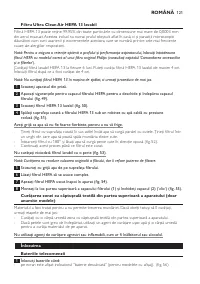
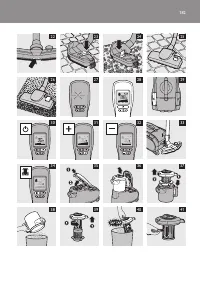
If you want to clean the ilter cylinder unit, remove the ilter cylinder from the ilter cylinder
case. Turn the handle on top of the ilter cylinder anticlockwise (1) and lift the ilter cylinder
out of the case (2). (Fig. 39)
9
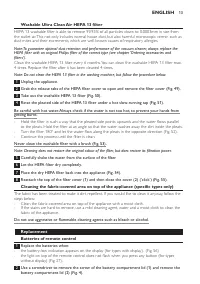
To clean the ilter cylinder, gently tap it against the dustbin to release all ine dust from the
ilter cylinder. (Fig. 40)
-
If you persistently fail to press the AutoClean button when the light in the AutoClean button
(for types without display) or the AutoClean symbol (for appliance with display) lashes, the
ilter cylinder clogs up with dir t and the suction power decreases over time (Fig. 34)
If this happens, unclog the ilter cylinder in the following way:
-
Hold the ilter cylinder over a dustbin and clean it with the cleaning brush supplied. Gently
brush from the top of the ilter downwards along the ribs of the ilter (Fig. 41).
Only use the cleaning brush that comes with the appliance. Other brushes may damage the ilter
cylinder.
The ilter cylinder is not waterproof and cannot be cleaned with water, cleaning agents or
lammable substances.
Note: Cleaning does not restore the original colour of the ilter, but does restore its iltration power.
10
To clean the ilter cylinder case, use a dry cloth or the cleaning brush supplied. You can also
clean it with cold tap water and some washing-up liquid (Fig. 42).
-
Do not clean the ilter cylinder case with the ilter cylinder in it under the tap, as the ilter
cylinder is not waterproof (Fig. 43).
11
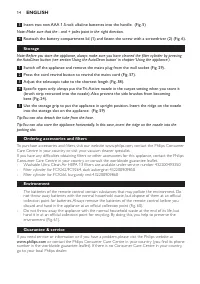
Put the ilter cylinder back into the ilter cylinder case (1) and turn it clockwise to ix it (2)
(‘click’) (Fig. 44).
Make sure that the ilter cylinder case is dry before you reinsert the ilter cylinder into it.
12
Put the ilter cylinder unit back into the dust bucket (‘click’) (Fig. 45).
Make sure that the dust bucket is dry before you reinsert the ilter cylinder unit.
13
Put the dust bucket back into the appliance (Fig. 46).
14
Close the cover irmly (‘click’) (Fig. 47).
Note: If the dust bucket and/or the ilter cylinder unit are not installed properly, the appliance does not
work and the standby light on the cover of the appliance lashes.
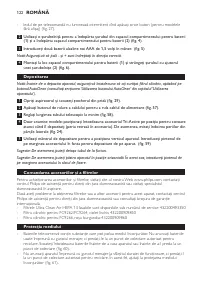
Cleaning the motor protection ilter
Clean the permanent motor protection ilter ever y two months.
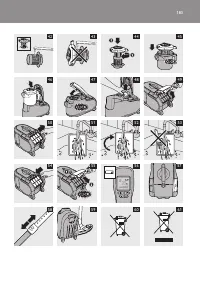
1
Unplug the appliance.
2
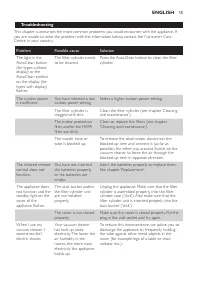
Take the motor protection ilter out of the appliance and clean the ilter by tapping the dust
out of it over a dustbin (Fig. 48).
If you want to clean the motor protection ilter more thoroughly, you can rinse it under a cold tap.
Do not use washing-up liquid, lammable substances or any other cleaning agent to clean the
motor protection ilter.
3
Press the clean ilter irmly back into the ilter compartment to ensure that it is properly
placed.
Make sure that the motor protection ilter is completely dry before you put it back into the ilter
compartment.
English
12
Содержание
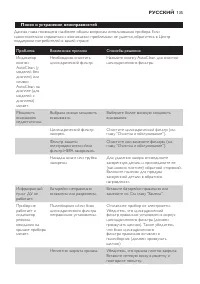
- 128 использовании пылесоса без трубки или насадки.
- 129 Пылесос начнет работать с максимальной мощностью всасывания.; регулировка мощности всасывания
- 130 при последующем включении прибора.
- 131 Пылесборник нельзя мыть в посудомоечной машине.
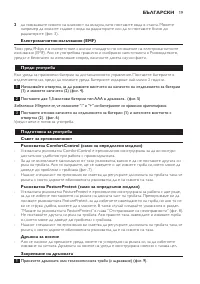
- 132 Очистка фильтра защиты электродвигателя; Фильтр защиты электродвигателя следует очищать раз в два месяца.; Моющийся фильтр ultra Clean air HePa 13; 3 можно не более 4 раз. Замените фильтр после 4 очисток.
- 133 замена; Заменяйте батарейки в следующих случаях:
- 134 Хранение; ребро насадки в ячейку для закрепления трубки.; заказ принадлежностей и фильтров; стране или ознакомьтесь с гарантийным талоном.; защита окружающей среды; или обратитесь в Центр поддержки потребителей Philips в вашей
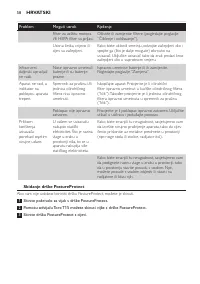
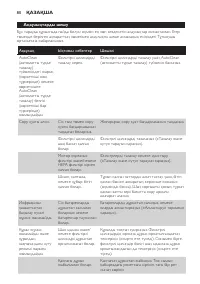
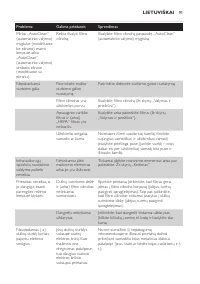
- 135 Поиск и устранение неисправностей; Проблема
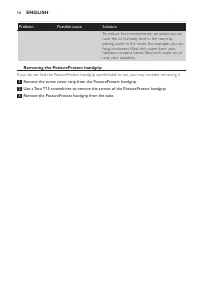
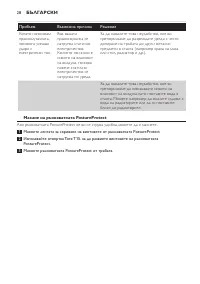
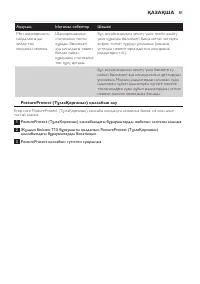
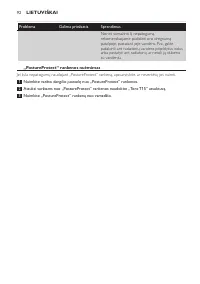
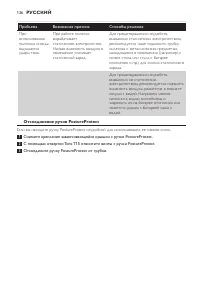
- 136 Отсоединение ручки PostureProtect; Отсоедините ручку PostureProtect от трубки.


