Принтер HP Photosmart A320 - инструкция пользователя по применению, эксплуатации и установке на русском языке. Мы надеемся, она поможет вам решить возникшие у вас вопросы при эксплуатации техники.
Если остались вопросы, задайте их в комментариях после инструкции.
"Загружаем инструкцию", означает, что нужно подождать пока файл загрузится и можно будет его читать онлайн. Некоторые инструкции очень большие и время их появления зависит от вашей скорости интернета.


1
Welcome
Thank you for your HP Photosmart purchase! Read this guide to learn the basics of
printing beautiful photos with your new printer. For more in-depth information about the
printer, see
“Find more information” on page 11
NOTE:
Read the Setup Guide first to set up your HP Photosmart A320 series printer.
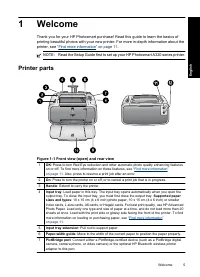
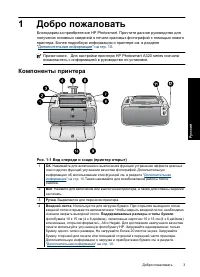
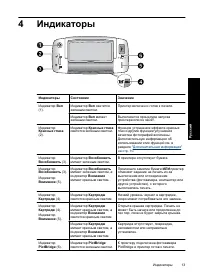
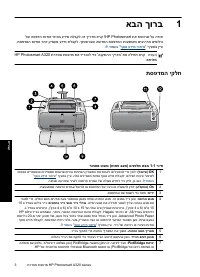
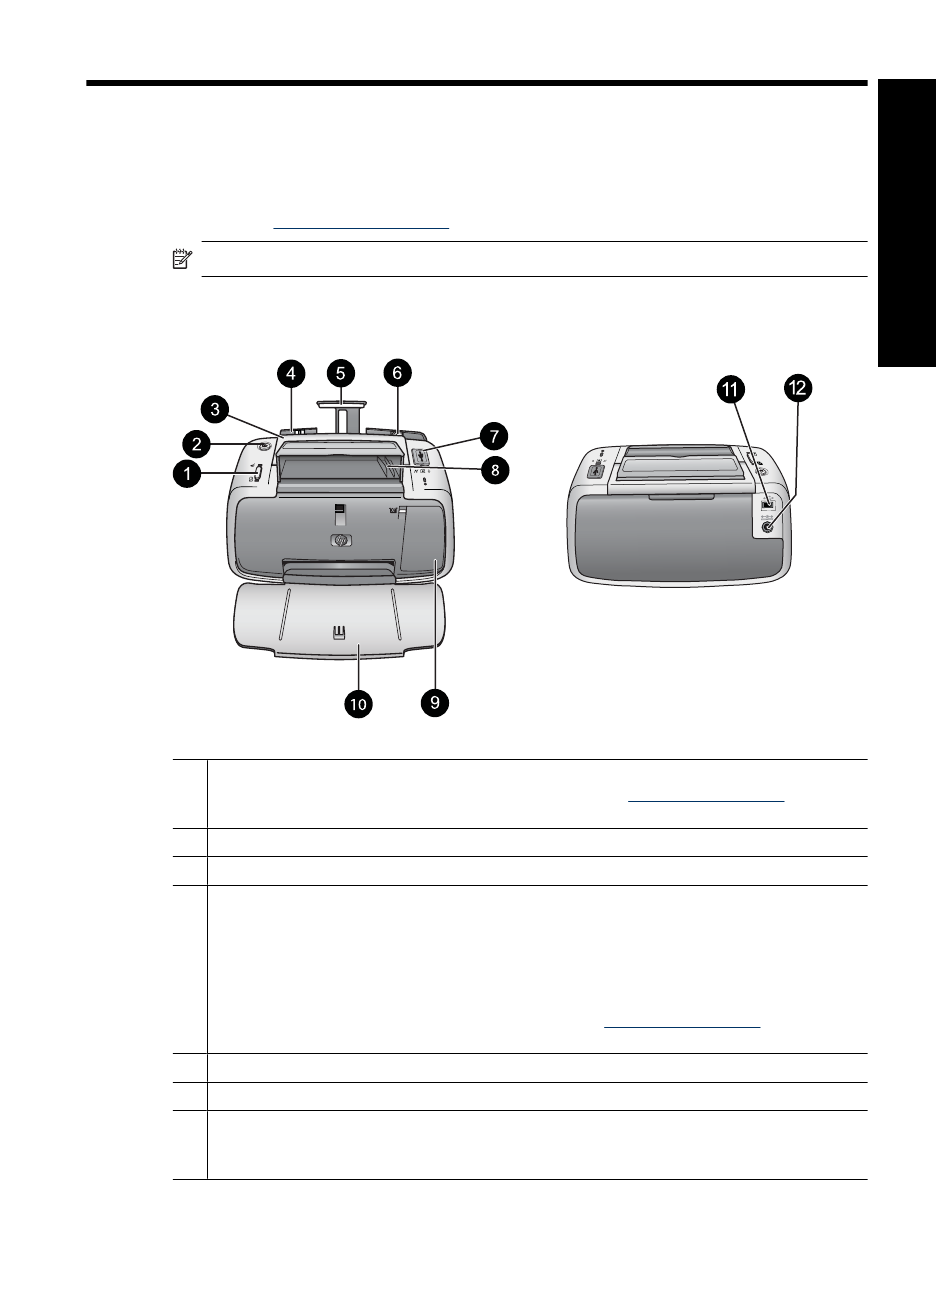
Printer parts
Figure 1-1 Front view (open) and rear view
1
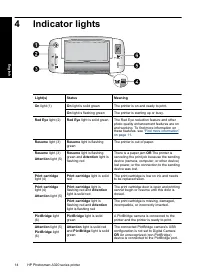
OK
: Press to turn Red Eye reduction and other automatic photo quality enhancing features
on or off. To find more information on these features, see
. Also, press to resume a print job after an error.
2
On
: Press to turn the printer on or off, or to cancel a print job that is in progress.
3
Handle
: Extend to carry the printer.
4
Input tray
: Load paper in this tray. The input tray opens automatically when you open the
output tray. To close the input tray, you must first close the output tray.
Supported paper
sizes and types
: 10 x 15 cm (4 x 6 inch) photo paper, 10 x 15 cm (4 x 6 inch) or smaller
index cards, L-size cards, A6 cards, or Hagaki cards. For best print quality, use HP Advanced
Photo Paper. Load only one type and size of paper at a time, and do not load more than 20
sheets at once. Load with the print side or glossy side facing the front of the printer. To find
more information on loading or purchasing paper, see
5
Input tray extension
: Pull out to support paper.
6
Paper-width guide
: Move to the width of the current paper to position the paper properly.
7
PictBridge port
: Connect either a PictBridge-certified device (such as a PictBridge digital
camera, camera phone, or video camera) or the optional HP Bluetooth wireless printer
adapter to this port.
Welcome
5
En
g
li
s
h


