Плита Gorenje G51101FWC - инструкция пользователя по применению, эксплуатации и установке на русском языке. Мы надеемся, она поможет вам решить возникшие у вас вопросы при эксплуатации техники.
Если остались вопросы, задайте их в комментариях после инструкции.
"Загружаем инструкцию", означает, что нужно подождать пока файл загрузится и можно будет его читать онлайн. Некоторые инструкции очень большие и время их появления зависит от вашей скорости интернета.

13
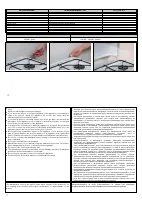
AD J U S TM E N T O F O V E N B U R N E R M I N I M UM P OW E R
On completion of this operation, proceed as follows:
Remove the oven bottom.
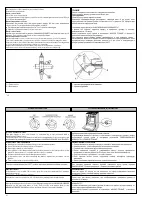
Oven control knob
Lift off the oven control knob.
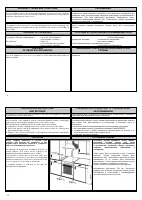
For propane/butane fully tighten screw G and for natural gas unscrew screw G by a
½ ШЫ ¾ ЭЮЫЧ ПШЫ ЧКЭЮЫКl РКЬ
Oven temperature selector
DТЬМШЧЧОМЭ ЭСО МШШkОЫ ПЫШm ЭСО mКТЧЬ ЩШаОЫ ЬЮЩЩlв. LТПř ЭСО ШЯОЧ ЭОmЩОЫКЭЮЫО
selector knob. For propane/butane fully tighten screw G.
FШЫ ЧКЭЮЫКl РКЬ ЮЧЬМЫОа ЬМЫОа G Лв К ½ ШЫ ¾ ЭЮЫЧ ПШЫ ЧКЭЮЫКl РКЬ
Light the oven burner and close the oven door.
Oven control knob
SОЭ ЭСО ШЯОЧ МШЧЭЫШl kЧШЛ ЭШ ЩШЬТЭТШЧ “MAБIMUM POАER” КЧН СОКЭ ЭСО ШЯОЧ ПШЫ 15
minutes. Then set the control knob to the to adjust the flame.
Oven temperature selector
Set the temperature selector control knob to position 8 and heat the oven for 15 minutes.
Then set the temperature selector knob to position 1 and use screw G to adjust the flame.
Right turn reduces the height of the flame, and left turn increases the height. The adjustment
is correct when the body of the flame is about 3 to 4 mm high.
Replace the knob and set it to the switch off position, then replace the oven base.
If the flame sensor does not operate properly, check its position according to fig.
„
“
:
.
.
,
G
,
-
,
1/2”
3/4”
.
“
”.
,
,
, 15
.
“
”
G
.
,
-
.
,
3
4
,
160°C.
Flame sensor position
1
–
Flame sensor
2
–
Oven burner
1 -
2 -
6
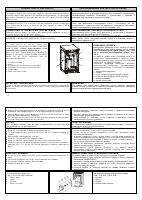
OVEN OPERATION
A T AP P R O TE C TE D
The gas supply to the oven burner is controlled by a tap protected with a
thermoelectric flame sensor.
The power input of the oven burner as well as the temperature of the oven space can
ЛО МШЧЭЫШllОН Лв ЬОЭЭТЧР ЭСО kЧШЛ ЭШ ЭСО ЩШЬТЭТШЧЬ „MAБIMUM POАER“ КЧН „SAVING“
.
,
,
“
” ”
”
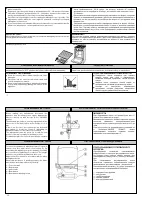
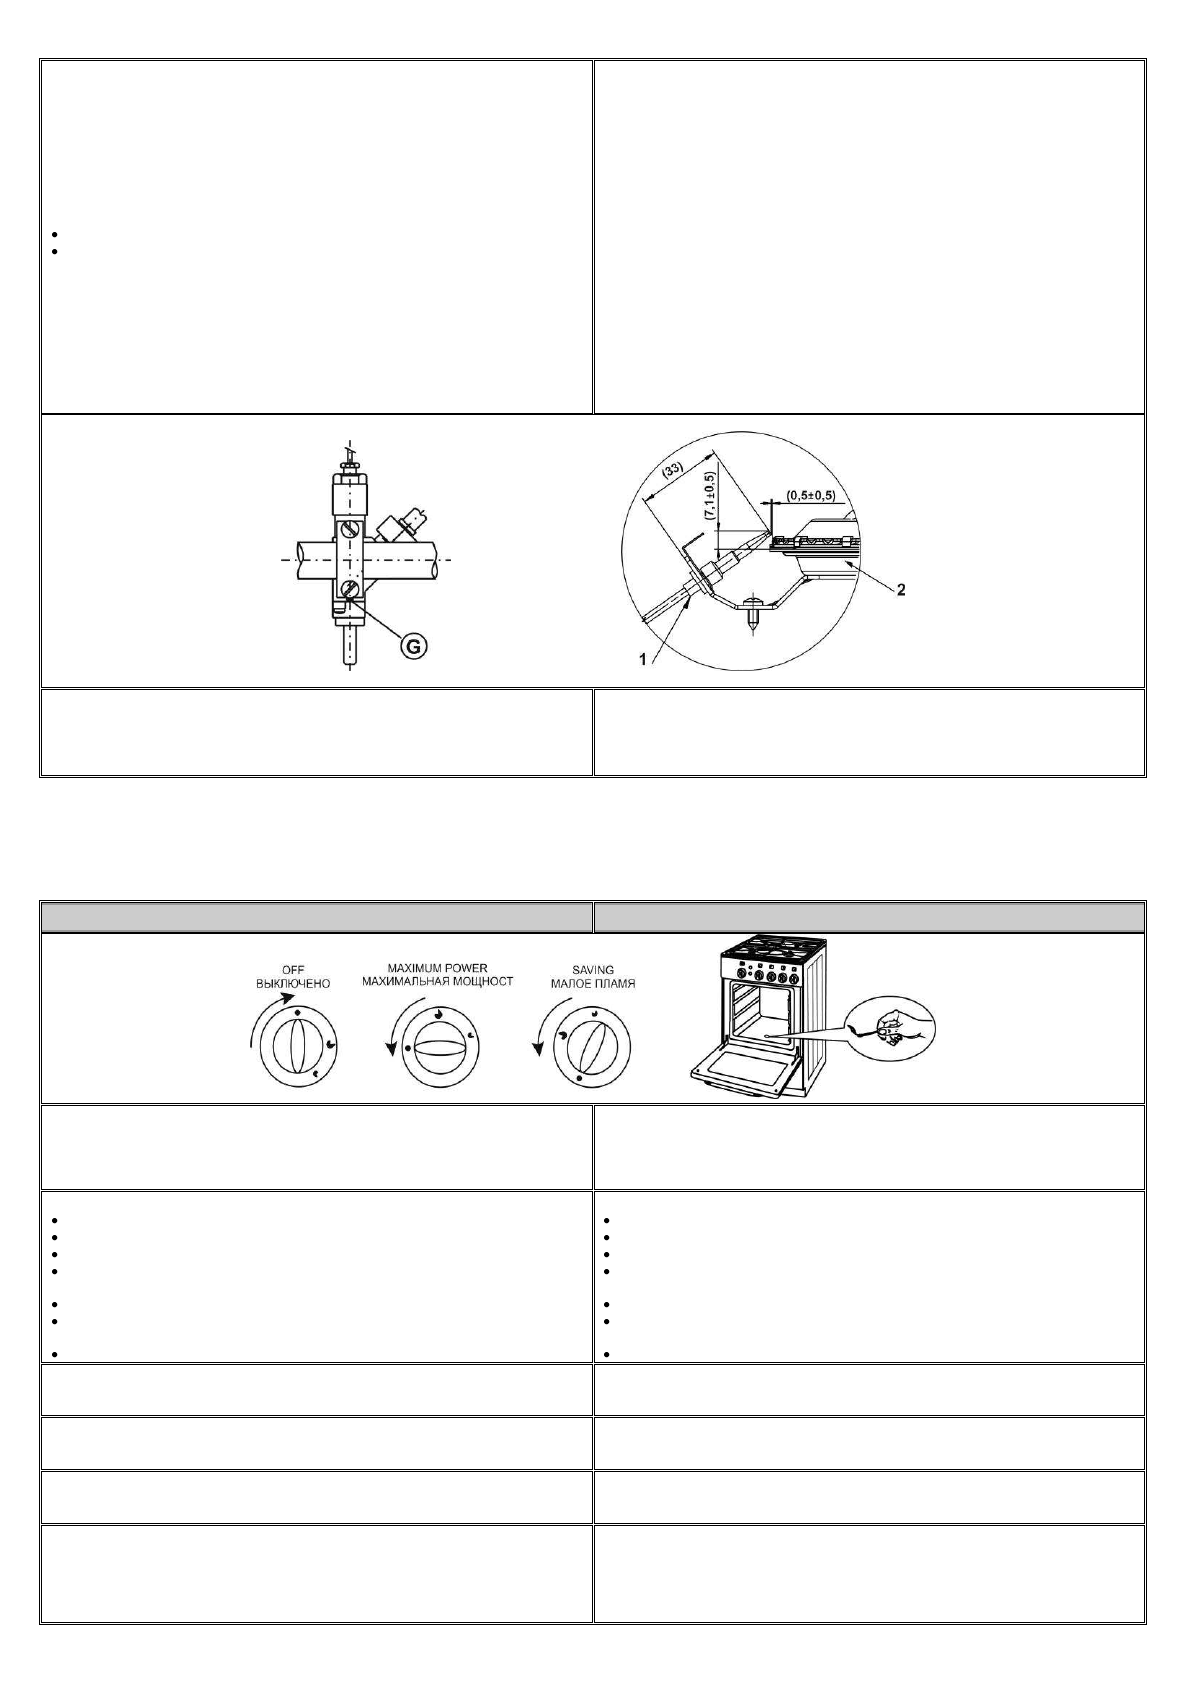
L I G H TI N G T H E B U R N E R
Gently press the button and turn left up to the "maximum power".
Press the knob to the limit position to the panel.
Gas Light a match or other igniter.
After ignition of the burner and hold the button pushed to the limit position to the
panel for a period up to 5 seconds until the sensor is heated.
Release the button and check that the burner burns.
If the burner goes out after releasing the button, repeat the procedure on the
ignition.
Then set the knob to the desired position.
"
".
,
.
.
5
,
.
,
.
,
.
.
S H U T TI N G T H E O V E N B U R N E R O F F
TЮЫЧ ЭСО ЬОlОМЭОН kЧШЛ ЭШ ЭСО “OFF” ЩШЬТЭТШЧ КЧН МСОМk аСОЭСОЫ ЭСО ПlКmО ТЬ ОбЭТЧМЭ
“
”.
-
.
I M P O R T AN T:
If the burner is not on after 10 seconds, open the oven door and wait for 5 minutes
before the next try.
!
10
,
5
,
.
B AK I N G / R O AS TI N G F O O D
Preheat the oven for a period of 10 - 15 min before putting yeast dough to bake.
,
,
,
10
-
15
.
TСО ШЯОЧ kЧШЛ ТЬ ЬОЭ ЭШ ЭСО ЩШЬТЭТШЧ „MAБIMUM POАER“.
After preheating put the food in the oven. Baking/roasting time at MAXIMUM POWER
depends on the type and mass of food. Then set the oven burner knob to the
MINIMUM POW ER (SAVING) position and keep it there to the end of baking.
“
”
.
,
.
“
”
.


