
Пилы дисковые Makita HS011GZ - инструкция пользователя по применению, эксплуатации и установке на русском языке. Мы надеемся, она поможет вам решить возникшие у вас вопросы при эксплуатации техники.
Если остались вопросы, задайте их в комментариях после инструкции.
"Загружаем инструкцию", означает, что нужно подождать пока файл загрузится и можно будет его читать онлайн. Некоторые инструкции очень большие и время их появления зависит от вашей скорости интернета.


18 ENGLISH
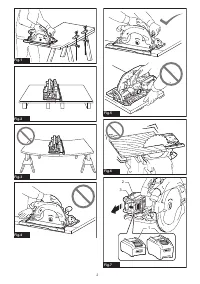
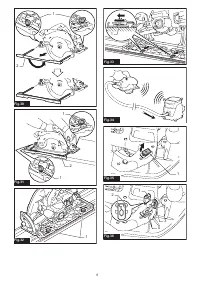
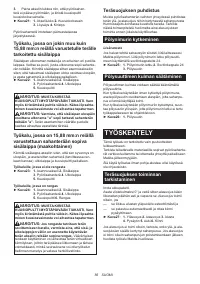
Cutting operation
CAUTION:
Wear dust mask when performing
cutting operation.
CAUTION:
Be sure to move the tool forward
in a straight line gently.
Forcing or twisting the tool
will result in overheating the motor and dangerous
kickback, possibly causing severe injury.
NOTE:
When the battery cartridge temperature is
low, the tool may not work to its full capacity. At this
time, for example, use the tool for a light-duty cut for
a while until the battery cartridge warms up as high
as room temperature. Then, the tool can work to its
full capacity.
►
Fig.28
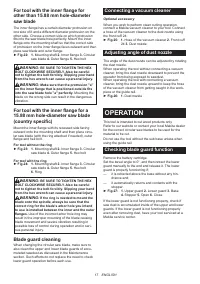
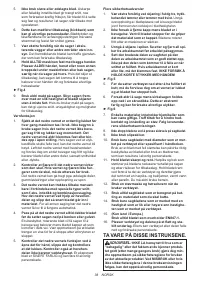
Hold the tool firmly. The tool is provided with both a front
grip and rear handle. Use both to best grasp the tool.
If both hands are holding saw, they cannot be cut by
the circular saw blade. Set the base on the workpiece
to be cut without the circular saw blade making any
contact. Then turn the tool on and wait until the circular
saw blade attains full speed. Now simply move the tool
forward over the workpiece surface, keeping it flat and
advancing smoothly until the sawing is completed.
To get clean cuts, keep your sawing line straight and
your speed of advance uniform. If the cut fails to prop
-
erly follow your intended cut line, do not attempt to turn
or force the tool back to the cut line. Doing so may bind
the circular saw blade and lead to dangerous kickback
and possible serious injury. Release switch, wait for cir
-
cular saw blade to stop and then withdraw tool. Realign
tool on new cut line, and start cut again. Attempt to
avoid positioning which exposes operator to chips and
wood dust being ejected from saw. Use eye protection
to help avoid injury.
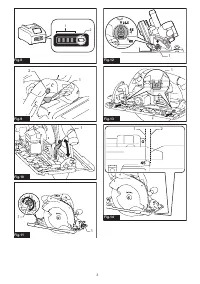
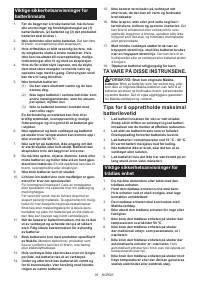
NOTE:
When making a miter cuts etc., sometimes
the lower guard does not move easily. At that time,
use the retracting lever to raise the lower guard for
starting cut and as soon as blade enters the material,
release the retracting lever.
►
Fig.29:
1.
Retracting lever
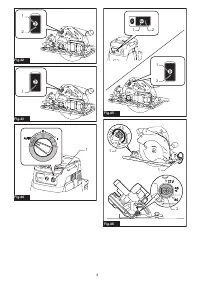
Sub base (Guide rule)
CAUTION:
Make sure that the sub base (guide
rule) is securely installed in the correct position
before use.
Improper attachment may cause danger
-
ous kickback.
By using the sub base as a guide rule, you can perform
extra-accurate straight cuts. Loosen the clamping
screws and slide the sub base out from the tool then
insert it upside down.
►
Fig.30:
1.
Clamping screw
2.
Sub base
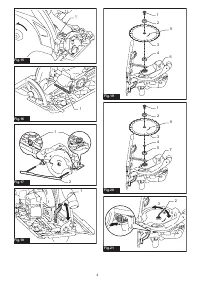
Simply slide the fence of the sub base snugly against
the side of the workpiece and secure it in position with
the clamping screws. It also makes repeated cuts of
uniform width possible.
►
Fig.31:
1.
Clamping screw
2.
Sub base
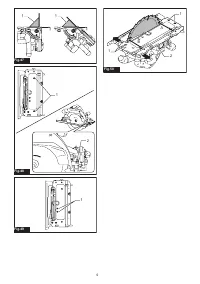
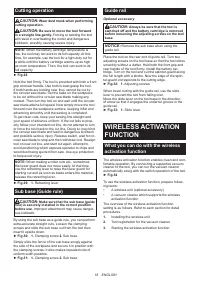
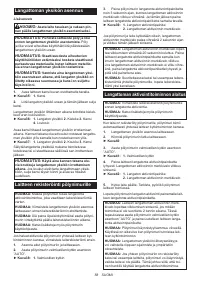
Guide rail
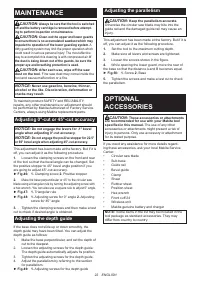
Optional accessory
CAUTION:
Always be sure that the tool is
switched off and the battery cartridge is removed
before loosening the adjusting screws on the tool
base.
NOTICE:
Remove the sub base when using the
guide rail.
Place the tool on the rear end of guide rail. Turn two
adjusting screws on the tool base so that the tool slides
smoothly without a clatter. Hold both the front grip and
rear handle of the tool firmly. Install the battery car
-
tridge. Turn on the tool and cut the splinter-guard along
the full length with a stroke. Now the edge of the splin-
ter-guard corresponds to the cutting edge.
►
Fig.32:
1.
Adjusting screws
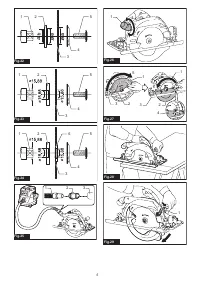
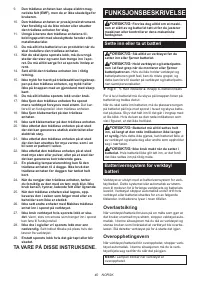
When bevel cutting with the guide rail, use the slide
lever to prevent the tool from falling over.
Move the slide lever on the tool base in the direction
of arrow so that it engages the undercut groove in the
guide rail.
►
Fig.33:
1.
Slide lever
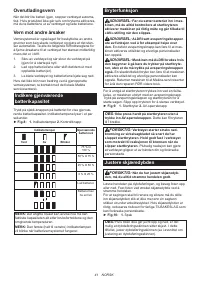
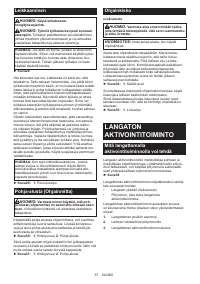
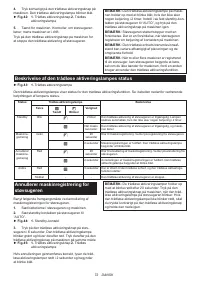
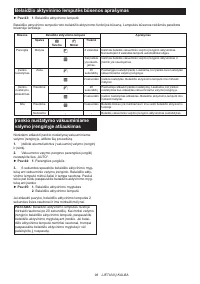
WIRELESS ACTIVATION
FUNCTION
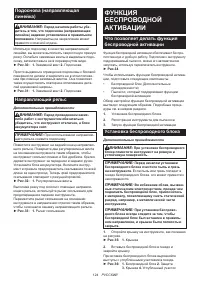
What you can do with the wireless
activation function
The wireless activation function enables clean and com-
fortable operation. By connecting a supported vacuum
cleaner to the tool, you can run the vacuum cleaner
automatically along with the switch operation of the tool.
►
Fig.34
To use the wireless activation function, prepare follow-
ing items:
•
A wireless unit (optional accessory)
•
A vacuum cleaner which supports the wireless
activation function
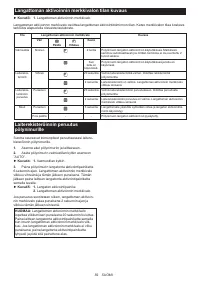
The overview of the wireless activation function
setting is as follows. Refer to each section for detail
procedures.
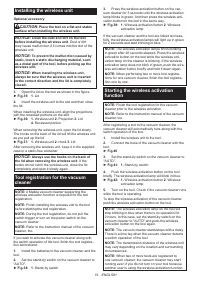
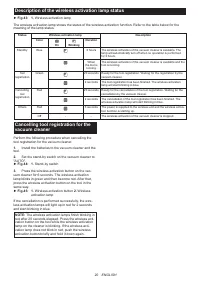
1.
Installing the wireless unit
2.
Tool registration for the vacuum cleaner
3.
Starting the wireless activation function
Содержание
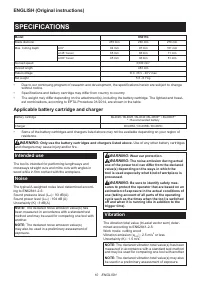
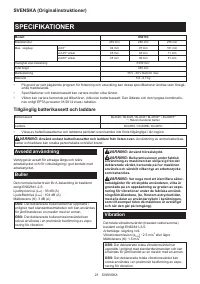
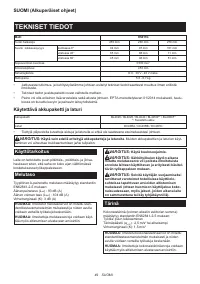
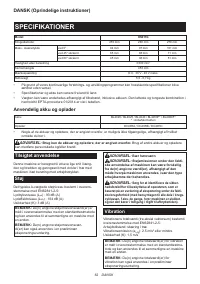
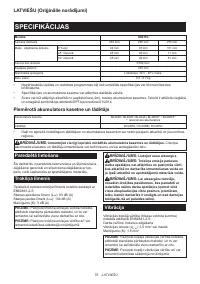
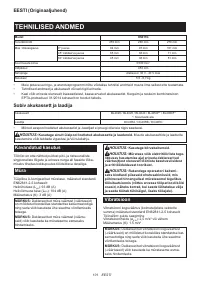
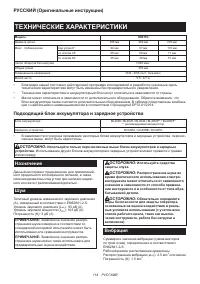
- 114 ТЕХНИЧЕСКИЕ ХАРАКТЕРИСТИКИ; Подходящий блок аккумулятора и зарядное устройство; Вибрация
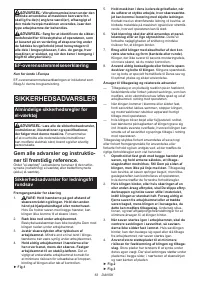
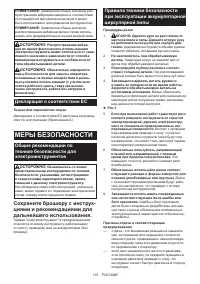
- 115 МЕРЫ БЕЗОПАСНОСТИ; Сохраните брошюру с инструк
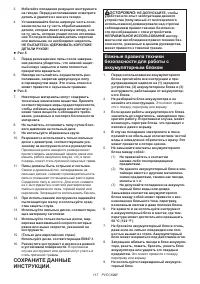
- 117 СОХРАНИТЕ ДАННЫЕ; Важные правила техники
- 119 ОПИСАНИЕ РАБОТЫ; Установка или снятие блока
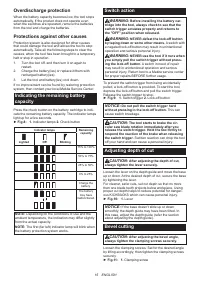
- 120 Защита от перегрева; Действие выключателя
- 121 СБОРКА
- 122 Установка подосновы
- 123 ЭКСПЛУАТАЦИЯ
- 124 Подоснова (направляющая; ФУНКЦИЯ; Что позволяет делать функция
- 125 Регистрация инструмента для
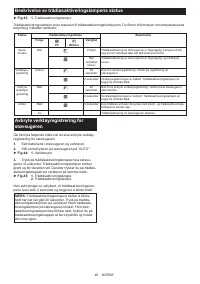
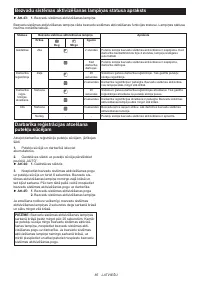
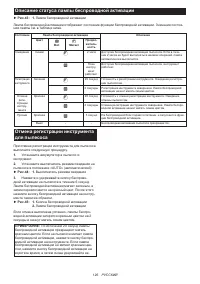
- 126 Описание статуса лампы беспроводной активации
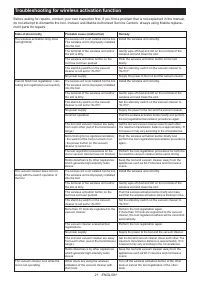
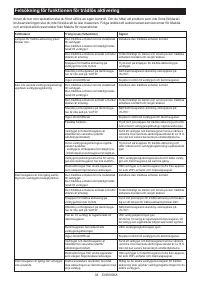
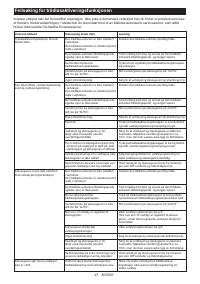
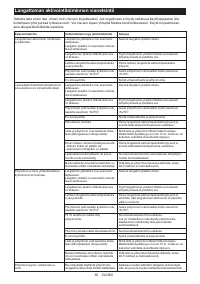
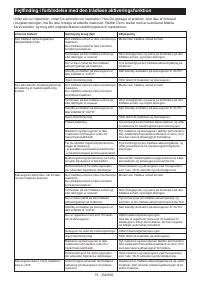
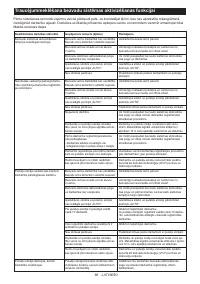
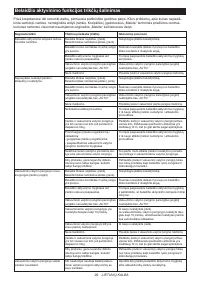
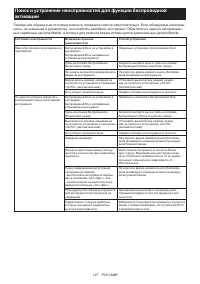
- 127 Поиск и устранение неисправностей для функции беспроводной
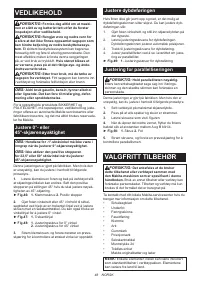
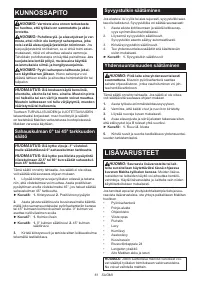
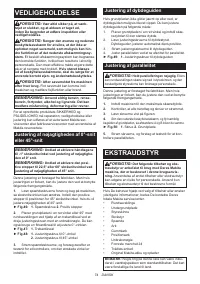
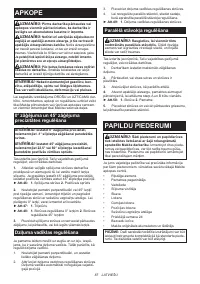
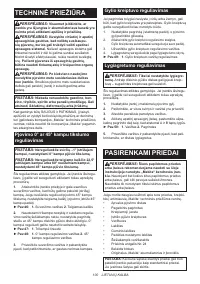
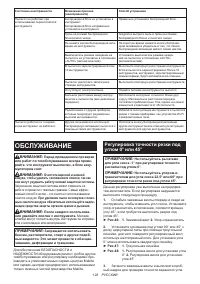
- 128 ОБСЛУЖИВАНИЕ; Регулировка точности резки под
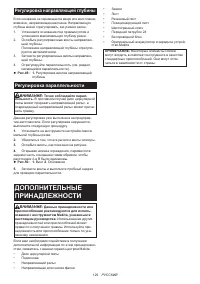
- 129 Регулировка направляющей глубины; ДОПОЛНИТЕЛЬНЫЕ
Характеристики

Остались вопросы?Не нашли свой ответ в руководстве или возникли другие проблемы? Задайте свой вопрос в форме ниже с подробным описанием вашей ситуации, чтобы другие люди и специалисты смогли дать на него ответ. Если вы знаете как решить проблему другого человека, пожалуйста, подскажите ему :)


