
Пилы дисковые Makita DHS680Z - инструкция пользователя по применению, эксплуатации и установке на русском языке. Мы надеемся, она поможет вам решить возникшие у вас вопросы при эксплуатации техники.
Если остались вопросы, задайте их в комментариях после инструкции.
"Загружаем инструкцию", означает, что нужно подождать пока файл загрузится и можно будет его читать онлайн. Некоторые инструкции очень большие и время их появления зависит от вашей скорости интернета.


11
For tool without dust nozzle provided as a standard
equipment, replace the lever fixed on the lower guard to
the one supplied with the dust nozzle (optional
accessory) at the same time when installing the dust
nozzle. Otherwise you will not be able to make a cut
because the lower guard movement is hindered by the
dust nozzle.
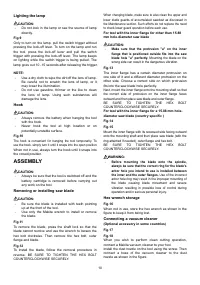
OPERATION
CAUTION:
•
Be sure to move the tool forward in a straight line
gently. Forcing or twisting the tool will result in
overheating the motor and dangerous kickback,
possibly causing severe injury.
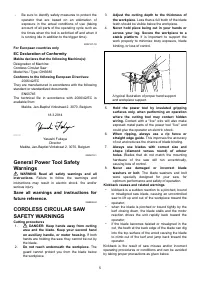
•
Always use a front grip and rear handle and firmly
hold the tool by both front grip and rear handle
during operations.
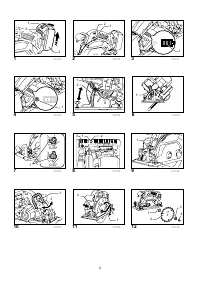
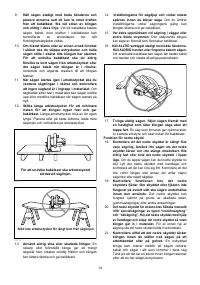
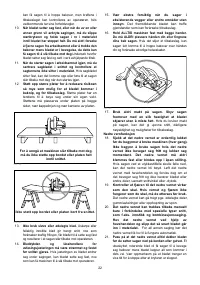
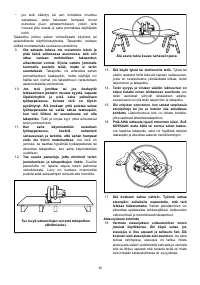
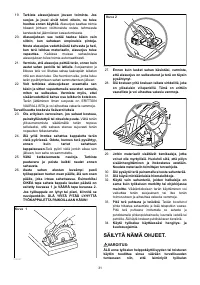
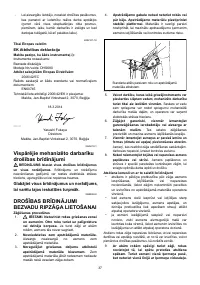
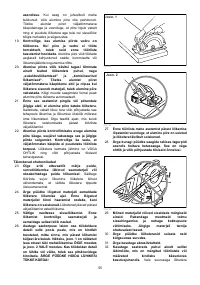
Fig.19
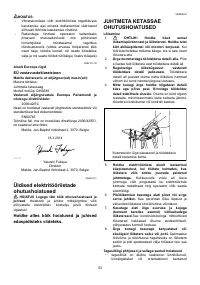
Hold the tool firmly. The tool is provided with both a front
grip and rear handle. Use both to best grasp the tool. If
both hands are holding saw, they cannot be cut by the
blade. Set the base on the workpiece to be cut without
the blade making any contact. Then turn the tool on and
wait until the blade attains full speed. Now simply move
the tool forward over the workpiece surface, keeping it
flat and advancing smoothly until the sawing is
completed.
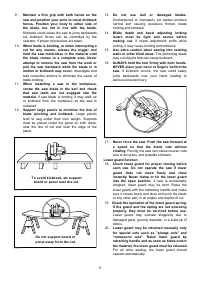
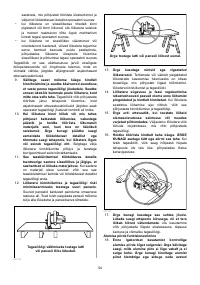
To get clean cuts, keep your sawing line straight and your
speed of advance uniform. If the cut fails to properly
follow your intended cut line, do not attempt to turn or
force the tool back to the cut line. Doing so may bind the
blade and lead to dangerous kickback and possible
serious injury. Release switch, wait for blade to stop and
then withdraw tool. Realign tool on new cut line, and start
cut again. Attempt to avoid positioning which exposes
operator to chips and wood dust being ejected from saw.
Use eye protection to help avoid injury.
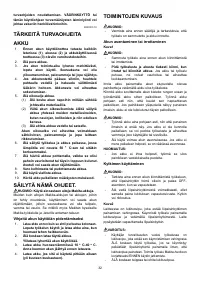
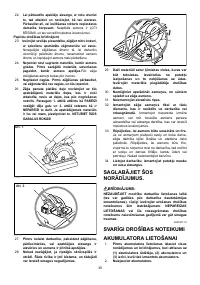
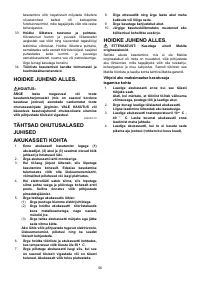
Rip fence (Guide rule) (optional accessory)
Fig.20
The handy rip fence allows you to do extra-accurate
straight cuts. Simply slide the rip fence up snugly
against the side of the workpiece and secure it in
position with the clamping screw on the front of the base.
It also makes repeated cuts of uniform width possible.
MAINTENANCE
CAUTION:
•
Always be sure that the tool is switched off and the
battery cartridge is removed before carrying out
any work on the tool.
•
Clean out the upper and lower guards to
ensure there is no accumulated sawdust which
may impede the operation of the lower
guarding system.
A dirty guarding system may
limit the proper operation which could result in
serious personal injury. The most effective way to
accomplish this cleaning is with compressed air.
If
the dust is being blown out of the guards be
sure the proper eye and breathing protection is
used.
•
Never use gasoline, benzine, thinner, alcohol or
the like. Discoloration, deformation or cracks may
result.
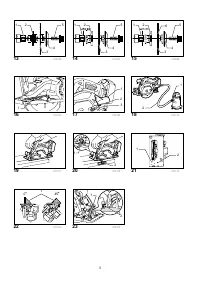
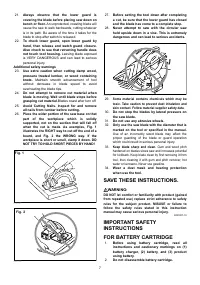
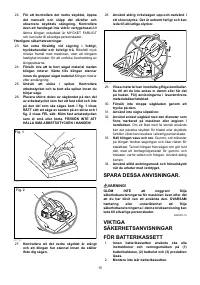
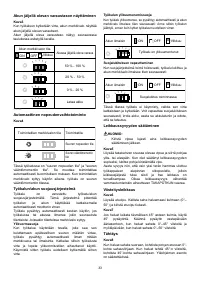
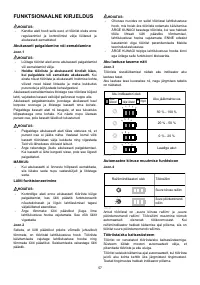
Adjusting for accuracy of 0° and 45° cut
(vertical and 45° cut)
Fig.21
Fig.22
This adjustment has been made at the factory. But if it is
off, adjust the adjusting screws with a hex wrench while
inspecting 0° or 45° the blade with the base using a
triangular rule or square rule, etc. Use the 45° stopper
for adjusting 45° angle.
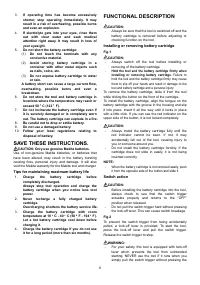
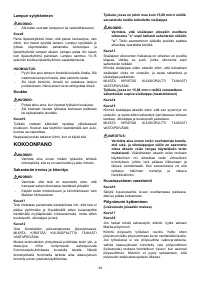
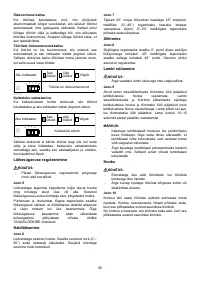
Adjusting bevel guide
Fig.23
The bevel guide has been factory adjusted. But if it is off,
you can adjust it as the following procedure.
To adjust the bevel guide, loosen the two screws. Align
the 0° line on the bevel guide with the guide on the base
when the base is set to 0° angle.
To maintain product SAFETY and RELIABILITY, repairs,
any other maintenance or adjustment should be
performed by Makita Authorized Service Centers,
always using Makita replacement parts.
OPTIONAL ACCESSORIES
CAUTION:
•
These accessories or attachments are
recommended for use with your Makita tool
specified in this manual. The use of any other
accessories or attachments might present a risk of
injury to persons. Only use accessory or
attachment for its stated purpose.
If you need any assistance for more details regarding
these accessories, ask your local Makita Service Center.
•
Saw blades
•
Rip fence (Guide rule)
•
Guide rail
•
Guide rail adapter
•
Rule bar
•
Dust nozzle
•
Hex wrench
•
Makita genuine battery and charger
NOTE:
•
Some items in the list may be included in the tool
package as standard accessories. They may differ
from country to country.
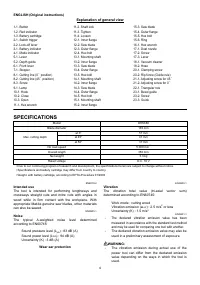
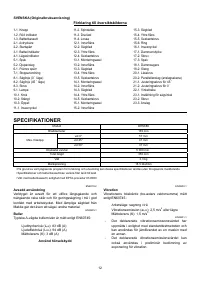
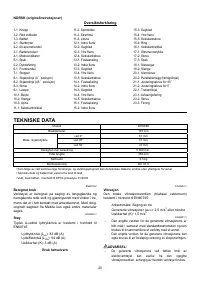
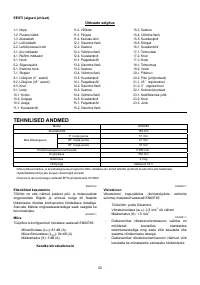
Характеристики

Остались вопросы?Не нашли свой ответ в руководстве или возникли другие проблемы? Задайте свой вопрос в форме ниже с подробным описанием вашей ситуации, чтобы другие люди и специалисты смогли дать на него ответ. Если вы знаете как решить проблему другого человека, пожалуйста, подскажите ему :)


