Пилы дисковые Makita 2712 - инструкция пользователя по применению, эксплуатации и установке на русском языке. Мы надеемся, она поможет вам решить возникшие у вас вопросы при эксплуатации техники.
Если остались вопросы, задайте их в комментариях после инструкции.
"Загружаем инструкцию", означает, что нужно подождать пока файл загрузится и можно будет его читать онлайн. Некоторые инструкции очень большие и время их появления зависит от вашей скорости интернета.


9
Switched on the dust extraction system before
starting the tool.
35.
The guard can be lifted during workpiece setup
and for ease of cleaning. Always make sure that
guard hood is down and flat against sawtable
before plugging in the tool.
36.
Wear gloves against the hazard of cutting when
handling saw blades, feeding wood into the tool or
doing maintenance.
37.
Never try to remove chips while the saw blade is
running or the tool is switched on.
38.
Never try to use the tool unless all guards and
other safety devices necessary for tool are in
good working order.
39.
Operators must be adequately trained in the
assembly, adjustment and operation of the tool.
40.
Never use the blades which maximum speed is
lower than the no load speed of the tool.
41.
Keep work area well lit.
SAVE THESE INSTRUCTIONS.
INSTALLATION
PREPARATION
Check contents of package for the following components.
Please inform Makita service center of any part missing in
the package immediately.
- Table saw (1 unit)
- Leg (4 pcs)
- Foot (4 pcs)
- Countersunk screw for foot (4 pcs)
- Hex nut for foot (4 pcs)
- Leg support (long) (2 pcs)
- Leg support (short) (2 pcs)
- Tire complete (1 pc)
- Dust nozzle (1 pc)
- Carrying handle (2 pcs)
- Square neck bolt for guide rail (4 pcs)
- Hex bolt for guide rail (4 pcs)
- Guide rail (long) (1 pc)
- Guide rail (short) (1 pc)
- Sub table (1 pc)
- Stay (long) (2 pc)
- Stay (short) (2 pc)
- Hook (1 pc)
- Blade guard (1 pct)
- Tapping screw (3 pcs)
- Hex bolt (38 pcs)
- Hex nut (38 pcs)
- Hex wrench (1 pc)
- Wrench (1 pc)
- Push stick (1 pc)
- Push block (1 pc)
- Fence (for Rip fence) (1 pc)
- Rip fence (1 pc)
Installing table saw
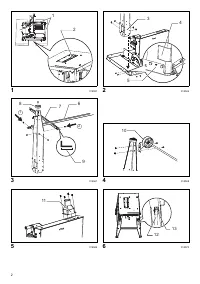
1. Overturn the table saw on two boards. Check the
riving knife positions the space between two boards.
(Fig. 1)
2. Attach the four legs to the inside of base edge. Attach
the leg with the hole for the switch to the side with the
sign “A” on the base. Secure the four legs temporarily,
do not tighten the screws firmly yet.
(Fig. 2)
3. Attach the leg supports (long) to the legs and then
attach the leg supports (short) to the legs. Secure the
legs and leg supports with the screws firmly. Always
check the direction of support legs.
4. Install the feet at the bottoms of the legs. Secure them
with countersunk screws and hex nuts.
(Fig. 3)
5. Install the tire complete to the legs and secure them
with screws and hex nuts.
(Fig. 4)
6. Install the dust nozzle.
7. Adjust the motor part to the 0° position and secure it
by tightening the knob. Secure the power cord with the
cord clamp.
(Fig. 5)
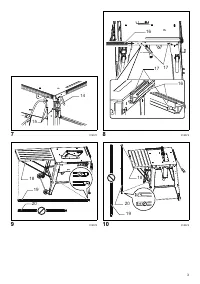
8. Turn the table saw back and then attach the carrying
handles.
(Fig. 6)
9. Install the switch to the leg and secure it with the
tapping screws.
(Fig. 7)
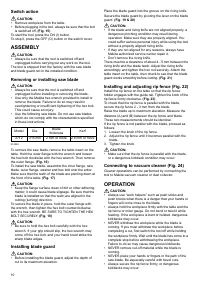
10. Install the saw blade and blade guard. When installing
them, refer to the Section “Removing or installing saw
blade” and “Installing blade guard”.
11. Install the guide rail (short) to the front side of the table
saw and the guide rail (long) to the left side of the
base.
(Fig. 8)
12. Install the sub table to the base. Select the proper
length stays depending on the position.
(Fig. 9 & 10)
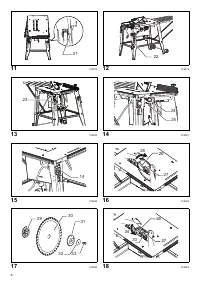
13. Install the hook to the leg.
(Fig. 11)
14. Locate the table saw in a well lit and level area where
you can maintain good footing and balance. It should
be installed in an area that leaves enough room to
easily handle the size of your workpieces.
If there is any tendency for the table saw to tip over,
slide or move during operation, the table saw should
be secured to the floor.
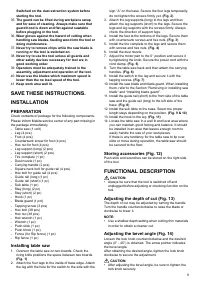
Storing accessories (Fig. 12)
Push stick and wrenches can be stored on the right side
of the tool.
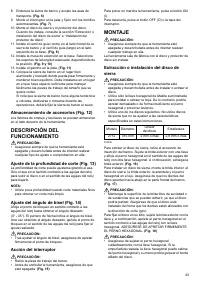
FUNCTIONAL DESCRIPTION
CAUTION:
• Always be sure that the tool is switched off and
unplugged before adjusting or checking function on the
tool.
Adjusting the depth of cut (Fig. 13)
The depth of cut may be adjusted by turning the handle.
Turn the handle counterclockwise to raise the blade or
clockwise to lower it.
NOTE:
• Use a shallow depth setting when cutting thin materials
in order to obtain a cleaner cut.
Adjusting the bevel angle (Fig. 14)
Loosen the lock knob counterclockwise and the desired
angle (0° - 45°) is obtained. The arrow pointer indicates
the bevel angle.
After obtaining the desired angle, tighten the lock knob
clockwise to secure the adjustment.
CAUTION:
• After adjusting the bevel angle, be sure to tighten the
lock knob securely.
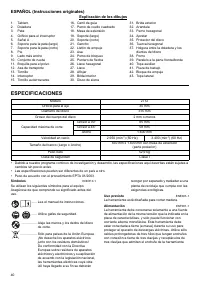
Характеристики

Остались вопросы?Не нашли свой ответ в руководстве или возникли другие проблемы? Задайте свой вопрос в форме ниже с подробным описанием вашей ситуации, чтобы другие люди и специалисты смогли дать на него ответ. Если вы знаете как решить проблему другого человека, пожалуйста, подскажите ему :)


