Пилы дисковые Makita 2712 - инструкция пользователя по применению, эксплуатации и установке на русском языке. Мы надеемся, она поможет вам решить возникшие у вас вопросы при эксплуатации техники.
Если остались вопросы, задайте их в комментариях после инструкции.
"Загружаем инструкцию", означает, что нужно подождать пока файл загрузится и можно будет его читать онлайн. Некоторые инструкции очень большие и время их появления зависит от вашей скорости интернета.


11
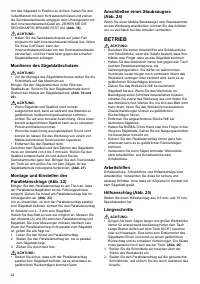
• Always use “work helpers” such as push sticks and
push blocks when cutting small or narrow workpieces.
Work helpers
Push sticks, push blocks or auxiliary fence are types of
“work helpers”. Use them to make safe, sure cuts without
the need for the operator to contact the blade with any
part of the body.
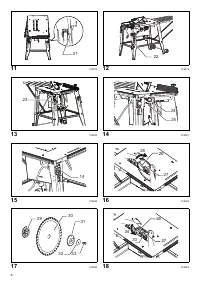
Auxiliary fence (Fig. 25)
Make auxiliary fence from 9.5 mm and 19 mm plywood
pieces.
Ripping
CAUTION:
• When cutting long or large workpieces, always provide
adequate support behind the table. DO NOT allow a
long board to move or shift on the table. This will cause
the blade to bind and increase the possibility of
kickback and personal injury. The support should be at
the same height as the table.
(Fig. 26)
1. Adjust the depth of cut a bit higher than the thickness
of the workpiece.
2. Position the rip fence to the desired width of rip and
secure it in place by tightening the knob.
3. Turn the tool on and gently feed the workpiece into the
blade along with the rip fence.
(1)
When the width of rip is 150 mm or wider,
carefully use your right hand to feed the
workpiece. Use your left hand to hold the
workpiece in position against the rip fence.
(2)
When the width of rip is 65 mm - 150 mm wide,
use the push stick to feed the workpiece.
(Fig. 27)
(3)
When the width of rip is narrower than 65 mm,
the push stick cannot be used because the push
stick will strike the blade guard. Use the auxiliary
fence and push block. Attach the auxiliary fence
to the rip fence with two “C” clamps.
(Fig. 28)
Feed the workpiece by hand until the end is
about 25 mm from the front edge of the table.
Continue to feed using the push block on the top
of the auxiliary fence until the cut is complete.
(Fig. 29)
Cross cutting
CAUTION:
• When making a crosscut, remove the rip fence from the
table.
• When cutting long or large workpieces, always provide
adequate support to the sides of the table. The support
should be at the same height as the table.
• Always keep hands away from path of blade.
Slide the rip fence into the rail on the table. Loosen the
knob on the fence and align to desired angle (0° to 60°).
Bring stock flush up against fence, secure it with the
clamp on the rip fence and feed gently forward into the
blade.
(Fig. 30)
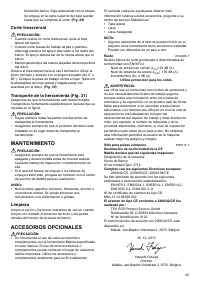
Carrying tool (Fig. 31)
Make sure that the tool is unplugged.
Carry the tool by holding the tool part shown in the figure.
CAUTION:
• Always secure all moving portions before carrying the
tool.
• Always make sure that the blade guard is installed in
place before carrying the tool.
MAINTENANCE
CAUTION:
• Always be sure that the tool is switched off and
unplugged before attempting to perform inspection or
maintenance.
• If the push block handle or push sticks is broken,
contact Makita service center to get the replacement.
NOTICE:
• Never use gasoline, benzine, thinner, alcohol or the
like. Discoloration, deformation or cracks may result.
Cleaning
Clean out sawdust and chips from time to time. Carefully
clean the blade guard and moving parts inside the table
saw.
OPTIONAL ACCESSORIES
CAUTION:
• These accessories or attachments are recommended
for use with your Makita tool specified in this manual.
The use of any other accessories or attachments might
present a risk of injury to persons. Only use accessory
or attachment for its stated purpose.
If you need any assistance for more details regarding
these accessories, ask your local Makita Service Center.
• Rip fence
• Wrench
• Hex wrench
NOTE:
• Some items in the list may be included in the tool
package as standard accessories. They may differ
from country to country.
Noise
ENG905-1
The typical A-weighted noise level determined according
to EN1870-1:
Sound pressure level (L
pA
): 93 dB (A)
Sound power level (L
WA
): 105 dB (A)
Uncertainty (K): 4 dB (A)
Wear ear protection.
WARNING:
The figures quoted are emission levels and are not
necessarily safe working levels. Whilst there is a
correlation between the emission and exposure levels,
this cannot be used reliably to determine whether or not
further precautions are required. Factors that influence
the actual level of exposure of the workforce include the
characteristics of the work room and the other sources of
noise etc.i.e. the number of machines and other adjacent
processes. Also the permissible exposure level can vary
from country to country. This information, however, will
enable the user of the machine to make a better
evaluation of the hazard and risk.
Характеристики

Остались вопросы?Не нашли свой ответ в руководстве или возникли другие проблемы? Задайте свой вопрос в форме ниже с подробным описанием вашей ситуации, чтобы другие люди и специалисты смогли дать на него ответ. Если вы знаете как решить проблему другого человека, пожалуйста, подскажите ему :)


