
Перфораторы Bosch GBH 2-26 DRE - инструкция пользователя по применению, эксплуатации и установке на русском языке. Мы надеемся, она поможет вам решить возникшие у вас вопросы при эксплуатации техники.
Если остались вопросы, задайте их в комментариях после инструкции.
"Загружаем инструкцию", означает, что нужно подождать пока файл загрузится и можно будет его читать онлайн. Некоторые инструкции очень большие и время их появления зависит от вашей скорости интернета.


English |
17
Bosch Power Tools
1 609 92A 220 | (28.4.16)
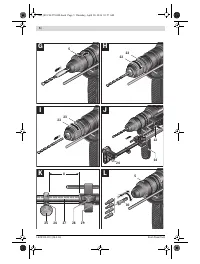
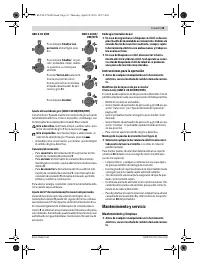
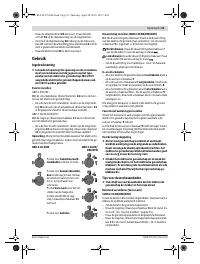
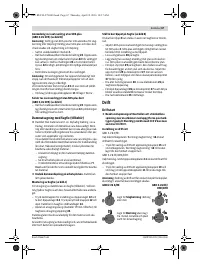
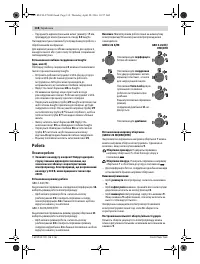
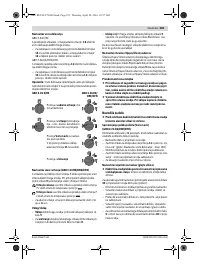
Inserting Drilling Tools without SDS-plus
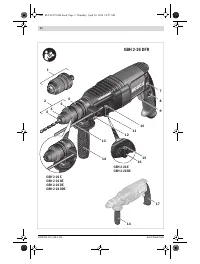
(GBH 2-26 E/RE/DE/DRE)
Note:
Do not use tools without SDS-plus for hammer drilling
or chiselling! Tools without SDS-plus and their drill chucks are
damaged by hammer drilling or chiselling.
– Insert a key type drill chuck
19
(see “Changing the Key
Type Drill Chuck”, page 16).
– Open the key type drill chuck
19
by turning until the tool
can be inserted. Insert the tool.
– Insert the chuck key into the corresponding holes of the
key type drill chuck
19
and clamp the tool uniformly.
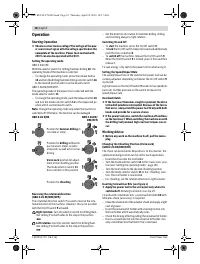
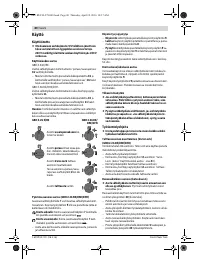
– GBH 2-26 E/RE: Set the selector switch
16
to the “Drilling”
symbol.
– GBH 2-26 DE/DRE: Turn the mode selector switch
11
to
the “drilling” position.
Removing Drilling Tools without SDS-plus
(GBH 2-26 E/RE/DE/DRE)
– Turn the sleeve of the key type drill chuck
19
with the drill
chuck key in anticlockwise direction until the drilling tool
can be removed.
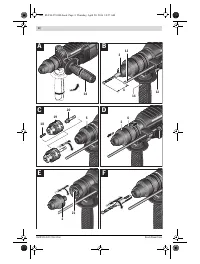
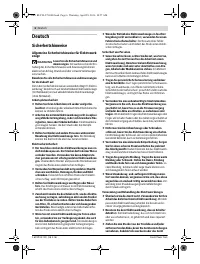
Inserting Drilling Tools without SDS-plus (GBH 2-26 DFR)
(see figure H)
Note:
Do not use tools without SDS-plus for hammer drilling
or chiselling! Tools without SDS-plus and their drill chucks are
damaged by hammer drilling or chiselling.
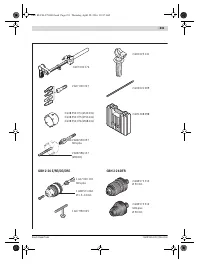
– Insert the quick change keyless chuck
1
.
– Firmly hold the retaining ring
23
of the quick change
chuck. Open the tool holder by turning the front sleeve
22
until the tool can be inserted. Tightly hold the retaining ring
23
and firmly turn the front sleeve
22
in the direction of the
arrow until a distinct latching noise can be heard.
– Check the tight seating by pulling the tool.
Note:
If the tool holder was opened to the stop, then the latch-
ing noise possibly may be heard while closing the tool holder
and the tool holder will not close.
In this case, turn the front sleeve
22
once in the opposite di-
rection of the arrow. Afterwards, the tool holder can be
closed (tightened) again.
– Turn the mode selector switch
11
to the “drilling” position.
Removing Drilling Tools without SDS-plus
(GBH 2-26 DFR) (see figure I)
– Firmly hold the retaining ring
23
of the quick change
chuck. Open the tool holder by turning the front sleeve
22
in the direction of the arrow until the tool can be removed.
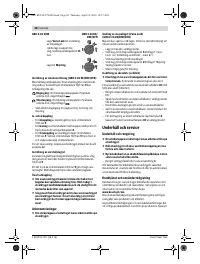
Dust Extraction with the Dust Extraction Attach-
ment (Accessory)
Dust from materials such as lead-containing coatings,
some wood types, minerals and metal can be harmful to
one’s health. Touching or breathing-in the dust can cause
allergic reactions and/or lead to respiratory infections of
the user or bystanders.
Certain dust, such as oak or beech dust, is considered car-
cinogenic, especially in connection with wood-treatment
additives (chromate, wood preservative). Materials con-
taining asbestos may only be worked by specialists.
– As far as possible, use a dust extraction system suitable
for the material.
– Provide for good ventilation of the working place.
– It is recommended to wear a P2 filter-class respirator.
Observe the relevant regulations in your country for the
materials to be worked.
Prevent dust accumulation at the workplace.
Dust can
easily ignite.
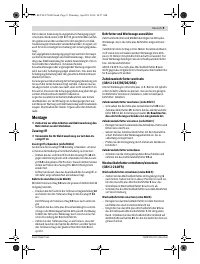
Mounting the Dust Extraction Attachment (see figure J)
For dust extraction, the dust extraction attachment (accesso-
ry) is required. When drilling, the dust extraction attachment
retracts so that the attachment head is always close to the
surface at the drill hole.
– Press the button for depth stop adjustment
12
and remove
the depth stop
13
. Press button
12
again and insert the
dust extraction attachment into the auxiliary handle
14
from the front.
– Connect an extraction hose (diameter 19 mm, accessory)
to the extraction sleeve
24
of the dust extraction attach-
ment.
The vacuum cleaner must be suitable for the material being
worked.
When vacuuming dry dust that is especially detrimental to
health or carcinogenic, use a special vacuum cleaner.
Adjusting the Drilling Depth on the Dust Extraction
Attachment (see figure K)
The required drilling depth
X
can also be adjusted when the
dust extraction attachment is mounted.
– Insert the SDS-plus drilling tool to the stop into the SDS-
plus tool holder
3
. Otherwise, the movability of the SDS-
plus drilling tool can lead to incorrect adjustment of the
drilling depth.
– Loosen the wing bolt
28
on the dust extraction attach-
ment.
– Without switching the power tool on, apply it firmly to the
drilling location. The SDS-plus drilling tool must face
against the surface.
– Position the the guide pipe
29
of the dust extraction at-
tachment in its holding fixture in such a manner that the
head of the dust extraction attachment faces against the
surface to be drilled. Do not slide the guide pipe
29
further
over the telescopic pipe
27
of the dust extraction attach-
ment than required, so that as much as possible of the
scale
27
on the telescopic pipe remains visible.
– Retighten the wing bolt
28
again. Loosen the clamping
screw
25
on the depth stop of the dust extraction attach-
ment.
– Move the depth stop
26
on the telescopic pipe
27
in such
a manner that the clearance
X
shown in the figure corre-
sponds with the required drilling depth.
– Tighten the clamping screw
25
in this position.
OBJ_BUCH-279-008.book Page 17 Thursday, April 28, 2016 10:57 AM
Содержание
- 126 Описание продукта и услуг; Применение по назначению
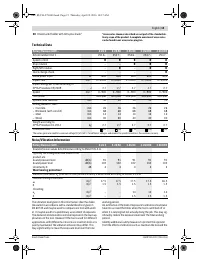
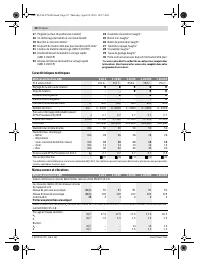
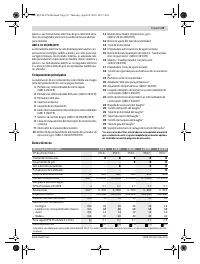
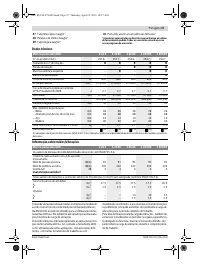
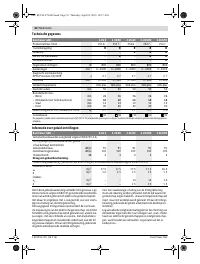
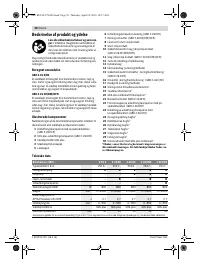
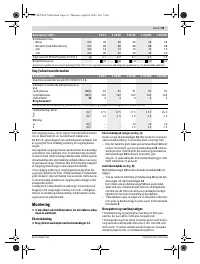
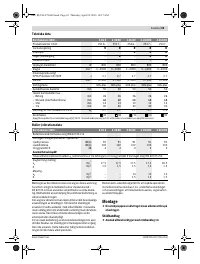
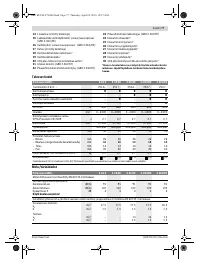
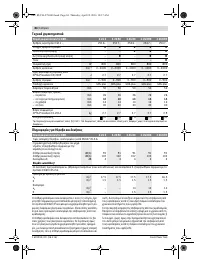
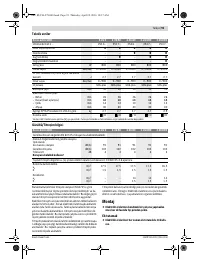
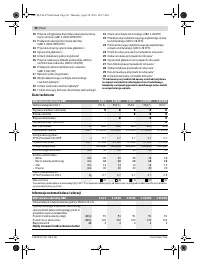
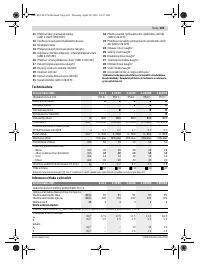
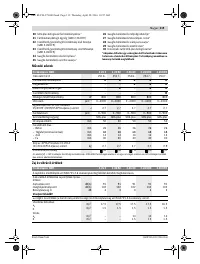
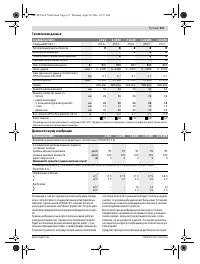
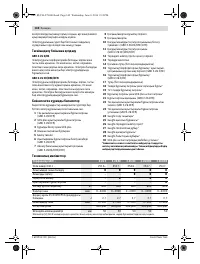
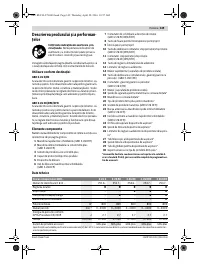
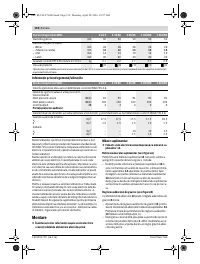
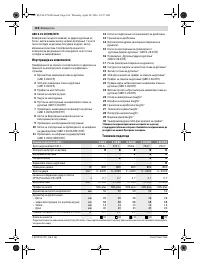
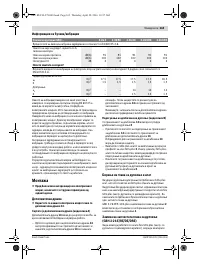
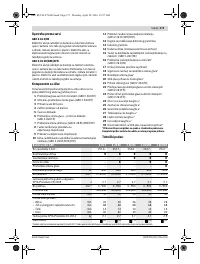
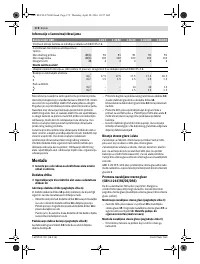
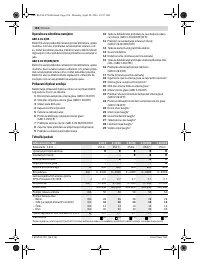
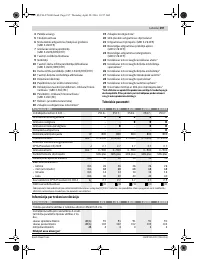
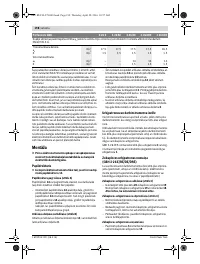
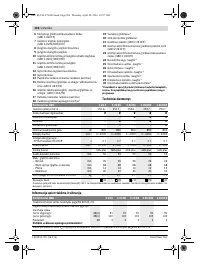
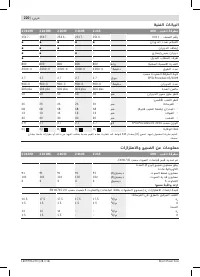
- 127 Технические данные
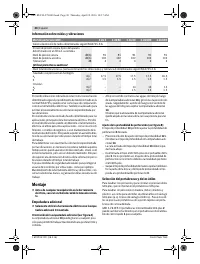
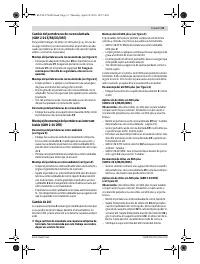
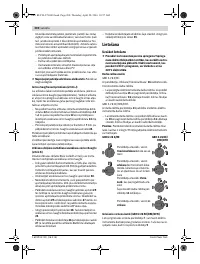
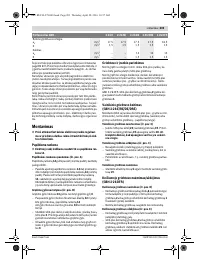
- 128 Сборка; Дополнительная рукоятка; Замена рабочего инструмента
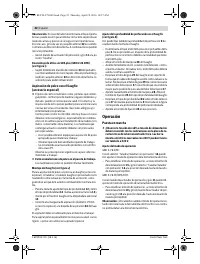
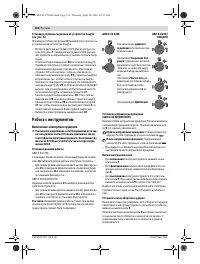
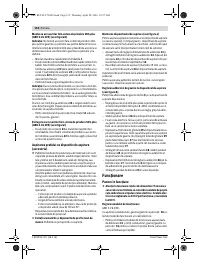
- 130 Работа с инструментом; Включение электроинструмента
- 131 Указания по применению; Техобслуживание и сервис; Техобслуживание и очистка
- 132 Утилизация; Українська; Вказівки з техніки безпеки; Загальні застереження для електроприладів
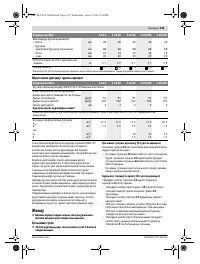
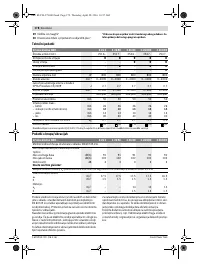
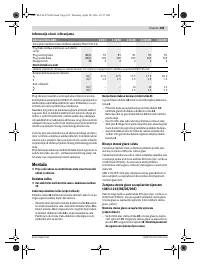
Характеристики

Остались вопросы?Не нашли свой ответ в руководстве или возникли другие проблемы? Задайте свой вопрос в форме ниже с подробным описанием вашей ситуации, чтобы другие люди и специалисты смогли дать на него ответ. Если вы знаете как решить проблему другого человека, пожалуйста, подскажите ему :)


